Last month, we discussed fundamentals, pre-existing paint problems and painter responsibility. Briefly, let’s underscore painter responsibility:
- Turn the mixing bank on and ensure complete agitator lid engagement.
- Consciously practice consistent application.
- Make a sprayout card, being mindful of your spray techniques for
consistency’s sake. - Take responsibility for the color – if you’re not happy with it on the card, you’ll likely not be happy with it on the car. If it happens that a mismatch slipped through the cracks for whatever reason and you’re now looking at it on the car, admit it. Don’t excuse it; accept that it’s your baby and you’re the one to fix it.
- Plot the course to correct it, reminding yourself that the only thing worse than painting it twice is painting it three times.
- Do whatever is required to keep it out of the booth a third time. Whatever is required.
First, let’s back the train up to before we painted the job and mixed the paint. How did we arrive at the decision to mix this formula?
It Always Matches
It’s incredible how many painters tell me, “I always mix this, and it always matches.” Go back and read about OEM inconsistencies and other pre-existing conditions. It might match often, but nothing ever “always matches.” And without a sprayout card, you’re just guessing.
How about the non-sequitur, “Oh, I keep the list of what matches in my head.” Really? Depending on the system, you may have more than 25,000 color formulas, and as many as 3,500 active formulas. You’re keeping that straight in your head? I compartmentalize my thinking, too, and in one of those compartments, I direct myself to not rely on memory for this. I won’t say it’s impossible, but I believe it’s a safe wager that the guy with the gray matter for that is engaged in other pursuits.
So what should you consider when making the choice to mix this over that? What brought us to this decision? Well, I believe it derives from the attitude demonstrated in this quote by Jeff Lee: “It’s this way because I wanted it this way; it’s not a fluke.”
Therefore, with purpose we progress. We do not guess which formula variant to mix; we use the tools available to guide us. The best color assessment tool available to you, hands-down, will be your personal color library. However, given how rare that is, we’ll consider that which is available otherwise.
Common color tools include:
- Color chip books and color chips.
- A 1-800-“Call the lab when you have a question regarding the possibility of an additional formula not published” phone number.
- The vehicle VIN, which contains pertinent color information such as country and/or plant that can narrow the search.
- You – as you may be an expert with your system and in possession of knowledge
regarding a particular toner or toners. - The toner chart.
- A color camera, which many systems have.
Gathering Info
We’ll start with gathering the correct information: color code and vintage. The 11th digit of the vehicle VIN of one particular automaker will reveal the plant the car was manufactured in. The first digit in the VIN of another maker will reveal the country of origin. These differences can matter. Inside your color chip book, you’ll likely find a dissection of the VIN and how to use that information in selecting a formula. Often, that information will lead you to a color chip that’s intended to be a representation of the mixed color.
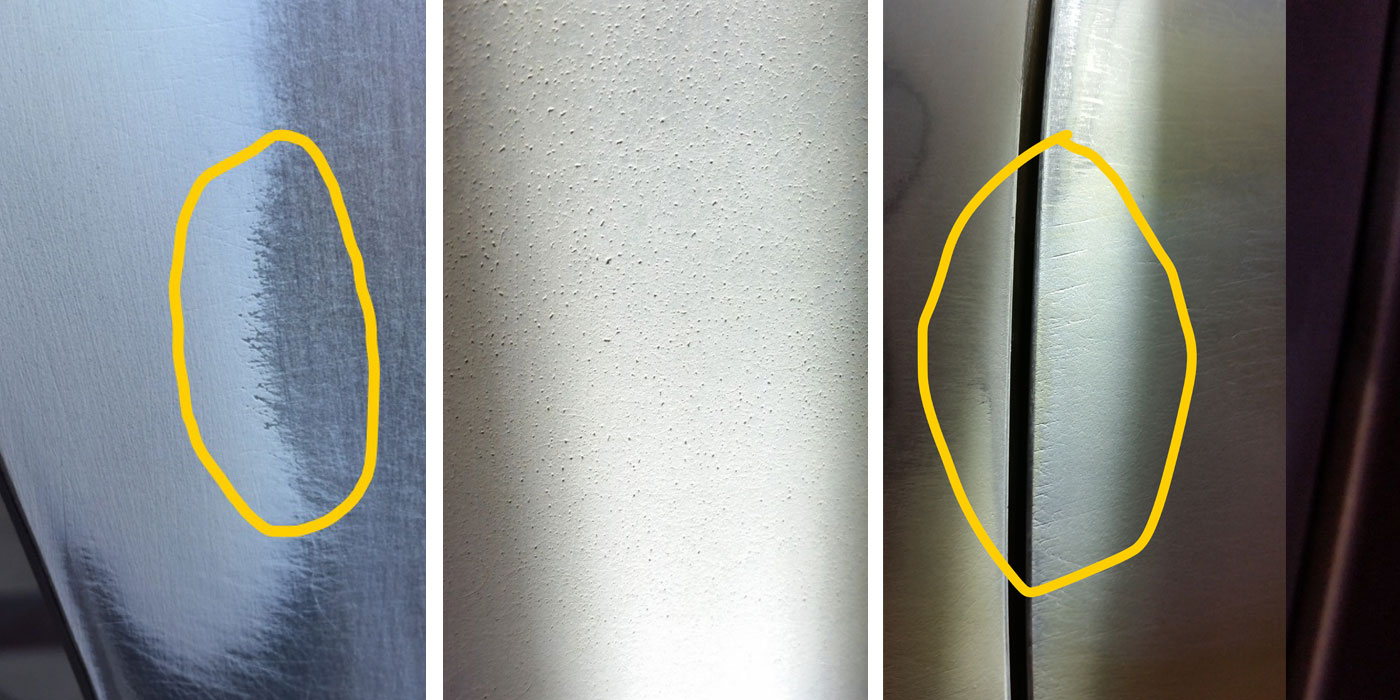
I know, not all color chips are created equal; some are better than others. This further strengthens the case for making your own color library, but we’re working with the existing chips. Regardless, we need to be certain we’re viewing a panel relevant to the repair. It doesn’t matter how the color will look to the hood if we’re painting a rear bumper. Furthermore, the proper viewing angle is crucial. Regarding that rear bumper, unless the customer is 24 inches tall, you shouldn’t be sitting on the ground looking at the face of the color. Far more important here is the sidetone, or the angle presented when viewing the color by standing next to the car.
Proper lighting is essential. Not just for the proper spectrum, but also for adequate illumination. The sun works well depending where in the country you live as well as the time of day, keeping in mind that the morning sun is a bit different than the noon sun, which is different from the evening sun. My preference is to utilize a handheld, color-corrected light. This allows me to move my light source in relation to the vehicle to see the different viewing angles as opposed to moving the vehicle in relation to the sun. The handheld unit also allows me to view a color inside the spraybooth.
Cleaning the Panel
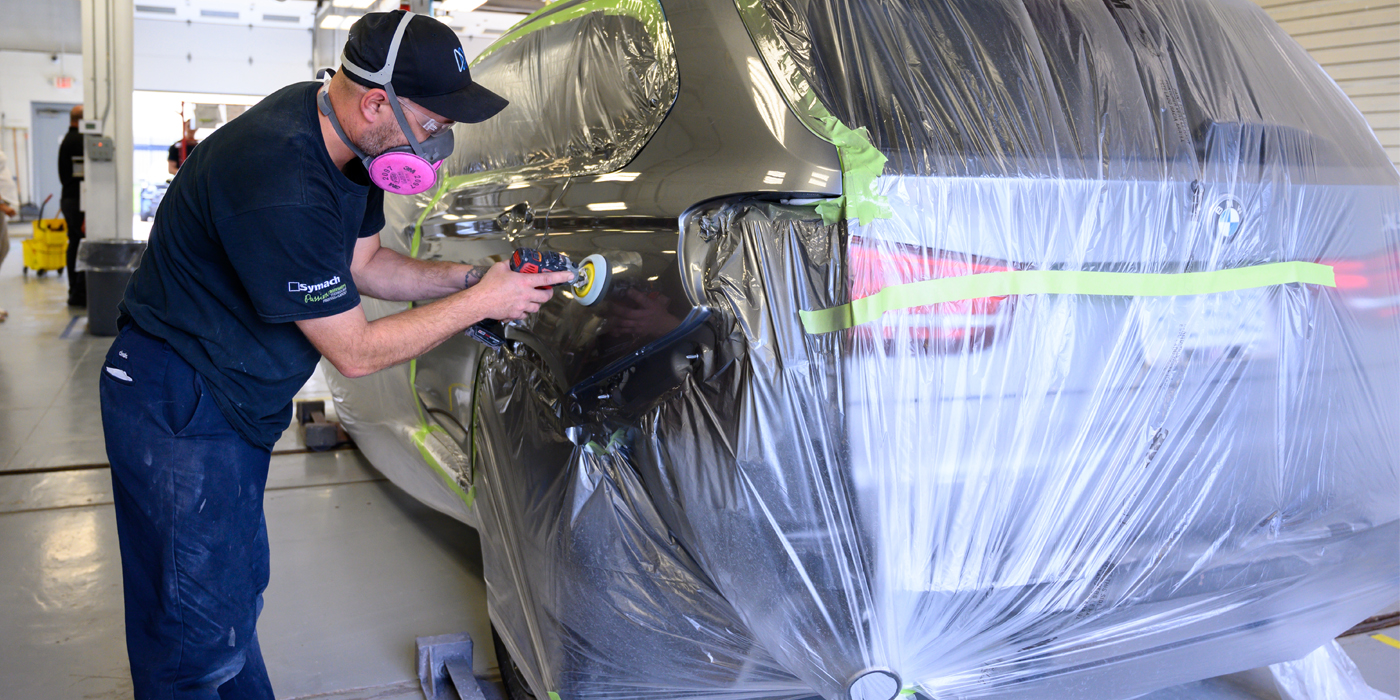
OK, we’re almost ready to start viewing and analyzing. But first, we need to clean the panel we’re going to compare. Wash it off and compound it with a small polisher. The small polisher results in a truer color by removing the environmental contaminants aggravated by UV exposure, which stubbornly resists hand-polishing. The heat generated from the polisher eliminates this and has the added benefit of restoring any loss of gloss due to age. The degree of gloss affects perceived color, which is why we’re seeing matte finishes from the factories as an upcoming challenge. But that’s a different conversation altogether.
Sidetones and Reverse Tinting
So, we’ve cleaned the panel, looked up the proper code and retrieved the appropriate color chip(s). With the proper light illumination at the correct viewing angles, we describe what we see. The vehicle is blue, but we say, “The car is redder in the sidetone,” so we check to see if there is a chip that corresponds. If there is, great! If there isn’t, then we call the color lab and ask if they have a formula variant that’s is “redder in the side-tone” – a tactic that has worked for me more than once. Often times, they’ll have something in their resources that is not included in your system updates.
Or, depending how accurate your color chips are, if you know they closely represent the formula mix, then you can reverse-tint. Reverse tinting is withholding a portion of a toner from the mix, as opposed to live tinting where we’re adding to the mix.
To reverse tint, you reverse the descriptive vernacular. Rather than “The car is…,” you say, “The card is…,” thereby pointing yourself toward the solution. If the “card is greener in the sidetone than the car,” then you can look at the toners within that mix and, using the descriptive toner chart, determine which toner is the offender and either leave a measured portion out or replace a measured portion with an appropriate toner.
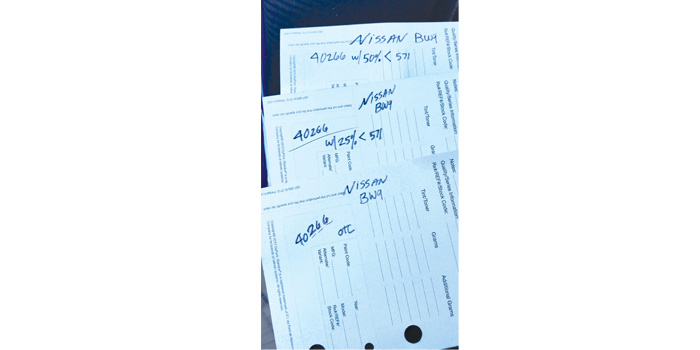
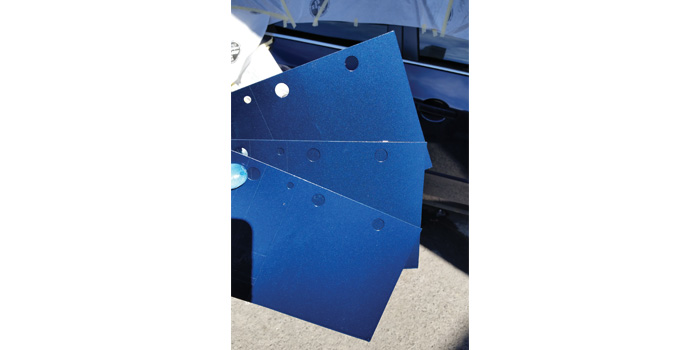
At this point, you’re going to make a spray-out card to view. I would suggest that since you’re already making the spray-out, you might as well save it and start a color library. Full documentation on the reverse will ensure that you can remix this color any time.
If you have a color camera, get those tech reps over to assist you in learning how to properly use it. The camera is a great tool, and each one will have its own nuances, but starting with a clean panel to snap a photo is universal. The camera will often get you a blendable match right out of the gate; other times, it’s simply going to get you to a starting point.
The broader point to all of this is to achieve the results you’re after on purpose, not haphazardly. Have a path you consistently follow for making the decision to mix what you’ve mixed.
Next month, we’ll look at “The Paint Is Mixed – Now What?”