I decided to give dry sanding a try years ago just out of pure, morbid curiosity. I thought, “Hey. What would happen if … I wonder if that would buff out?”
It did. Woah.
Dry sanding seems to be an overlooked subject. I know I overlooked it for years. Thing is, if you’re interested in making more money and saving time, you might want to consider this method.
If you’re a tech, you’ll make your owners and managers happy with your quicker turnaround times and decreased shop mess. And you’ll literally be done in at least half the time.
Now do I have your attention? Good. Let us continue.
Before You Switch
There are a couple of key points to consider before considering a change to dry sanding.
Do you have the equipment necessary to make the change? You’ll want to use a 3-inch sander and, of course, 3-inch paper to go along with it. The sanders average around $160 to $200. Not too bad, but maybe you can persuade your local tool guy to let you “try it before you buy it.”
Take notice of your environment. If you’re in an environment that’s really dirty and you’re buffing all the panels from edge to edge, this is not the system for you. You can still try it – but with a 6-inch DA with a transition pad. (To make sure everyone knows what I mean when I say transition pad … You usually have to use Velcro paper on your DA already. The transition pad is a 6-inch foam pad that goes on your DA prior to your putting on the paper. It allows the paper to go over sharp body lines and edges without burning through immediately. Notice I said immediately – because you can still go through even with the pad on your DA. Any further questions, consult your jobber.)
So, you have decided to give this a try? If you have your DA and your paper, you’re ready to give this a whirl.
Say Goodbye to Wet Sanding
When you wet sand, you’re obviously using water in one way or another and most likely a squeegee to dry the surface to see your progress or lack thereof. It’s rather messy and a lot of the clear ends up running down into crevices on the body of the car – and this is very annoying to clean up.
If you’re using an electric buffer, there’s also a safety hazard involved if you buff in the same area that you finish sand in. And who doesn’t? Standing in a puddle of water while holding an electrical appliance can help you get over your need for coffee in the morning – but it also isn’t really such a smart thing to do.
If you go the dry sanding route, you can eliminate the need for the infamous wet sand bucket and all the paper soaking in it, or you can wave bye-bye to your spritzer bottle, hose or whatever you’re using for a water source. Not to mention, you no longer have to worry about a drain or a water source being nearby.
Say Hello to Dry Sanding
When you dry sand, you get to see what you’re doing at all times. There’s no water in the way, and your hands won’t end up getting extra chapped.
Let’s Get Started:
Arm yourself with a 3-inch DA loaded with a transition pad and 1,500- grit paper. Hold on Jim! Where in the world do I get a 3-inch transition pad? You either trim down a 6-inch pad or get lucky and get a pad with the sander when you buy it.
So, now you’re ready to take out those pesky imperfections that are making your otherwise stunning paint work look flawed. Sand away? Hold on! Not yet. First, there’s the Golden Rule of dry sanding: Panel must be very clean prior to any sanding.
Wipe down the panel.
Take a little Isopropyl alcohol and mix it with water – three parts water and one part alcohol. This also makes for a nice final wipe before glazing. You want to see the imperfections before glazing; use this.
Now that you’ve wiped the panel, you’re ready to sand!
The next step is very important. Don’t skip it or you’ll be doing more work than you wanted to. And since you’re buffing, you’re already doing more work than you wanted to. Let’s use a hood as an example. Most flat panels get the majority of the crud in them and are the ones that most customers are drawn to. Want to test this theory? Tell somebody you just had your car painted and see which panel they spend the most time checking out.
Make your initial pass. Take your sander and go across the areas that have the nibs in them and hit them lightly and quickly. You just want to basically knock the tops off them. Do this to all the panels involved. (When you initially sand the panel, you don’t have to do the whole panel, just the dirt nibs. Now having said that, if it’s a hood and it’s trashed almost edge to edge, you might want to grab the 6-inch DA with the transition pad and 1,500-grit sandpaper for your initial pass to de-nib it. This will save a lot of time just because you’re covering more area with the sander.)
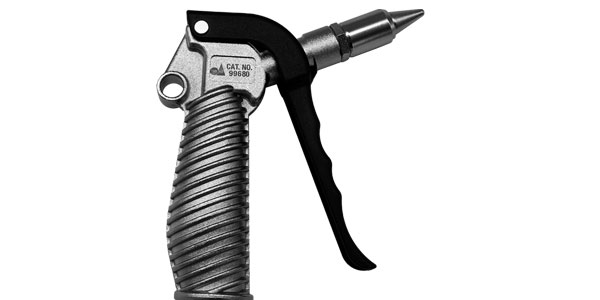
Go back with the air blower and a soft cloth and blow the panels off – blowing your cloth out occasionally. When you’re done with that, you can opt to hit it with the alcohol solution if you so desire, but I’ve found that if you’re thorough with the air, you don’t need to.
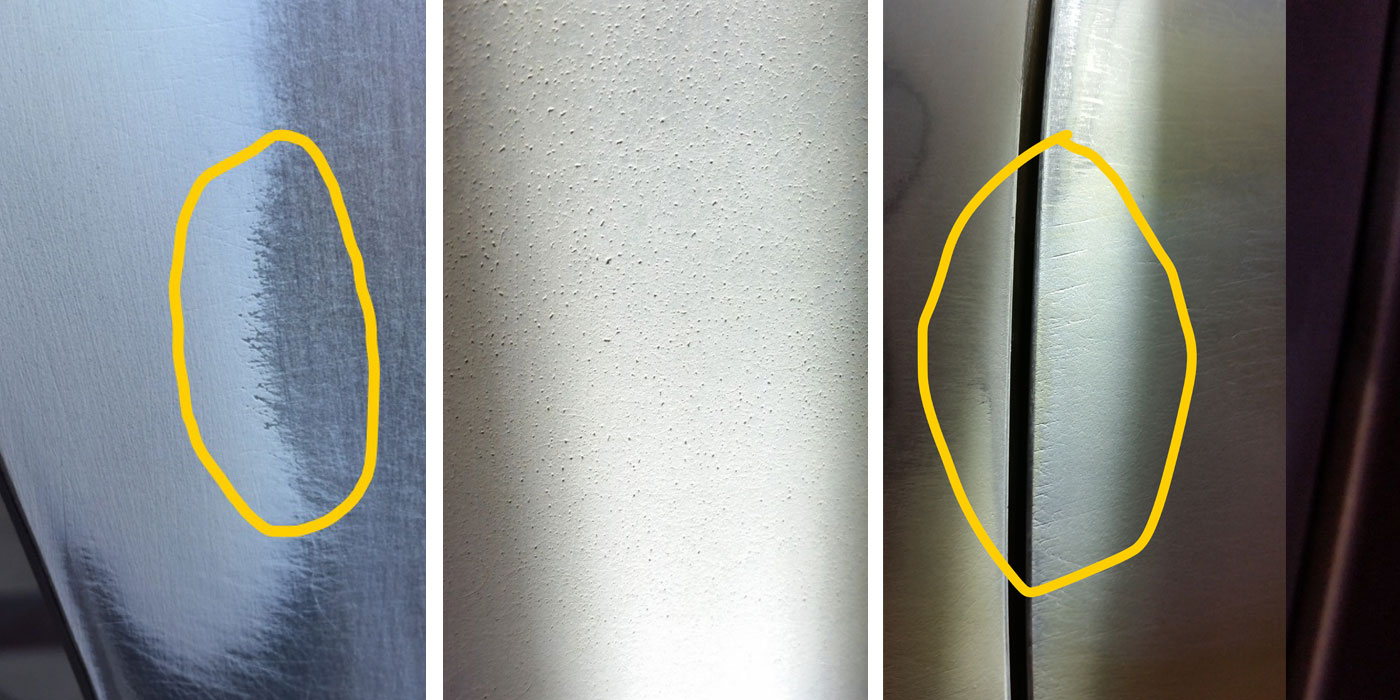
If you skip this step, you’ll likely end up with what looks like a bunch of phone cords all over your panel. This is especially true on flat panels since the debris you’re removing has nowhere to go. Please take the time to do this step rather than sending me hate mail.
Now what you’re left with is a pretty exciting thing. You can now see exactly where all the imperfections are.
Sand.
Now you’re going to have to do a bit of experimenting on your own. You’ll find that the 3-inch 1,500-grit paper doesn’t hold up all that long and that it may be to your advantage to remove the transition pad and go right to using the hard pad that’s on the sander.
Of course, now you have to be extra careful to keep the sander flat and watch those body lines. But the upside is that the sander will cut much more quickly without the transition pad behind the paper. Either way, you’ll get the same result. Just play around a little and see what you think.
It helps to clear the paper on the sander occasionally on your cloth or the way I used to do it – on my pant leg. High tech, ayy? This will make the paper last longer.
A side note worth mentioning here is that when you’re not using the pad and your clear is fully cured, you can actually take out small sags with this method.
After sanding, de-nib the rest of the way. You usually need to spend just a couple of seconds on each spot before moving along to the next one.
When you’re all done and satisfied the dirt is gone, blow off the panel.
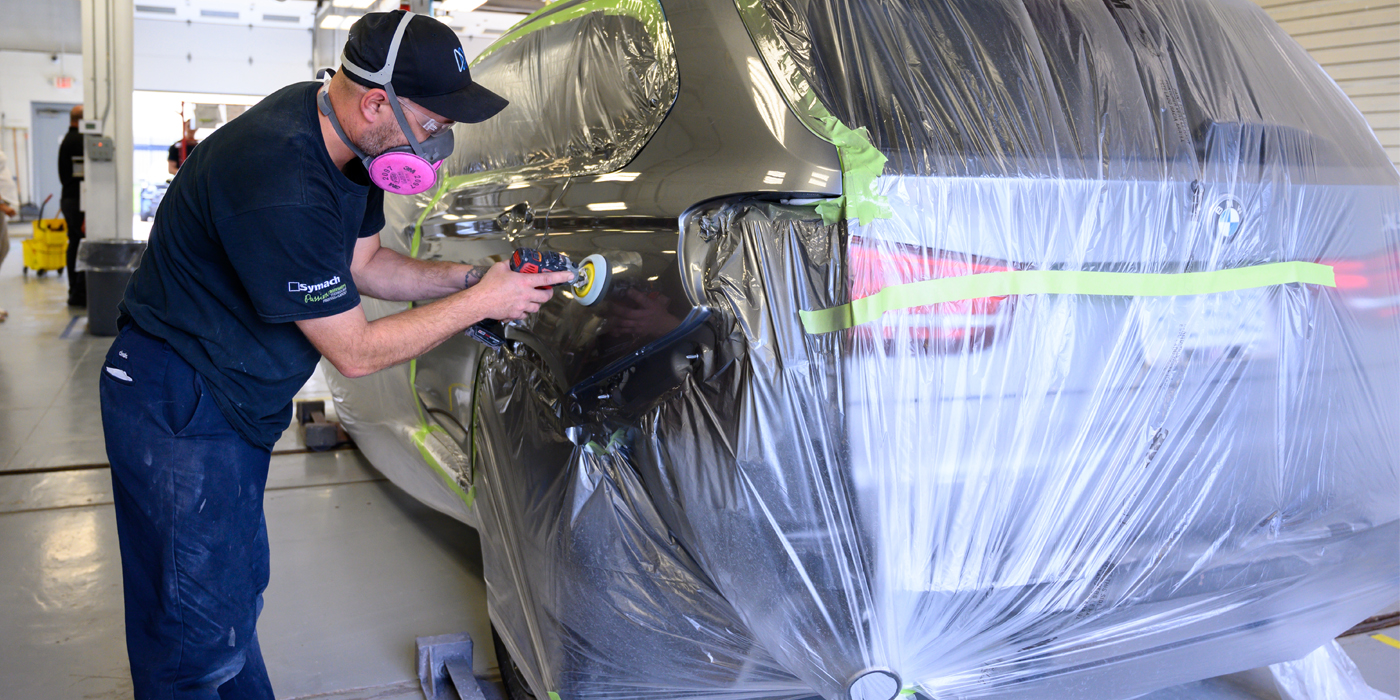
You’re ready to buff.
You’ll find that these marks come out quite a bit easier than wet-sand marks done by hand. You’re putting on the surface a mark that’s the same as the ones you put on prior to painting it. They flow out much better. Alas! Do not be fooled! You still need to get down on them until they’re gone. They go away so quickly that they can give you the illusion that they’re gone for good – only to show up in the glazing step or worse, in the detailer’s bay.
(There’s actually a 1-inch sander. I haven’t had the pleasure of trying it yet, but I think, in theory, that you’re looking at the same procedures and maybe even less buffing at the end.)
Give my dry sanding method a try and chances are, you’ll never go back to wet sanding – especially if you work in an area where it gets really cold. I guarantee you’ll notice a considerable time savings, which translates into more money for everyone involved.
Writer James Rossman has been in the autobody industry since 1989 and has been employed as a painter’s helper, a painter, production manager, a wholesale area manager for a paint company, a wholesaler rep for a local jobber and a production manager. These days, he’s the business development manager for Vision Collision in the Lansing, Mich., area. Rossman’s been involved in nearly every facet of the industry, short of doing his own frame work. (“Although I think as a manager, I was actually framed for a couple of things,” says Rossman.) He enjoys spending time with his family and restoring his 1980 Oldsmobile Cutlass.
Contact Us! Fax your comments to (330) 670-0874 or e-mail them to BSB editor Georgina K. Carson at [email protected].