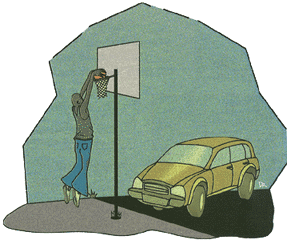
Just when you thought they were gone for good, MJ, bell bottoms and full-framed vehicles are back. Though Jordan can still score 40 points per game and bell bottoms are still … scary, today’s full frames aren’t the same as the ones produced in the past. And the repair procedures aren’t the same either. by Tom Brandt
Full-framed vehicles are a lot like Michael Jordan and bell bottoms. Just when everyone thought they were gone for good, they make a comeback.
Jordan’s back because he missed playing. Bell bottoms are back because … well … I don’t know why. I’m a guy. And full-framed vehicles are back because of sport utilities.
Love ’em or hate ’em (and there are plenty of people on both sides), SUVs and the crossover/hybrids they’ve inspired have created a whole new car market – and a whole new repair segment. They’ve also created a renewed interest in pickup trucks. Because of this, during the past few years, many have expressed concern regarding the need to train techs on full-frame repair – especially since most of the people who were good at it 25, 30 years ago are no longer repairing vehicles. After the takeover of the unitized vehicle, technicians who came into the industry learned and focused primarily on the unitized structure. This, along with the trend toward specialization in the collision industry, meant less techs running frame and unibody machines.
Today, however, statistics indicate that nearly as many full-framed-type vehicles are being manufactured as unitized. But these new full-framed vehicles aren’t the same as the ones produced in the past. The repair procedures aren’t the same either.
Gone Are the Rigid Rails
Many of the same standards that unitized vehicles need to meet also have been applied to light-duty, full-framed vehicles. Energy-absorbing areas are designed into frames and bodies to help protect passengers during collisions, along with occupant-safety systems including inflatable restraints (which can be affected by the frame and body structure and its energy-absorbing abilities).
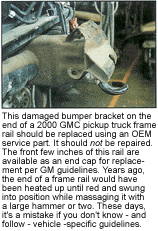
Rather than a rigid rail, many of the end sections – particularly the front – have crush initiators designed into them. These areas are generally labeled by vehicle manufacturers as ones to “Not Be Repaired.” They may be an area with convolutions in them, like on many Ford trucks and vans or some other type of crush cap. Recommendations for these areas need to follow vehicle-specific guidelines because some have replacement procedures and parts available, while others state the frame should be replaced. Years ago, however, the end of a frame rail would have been heated up until red and swung into position while massaging it with a large hammer or two.
Not knowing vehicle-specific guidelines is a mistake. When recommendations exist for replacement of the frame-rail end, frame horn or crush cap, the parts are listed in the procedure and can be secured from the OEM parts supplier. In some instances, getting the listed parts presents a challenge – even though the procedure exists. And when these critical areas are listed as “not to be repaired” and the only option is complete frame replacement, the procedure might be tough to understand. But that’s no excuse.
Choosing not to follow the guidelines puts you and your shop in a potential liable situation if a future collision occurs and the frame doesn’t perform correctly. (Keep in mind that how these frames absorb collision energy out in end sections plays a role in air bag deployment rates as well.)
Heating Things Up
Recommendations for the use of heat on frames also have changed due to changes in the types of materials being used and their designs. For some of these same reasons, frames don’t always straighten as easily inside of recommended guidelines.
Years ago, frames were made of mild steel and could be heated without changing the molecular structure of the metal. The whole frame was made from the same type of mild steel and was, oftentimes, the same thickness.
Today’s frames, however, might be made in three major sections, each being a different type of metal and thickness. High strength steels (HSS) are being used for frame parts and shouldn’t be heated or, if allowed, have specific guidelines for heating. The reason for these guidelines is that HSS is made with a higher carbon content with other chemicals added to it, and heating it can convert it back to a similar metallurgy of that of mild steel. It’s a challenge to find out which sections on a frame are HSS and which aren’t. If you’re unable to identify the type of metal, then treat it as HSS.
When heating HSS is allowed and you’ve selected it as a repair method, monitor the heat using something other than your own eyes and looking for a color change in daylight conditions. By the time color change becomes visible, you’re likely to be going beyond the recommended temperature range. Monitoring the heat can be done using heat crayons, thermal paints or non-contact electronic temperature measuring devices. Time limits also should be respected when heating is allowed.
Use caution when heating any area of a frame, but particularly boxed sections where anti-corrosion materials and lines may be inside and out of sight. If a fuel line runs inside of a rail, you may end up warming the frame and vehicle more than intended. Anti-corrosion compounds can easily catch fire as well. Areas of repair and heating will need to have these anti-corrosion materials restored.
In areas where HSS has become bent beyond a point that easily wants to straighten, you need to check for cracking. Again, don’t just rely on your own visual ability. Crack die penetrants are available in aerosol form from welding suppliers. When used correctly, these three-part product systems can help to define cracks and micro-cracking that might be occurring in the metal.
Working with Hydroformed Sections
Some frame sections are hydroformed, which means in manufacturing that the rail starts out as a pre-shaped tube and is pushed into its final shape by using extreme injected-fluid pressure on the inside of the tube, forcing it outward against the die walls. This results in a tubular section or a boxed-in area with no visible seams running lengthwise on the parts.
These parts handle collision energy differently and also straighten differently. They handle collision forces differently because they have the same amount of working hardening in all areas from the tooling or shaping process and react more evenly all the way around when pressure is applied in a collision.
When straightening hydroformed parts, less holes are available for measuring, and minor damage is more difficult to spot visually because of the smoothness of the part. When these parts are pulled, it’s important to ensure that chains wrapped around them don’t dent the corners because this will weaken them, similar to denting tubing. Gaining access to areas to work them out from the backside is also a challenge – if not near impossible – in some areas. If the vehicle manufacturer has specific guidelines for a hydroformed rail, follow them.
Pulling the Frame
Multiple pulls seems to be a concept that’s generally accepted and allows more damage to be removed at one time while avoiding extremely high pulling pressures. I remember seeing a chain break during a pull early in my career, which made me realize that multiple pulls and finesse had to be a safer way to go. It’s also a good idea to use a pressure gauge to monitor the pressure during both pulling and stress-relieving procedures.
Pulls should be done so as to reverse the order or sequence of the damage as it occurred during the collision. Having a good understanding of collision theory here is beneficial.
Damage that’s in the base section or middle of the vehicle needs to be removed before attempting to repair the ends. The first type of base damage to correct is diamond – if it exists. Once diamond has been corrected, the center section needs to be properly anchored so diamond doesn’t reoccur. Note: When measuring for diamond, be careful that you don’t mistake a collapsed corner section of the center section for diamond when performing x-measurements.
If a full frame is going to straighten and have good strength and performance, it should do so without your having to beat it back into shape. When repairing a frame, you need to ensure that it will have its full strength back and will perform correctly while in use and if involved in another collision. This is why it’s crucial to know when frame replacement is the correct choice.
Something else to keep in mind is straightening a truck with the box on and bolted down vs. with it removed. You might have it straight with the box removed or loose and find that when it’s bolted back down, it becomes out of level again. It’s generally good to pull the damage out of both the box and the frame together since they reacted that way during the collision. It does make it more difficult to gain access to the frame in this area, but on the other hand, it saves a trip back to the frame rack or prevents excess shimming of the box during reassembly.
The Importance of Measuring
The measuring equipment that’s evolved with technology and for use with unibody vehicles will, in most cases, adapt to full-framed vehicles. Still, it’s important to keep in mind that measuring equipment has taken on a bigger role with frame repairs.
Years ago, sheet metal fit was one of the primary gauges as to the accuracy of a frame repair. A good alignment technician could shim and balance alignment angles and get most of those big boats to float down the road again.
Today, not only does sheet metal have to fit, but the frame has to have key suspension-mounting locations, cross members and ball joints located correctly during the repair – or the vehicle isn’t going to make alignment. These vehicles are built to tighter tolerances, drive and handle better, and have owners who are less tolerant of a minor problem.
Because the public is more willing to utilize litigation if they feel their vehicle hasn’t been properly repaired, you need to protect yourself. And the best protection is documentation.
You should begin frame repairs and repair decisions by measuring and documenting the actual damage and extent of the damage. You can then use this to determine your repair and replace decisions. You should also use these measurements to draw or map out a repair plan. This can mean sitting down, thinking the damage through and then determining how to reverse the damage. In the old days, they used to say that that was what the milk crate and coffee cup were for. (Sit on the crate, sip the coffee and think.)
Once a plan is in place, you should document it for the file – along with the final repaired measurements to help show that the vehicle was restored to proper dimensions. Computer-assisted measuring has increased the efficiency of this step, though documentation also can be done using forms and consistent practices with manual methods.
It’s also crucial with full-framed repairs to understand how specifications for measuring were achieved. Was the vehicle measured with the vehicle weight loaded on its wheels and suspension or was it sitting on an anchoring system? On a full size, full-length-bed pickup truck, this can make up to 40-50 mm (11/2 to 2 inches) of difference on the datum height at the rear.
The jury is still out as to which method is the best to initially measure a frame – vehicle weight on the suspension or vehicle weight sitting on the frame, suspension unloaded. If you measure with the weight on the suspension, suspension problems such as bad springs or bent components can show in the readings for the frame measurements. If you set the frame on blocking in the base section and unload the suspension, the weight of the engine and end sections can cause a soft frame with a twist to not show in the measurements. Regardless of which route you take, it’s important to know how you arrived at your specifications.
Tips for Blocking and Anchoring
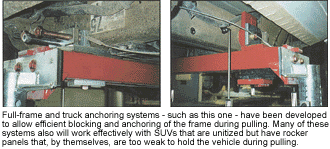
Anchoring a full-framed vehicle is the area that’s changed the most when you look at today’s pulling equipment. Most of the change, however, is due to practices used with unitized vehicles and anchoring them for pulling. As an industry, we learned the value of solid positive anchoring and the role it can play in the straightening process. As a result, full-framed and truck anchoring systems have been developed to allow efficient blocking and anchoring of the frame during pulling. Many of these systems will also work effectively with SUVs that are unitized but have rocker panels that, by themselves, are too weak to hold the vehicle during pulling.
Blocking and anchoring are the keys to successfully allowing the pulling pressure to effectively do its job. In the past, the first pulling pressure applied slid the vehicle around until chains became tight and work could start. Most areas were anchored by wrapping chains around them and hoping that no additional damage was done. If something was damaged, the flange was straightened and the work went on.
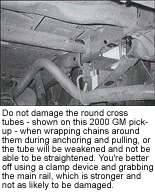
Today’s frames, however, may have a tubular cross member – and if a chain is wrapped around it and it’s dented or damaged, it’ll be weakened and not be able to be straightened. Do not use chains on round cross tubes. Instead, with a clamping device, grab the main rail, which is stronger and not as likely to be damaged.
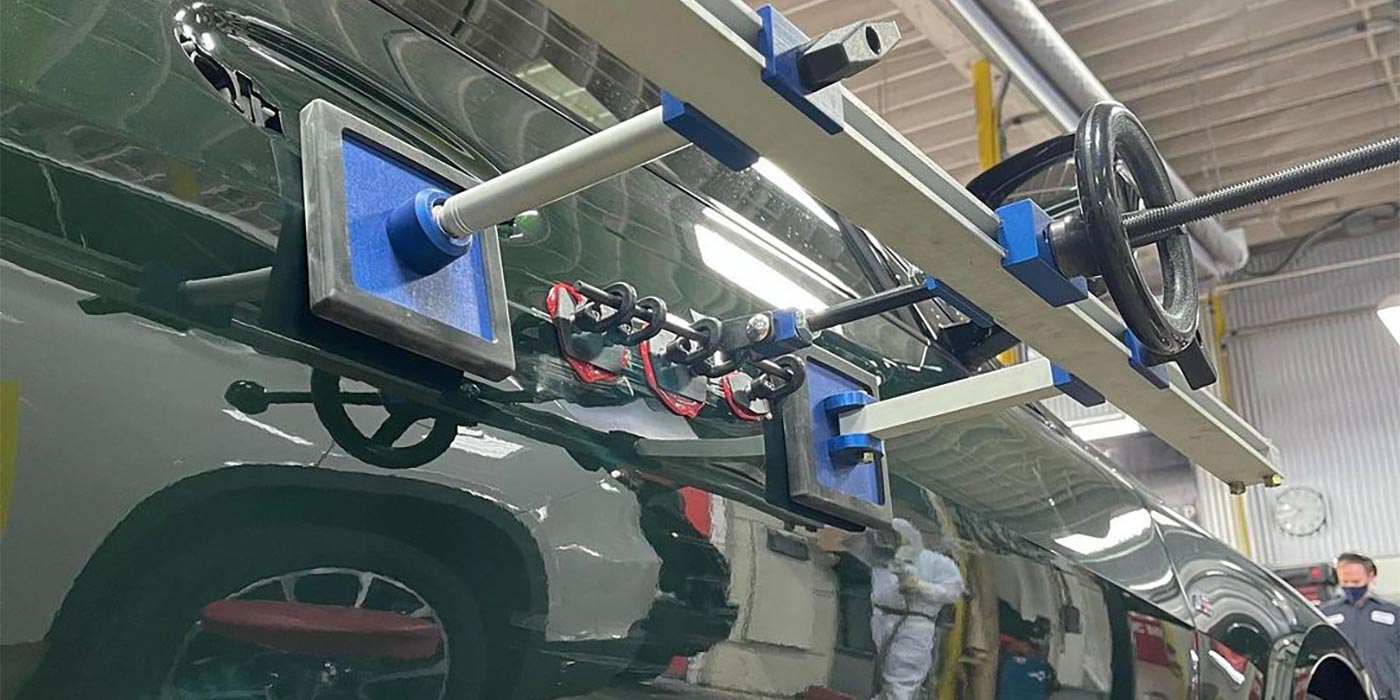
Anchoring systems allow clamps or vise fixtures to grab the rail and hold it. Other fixtures may fit in holes, on suspension mounting locations, or work with straps and chains. Once tightened down, the frame is held from moving back and forth and side-to-side, and the base section height is maintained. This allows all pulling energy that’s applied to work on removing the damage.
Anchoring for diamond has to be the scariest thing when you start out on the frame rack and find that you have to hold one rail and pull the other. For this to work properly, you have to hold in the base section to allow the end sections to swing around as the other rail is pulled. An anchoring system helps to make this task more secure.
These newer frames move with the body structure and gain strength from each other, so they need to be worked together during repairs. Sometimes a body also may need to be anchored along with the frame so damage can be removed from both at the same time.
Training a New Batch of Techs
Utilizing vehicle-specific guidelines when they’re available from the manufacturer is critical to ensuring that full-framed repairs will perform correctly. But finding out if specific guidelines exist is often difficult. To help, there are other sources besides equipment manufacturers, such as Tech-cor, which has bulletins that can be accessed online at www.tech-cor.com. The site includes a listing of other sources as well.
So … back to where I started. Where have all the frame technicians gone? Well, hopefully many of them are enjoying a well-deserved retirement. (And, most likely, they won’t be coming out of retirement like Jordan did.) As for those of you left working on these new frames, not everything can – or should be – straightened.
Writer Tom Brandt is an auto body collision technology instructor at Minnesota State College Southeast Technical Campus in Winona, Minn. The program is a post-secondary, two-year diploma program and is NATEF certified. Brandt has 16 years of teaching experience, has been an I-CAR instructor for 15 years and, prior to that, was a combination technician.
| Huge Topic, One Article Note to the readers: Servicing full-framed vehicles is a huge topic, and it’s impossible to cover a book’s worth of information in a four-page article. Today, there’s not a step-by-step generic frame procedure that can be defined to fit all brands and types. The metal being used in today’s vehicles could be an article by itself when it comes to explaining hydroforming, tailor welded blanks and other new technologies. There also are many other items that could be added or expanded upon, such as corrosion protection and restoring of coatings on the frame following repairs. I didn’t get into crack repair or rivet replacement at all, and I’m not sure I’d want to unless I used a specific vehicle as an example. I’m telling you all this because, as the reader, I think this might give you an idea of why it’s hard to be specific and to provide general rules or guidelines about full-framed service. |

