I have very good news. In researching this story about painting plastic parts, I spoke with plastic bumper manufacturers and paint manufacturers. I also spoke with real, live painters. And every one of them told me that they don’t have many problems when it comes to refinishing plastics – although several did say that plastic bumper covers still give them occasional problems.
It’s been a long road from the first flexible bumper cover on the 1967 Pontiac GTO to the latest body cladding on the 2004 Pontiac Aztec. And auto painters have suffered through a lot of grief trying to identify the type of plastic based on a two- or three-letter identifier stamped (seldom) on the back of the part.
When the identifier was missing, other methods of identification were necessary. Over time, painters were expected to burn a sliver of the mystery plastic and name it based on the color of the flame or the smell of the smoke. Some identification tests included floating a chunk of the unknown material in water. It sunk? It floated? It half floated?
I’m pleased to report that to successfully paint plastic automobile parts today, it’s no longer necessary to name the plastic first. Whether thermoplastic or thermoset, today’s parts can be treated uniformly.
Sanding Plastic
Let’s start by talking about sanding plastic components. Sanding friction causes heat, and plastic parts act like a heat sink. Metal parts also get warm as sanding friction heats them up, but metal tends to reflect the heat back out. Plastic parts, however, absorb the heat and can soften or even re-flow under power sanding.
If your dual-action, random-orbit sander is going so fast that it sounds like a jet engine whine, it’s likely that you’ll have problems painting plastics.
Next, let me say that sanding any part prior to refinishing is a good idea. As many of your paint reps will tell you, it’s now possible to simply wipe clean and begin spraying on certain OEM parts under certain conditions. Several OEM undercoats don’t have to be sanded under perfect circumstances. While this can be a substantial time saver, I’m an old school guy (not to mention just plain old!) so I’m always happy to have the painter sand the part.
Sanding effectively doubles the surface area, thus providing twice the opportunity for the new coating to adhere to the old. In my experience, even a light-scuff sanding will help adhesion markedly.
The surface area to be painted expands by the size of the sand scratches (measure up one scratch, down the next). And more surface area means more places for the new coating to cling to.
Too much sanding can cause problems as well – problems like the “hairing” of TPO bumper covers when the plastic splits and melts into hair-like strands.
Too much power sanding can cause thermoplastics to reflow. Perhaps you’ve seen what happens on certain plastics after a forceful power sanding. When you walked away from the part, the sand scratches were very evident. When you returned minutes later, the sand scratches were disappearing. Too much heat melted them flat again.
Excess heat from sanding also sometimes caused a mold-release problem in the old days. Today, however, most mold-release agents are a water-based material instead of the wax-based coating used for years. Thorough cleaning at both the OEM and shop levels will help to remove mold-release agents of any type.
Don’t get me wrong. I’m a huge fan of power sanders. Labor time is too valuable to do much hand sanding by my reckoning. At $40 per hour door rate, every minute is worth 67 cents.
Most painters only do their block sanding by hand; they use power sanders to remove the old finish and featheredge for repair. The final coats of primer might be blocked down flat by hand, or the old finish in hard-to-reach areas might require hand sanding. Stop I say!
Purchase whatever type and style of sander is necessary to do more sanding with a machine. Mechanize the task and save labor time.
If you did 20 minutes of final sanding by hand, you’d spend $13.40 in labor ($40/hr = .67 per minutes X 20 minutes = $13.40). If you could do the same job with a power sander in 10 minutes, you’d be ahead $6.70 on every job you completed.
It won’t take long to buy exactly the right power block sander. You could purchase a brand new $200 sander every 30 cars with the labor savings alone.
For power block sanding, you need a tool that runs very smoothly, and for hard-to-reach areas, you need a sander with odd or specifically shaped sanding pads. Someone makes just exactly the right thing.
Buy ’em! Use ’em! Save time!
But always be very careful on plastic parts. Turn the air pressure way down or even do it by hand (gasp!) to avoid heat buildup, which will be readily sucked into the plastic part.
Clean Is Good
Thorough cleaning of plastic prior to painting is basically similar for the bumper cover manufacturers and the body shops. At the OEM level, the people I spoke with all used an automated wash booth to ready their parts for painting. Using hot water and a special detergent designed for plastic, the parts are pulled through the wash booth on an overhead conveyor chain.
First they’re washed with detergent, rinsed with water and then dried by both blowing and heating the clean parts. Finally, the parts are tack wiped and blown off to catch any dust prior to priming.
In the shop, the same thorough process must take place. In addition to the detergent wash and rinse, the shop could use an abrasive paste to lightly abrade the plastic as it’s being cleaned.
I heard conflicting advice about which type of wax and grease remover is the best choice. At issue is the difference between solvent-based and alcohol-based cleaners.
Traditional wax and grease removers are solvent-based (refined from petroleum) liquids. Solvent is readily absorbed into raw plastic.
Alcohol-based (distilled from grain) wax and grease removers aren’t easily absorbed into the plastic because they flash off faster. Theoretically they’d be perfect for final plastic cleaning. However, one leading coatings manufacturer suggested that the alcohol cleaners flashed off too quickly to do much good cleaning the surface, so they continue to recommend solvent cleaners even on raw plastic. Wipe on and wipe off immediately is their advice.
Another manufacturer suggested just using water-based (soap/detergent) cleaners in place of either solvent or alcohol types on bare plastic.
What should your shop do? In general, if you use traditional wax and grease removers on raw (open and unprimed) plastic, you should allow the solvent that was absorbed to evaporate back out. Don’t be in a rush to get on the next coat.
Specifically what your shop should do is follow your coating manufacturer’s directions. Every system has exact instructions; follow them to the letter for the best results.
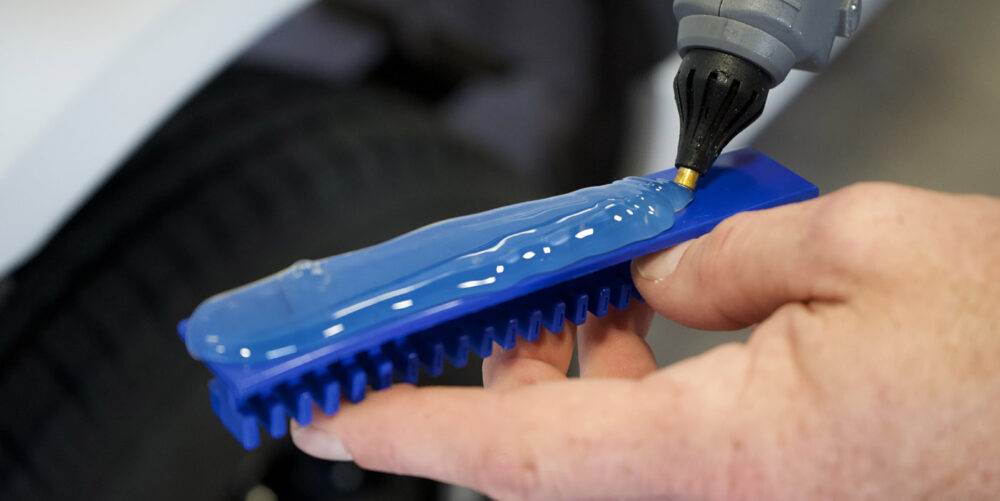
Using Plastic Adhesion Promoters
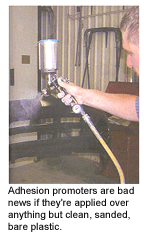
One area absolutely everyone agreed on was the proper use of plastic adhesion promoters. They’re the perfect thing over bare, sanded plastic, and they’re the absolute wrong thing when applied over primer.
While the exact formula for an adhesion promoter varies from brand to brand, all versions contain a strong solvent that will open the pores of the plastic to enable the new coating to adhere to the raw plastic. Adhesion promoters also have a time window; they must flash off for a specific period to gain maximum inter-coat adhesion, but they must be painted over within a certain time, too. If left past the window of time, the plastic adhesion promoter doesn’t do the job it was supposed to.
Each manufacturer has specific directions about how many coats to apply to bare plastic and how long to wait before proceeding. Follow the directions for your brand exactly.
However, no plastic adhesion promoter is designed to be sandwiched between a primed or sealed substrate and the next coating. The rich solvents in the adhesion promoter will cause a loss of adhesion when used over primed or painted parts. In fact, one bumper cover manufacturer suggested that the most common problem they see is misused adhesion promoter. It’s for bare plastic, not painted plastic. In some repairs, this may mean masking the surrounding painted area or immediately wiping off the excess adhesion promoter to prevent later delamination.
These “magic” adhesion promoters are bad news if they’re applied over anything but clean, sanded, bare plastic.
Primer Problems
One problem I did hear about was the difficulty in determining if the plastic part had primer already on it. Theoretically, you could just lightly sand the part to see the dust from the primer. Realistically, it’s not so easy.
The matte black plastic looks remarkably like the matte black primer. Some bumper covers are unprimed from the manufacturer, and some have a less-than-stellar coat of primer. If sanding doesn’t reveal the primer’s presence, try reading the box it came in. Many times the packaging (OEM or aftermarket) will say “unprimed.” Sometimes flipping the part over and comparing the unprimed back to the front will help, too.
Many bumper cover manufacturers are using a water-based primer both because water isn’t readily absorbed into the plastic and because dissimilar coatings (solvent over water) act like great barrier coats. Water-based primers are a good choice.
Some bumper recyclers, however, are just using lacquer primer over-thinned with cheap lacquer thinner to make the part look black. But if the mil build is light or the spray application uneven (it’s hard for the painter at the factory to see the difference between flat blacks, too), the primer can cause problems for your painter.
Wet a rag with enamel reducer, and wipe lightly to determine if the primer is solvent resistant and properly adhered. The problem is that a soaking-wet rag with a slow-dry enamel reducer may wipe off even properly applied water-based primer. Tread lightly.
In general, if the primer looks or feels funny, you’re better off removing it by wiping or sanding before you complete the whole thing. It’s a lot cheaper to remove the primer and prime it again than to strip, paint and clear the whole thing all over again.
Flex Additives Prevent Headaches
“Flexibilizing” the paint coat- ings is a good safety step. Some coatings manufacturers call for flex additives in the primer, sealer, color and clear. Others call for flex additive only in certain products.
While it’s certainly true that today’s urethane coatings are hundreds of times more flexible than lacquer paints, additional flex additives can still help to prevent future problems.
In days of yore, flex additives (elastomeric coatings) didn’t stay in the film very long and were largely used to keep the paint intact while the part was bent and twisted during installation.
Today’s flex additives stay within the paint film for much longer and can help to prevent cracking and chipping when the bumper cover is flexed by contact with a shopping cart or a parking meter.
Remember that the factory paint finish on plastic parts had significant elastomeric value; make sure your system of refinishing has just as much. Your repair is only as flexible as the weakest coating. The topcoat clear may flex 90 degrees without cracking, but if the primer cracks at 30 degrees flex, you’ll still be redoing the job.
Force-Drying Plastic
One last caution as a result of my plastic refinishing interviews: Be very careful when force-drying plastic parts. Cranking up the heat light or the oven to high temperatures to speed the cure of the paint can cause adhesion problems on plastic.
I’m not saying that you can’t force-dry paint on plastic parts. I’m just saying to be careful and to err on the cool side rather than on the holy-crap-hot side.
Directions Are There for a Reason
Each paint company that offers a plastic refinishing “system” has specific directions for their products. Should the plastic part be primed with primer-surfacer, sealed with sealer, sanded between products, receive one, two or three coats of something? It’s different, depending on your brand.
Also, the painters I spoke with had each adopted some coating manufacturer’s plastic refinishing system in its entirety and no longer mixed components from one brand with additives from another. Personally I think this is a large part of the reason none of them were having many problems.
The other reason: Plastic parts have never been so easy to refinish as they are today.
But, like always, those who follow their paint manufacturer’s directions (what a concept!) will have the best results.
|
Getting a Grip on Material Costs Not only is there no money in a comeback, I personally believe that in most shops, the biggest cause of a high material bill is redos. When the shop complains that its material bill is too high (more than 7 percent of sales in my book), several things are likely. First, since the only way to get paid for materials is a multiple of refinish hours times a material allowance ($20 to $24/hour), writing a better estimate is the No. 1 way to do better on materials. Another four-tenths of refinish time means another $8 from the insurance company for materials. Another pertinent issue regarding excess material costs is what the shop purchased in its material account. Most shops have only one account with their PBE jobber. As a result, they lump new paint guns, new sanders (good for you!) and expensive spraybooth filters into the one account. That stuff isn’t paint and materials, folks. Start a second charge account with your jobber to keep paint and material purchases separate. Once you have your estimate nice and full and your materials accounting practices under control, there are three things left that can quickly cause a high material bill: 1. Redoing work. And in that order, based on my 34 years of experience. Unfortunately in many shops, the painter who causes most of the rework is also the one who turns in lots of hours. But part of the reason for the impressive flag hours are the corners he cuts to get those big weekly paychecks. My advice is to punish the people causing rework. The insurance company paid labor and material to refinish the job once, so make the technician responsible pay for the second one. |
Writer Mark Clark, owner of Professional PBE Systems in Waterloo, Iowa, is a well-known industry speaker and consultant. He’s been a contributing editor to BodyShop Business since 1988.