 To mask or not to mask; that is the question.
It wasn’t always the question. There was a time when detrimming door handles and mirrors was unheard of. Naturally, we hadn’t even coined the phrase “precision mask” because everything was precision mask, or as we referred to it, “masking.” What the heck were you doing in the paint shop if you couldn’t even mask?
 Times certainly have changed. Generally, we don’t even consider masking various components as opposed to R&I (remove and install). These days, we often see masking as something done to jambs, adjacent panels or windshields – but only after pulling the windshield molding, as largely gone are the soft rubber windshield moldings you could “rope” or use lifting tape under in order to slide a piece of masking tape under the edge.
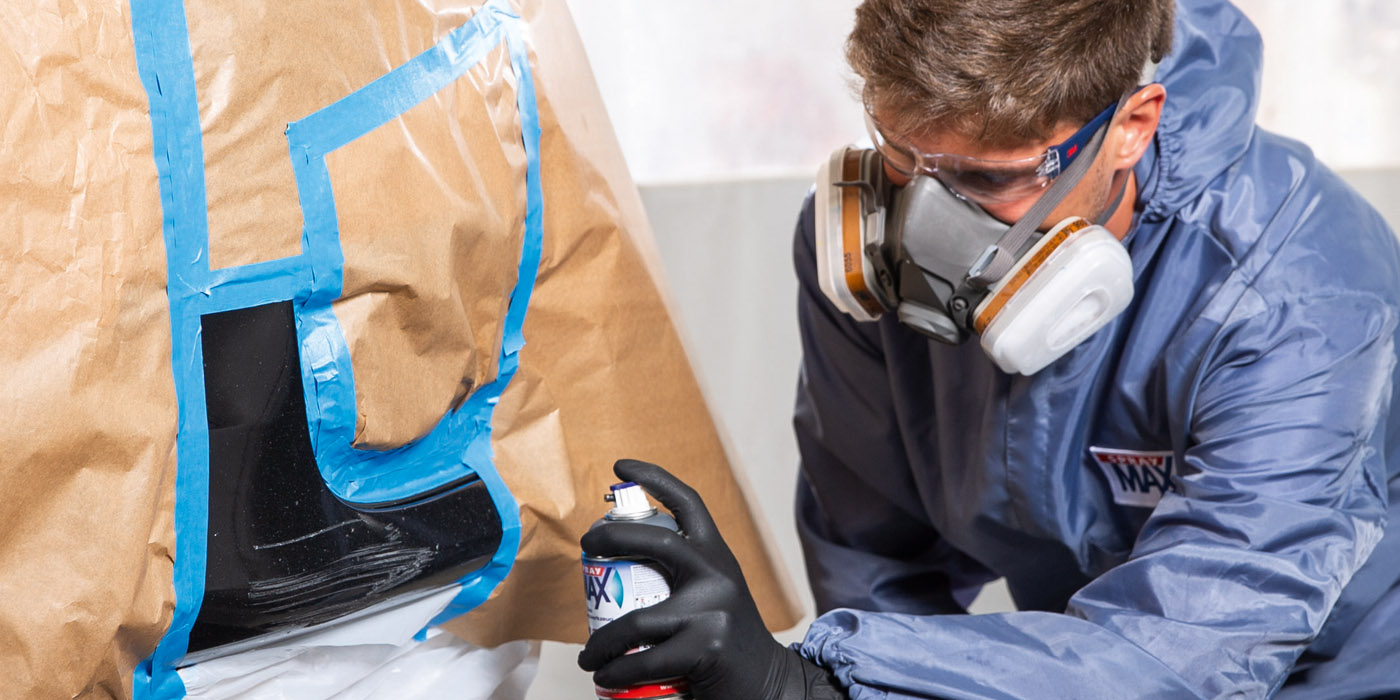
 However, I contend that precision masking is still a skill to develop. And develop it you must if you plan on masking components while maintaining the “invisible repair” concept – not to mention a sound paint edge that resists peeling or chipping.
R&I Mindset
I suppose I’m getting ahead of myself. Your mindset may still be at “R&I the components,” with no possible reason imaginable to precision mask. Fair enough; that’s a common thought. I suspect most of us have heard the following phrases or perhaps even uttered them ourselves: “I want it done right,” “It can’t be done right if that’s not removed,” “I’m not going to do hack work” or “The paint will bridge if we don’t take it off.” Absolutely precious.
If you want to do it right, then do it right. If you refuse to do hack work, then don’t do hack work. Those are work habit integrity issues and are not representative of proper masking. As far as the paint bridging goes, for the most part, the culprit isn’t simply masking. It’s improper masking and the improper application of the sprayed coatings. Apply it, don’t “pour it on.”
I’m not suggesting that we eliminate R&I procedures that facilitate efficiency and productivity in the paint shop. What I am suggesting is that there are some instances where we don’t have a choice, and in such instances, we need to be certain we can perform the task and still guarantee the outcome.
“But Carl, you always have a choice!” Yeah, you’re right. We can choose to violate the federal mandate that says we must preserve VIN and R-DOT stickers by scraping them off or, worse yet, paint right over them. Preserving those stickers certainly is not hack work, and there is no R&I of the sticker in order to “do it right.” I’m aware that some of the OEM R-DOT stickers are already masked, but most are not.
There are countless situations where you may find that you must mask, such as the molded-in “step pad” on certain rear bumper covers or the “grill” of certain front covers. Or, where you simply choose to mask due to cycle time or perhaps because the non-reusable clips that break are discontinued and the vehicle is scheduled for delivery the day after tomorrow.
 Cleaning and Prepping
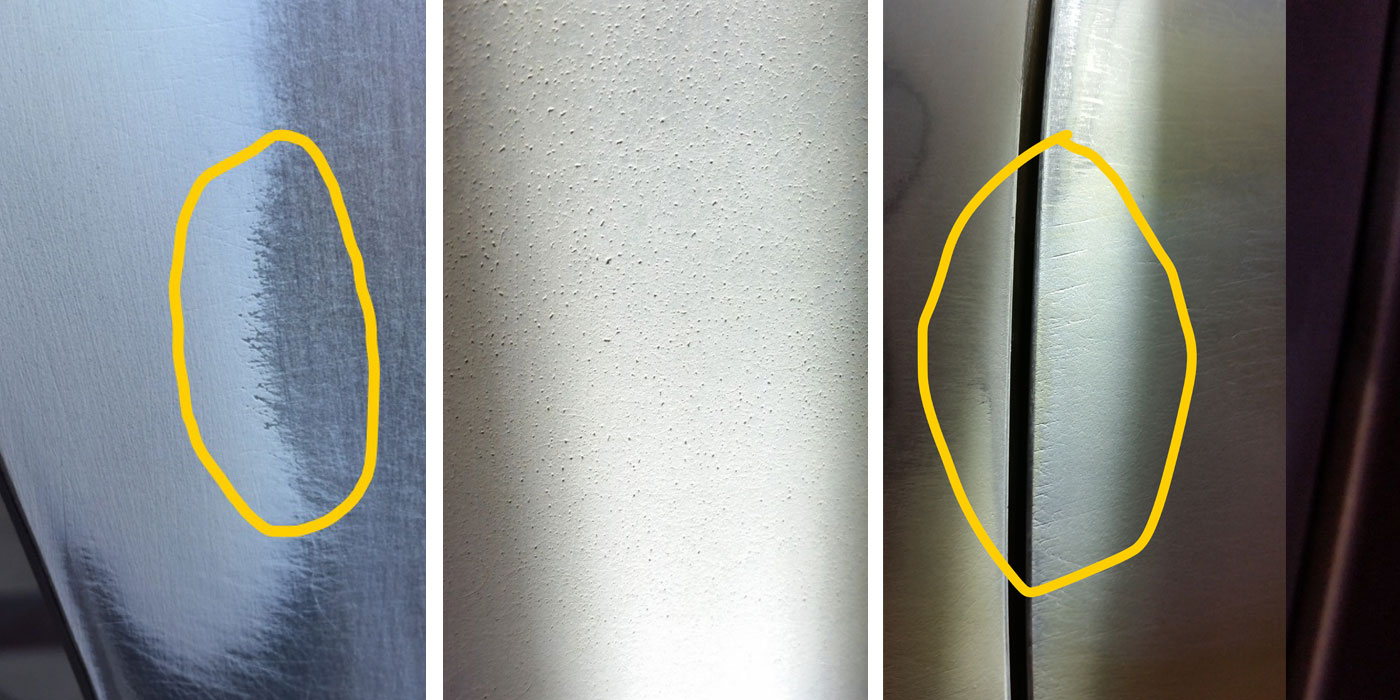
Precision masking is important, but equally important is precision prepping and proper cleaning. All three must be present to ensure that paint film adhesion is achieved at the painted edge/masking tape junction. Of course, properly unmasking is required as well. No chipping or peeling at the edge, in spite of the fact that you painted right up to the masked edge, is indeed possible.
So how do you do it properly? It’s as simple as being faithful to the fundamentals: masking, sanding and cleaning. Attention to detail and a determination to leave as few clues as possible. Replacing the mindset of “I can’t” or “I won’t” with “I must and I will!” It takes a little longer to precision mask/prep something and not leave clues by way of overspray or overmasking, but it can be done.
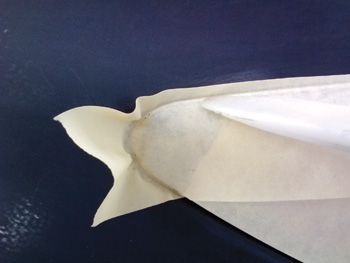
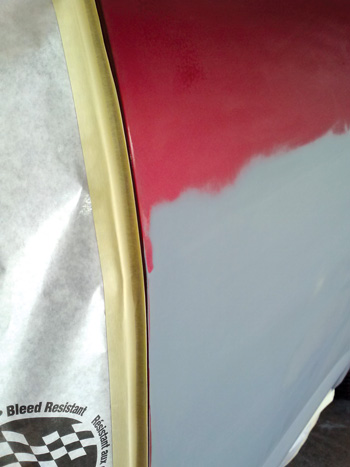
I offer you one of many techniques to accomplish this. It does require a little skill, but the more you perform it, the easier and more proficient you’ll become. Like many techniques, if you practice it in places where it isn’t that critical, you’ll have the skill refined when and where it is critical.
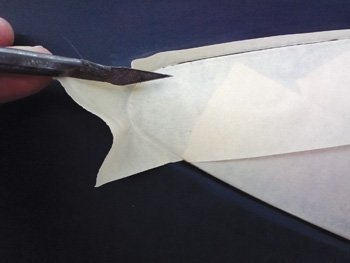
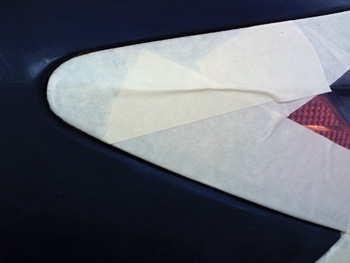
Just overmask it, then trim it back with a razor knife. Don’t over penetrate with the razor knife and damage the surface below the tape. Then, sand right up to the edge of the tape, using a fresh edge of sandpaper or a sanding pen. The key is “right up to the edge.” Do not destroy the masking tape by sanding over the edge of it and compromising the integrity of the edge. Do not destroy the tape edge by stretching and turning a tighter radius than the tape can achieve without the “memory” of the tape pulling back and allowing overspray under the edge. You need that tape edge crisp to ensure effective masking and successful unmasking. Sometimes it’s a better choice to trim a radius into the tape rather than bend the tape around.
Mask with a Purpose
It’s helpful to always have the purpose of the masking and unmasking in mind. Purpose of the masking? Yes! For example, bagging a vehicle with a plastic bag to protect it from overspray has little value if your critical edge (the masking immediately adjacent to the painted panel) of masking is adhering poorly and pulling up, allowing overspray under it. Sure, you covered the car, but you failed to protect it from overspray. Don’t just go through the motions; mask with a specific purpose and be certain the purpose is achieved.
Unmasking in mind? Yeah, not simply pulling the tape away from the painted edge towards itself, but with consideration to efficiency in general. Think of unmasking as a thread pulled from a sweater, all connected and unraveling in succession. If, when possible, you can “pull the thread” of the critical edge and methodically remove it in succession, you’ll find this to be quicker. And as long as the masking is in your hand, toss it onto the middle of your plastic car cover rather than on the floor, roll up the bag and toss it. This, too, will save a little time. Naturally, waiting to unmask until after you’re done with any polishing that’s required will save time with the cleanup – all contributing to overall efficiency.
As far as what tape to use with any technique, the task will dictate that for you. Sometimes a vinyl-type tape is necessary. Other times, a crepe paper tape is sufficient. Considering just those two types of tape, you have dozens of choices, and not all tapes are equally fitted for the task.
 Other Masking
On to other masking…for it’s not just precision masking techniques we need to consider but any masking that eliminates the clues of our repair. It’s easier, faster and more profitable to simply mask effectively rather than clean overspray later.
The plastic car cover of today with one paintable side is an item I believe has sped up my process. Yesteryear’s version didn’t have a paintable side and, as a result, you couldn’t use the plastic for your critical edge. I know a lot of painters still prefer a papered critical edge, and that’s perfectly fine, but I for one was impressed with the results I attained using plastic at the critical edge. And it led to faster bagging and cleaner paint jobs!
I like to save the pieces of plastic from trimming around a hood or door in empty tape rolls and use them later to mask the opening where a door or windshield has been removed. That little bit of proactive prevention goes a long way in keeping peace with the detailer. The greater benefit, of course, is avoiding a horrified customer who may unexpectedly show up to retrieve a garage door opener and find there’s four pounds of sanding dust coating their car’s interior. I’m well aware that not everyone cares about that, but I do. You probably do, too. I guarantee the owner of the vehicle does.
Overspray is a telltale clue of our repair. Protecting components or adjacent panels from overspray is an easy task and an obvious function of masking. Avoiding the telltale sign of a hard line in a jamb, or a fuzzy oversprayed jamb, is not quite so easy but it can be done. It’s a two-pronged approach: masking and spraying.
The masking requirement – be it the “folded tape trick,” a commercially manufactured transition tape or even one of the foam aperture tapes – is consistent positioning of the tape at the crown of the radius of the natural breaking point into the jamb or at the first concave within the jamb. I’ve seen it done both ways successfully.
The second prong is your spraying technique. You can’t flood the taped edge lest you bridge it and defeat the purpose of the specialty tape. The angle you spray relative to the tape position as well as your point of overlap helps facilitate this. It takes a little practice, but the results are worth it.
Door/Quarter Panel Gap
Another area that presents a bit of a challenge yet can be addressed with a simple technique is the door/quarter-panel gap. How do you prevent the sealer from over penetrating the jamb, forcing a spot/refinish operation in order to rectify it? Talk about killing efficiency. The result is a second trip into the booth to address a preventable problem.
First, let’s understand why this happens. Sealer is heavier than color and therefore penetrates deeper than the color when sprayed. We’ve all seen it and wondered why the color doesn’t cover the sealer. Incidentally, this can happen regardless of whether you mask at the crown of the radius near the panel’s exterior field or at the first interior concave of the jamb. And, as we all know, odds are we’re going to have to paint that jamb to fix it. Let’s avoid that situation instead. My solution is simple and easy…and much faster than spot painting the jambs later.
Your vehicle is in the booth, prepped, masked, wiped down, tacked and ready for spraying. Get a spray-out card (I know you have spray-out cards because you’re diligently building your own personal color library, right?) and cut it into 1.5-inch-wide strips. Gently bend them in half, avoiding a hard crease. Insert the folded card stock into the jamb prior to sealing. Once the sealer has flashed off, pull the card stock out and proceed with your color application. You’ll notice that the card stock has performed as a preliminary masking barrier, stopping the penetration of the sealer into the jamb.
Maximum Efficiency
The cleaner and more precise our efforts, the more efficient and productive our operation is. This bears fruit by way of improved cycle time, material savings and better margins. Better margins can result in equipment and tool investments as well as training opportunities and facility improvement, etc. Masking is simply one link in the chain, and if you can’t mask, what the heck are you doing in the paint shop?
Carl Wilson has been painting for nearly 30 years, with formal training from the GM Training Center, ASE, I-CAR and multiple product and color courses. He currently works as a technical rep for Hi-Line Distributors in Oahu, Hawaii. He can be reached at [email protected].