 There are probably not many refinishers who have never had an adhesion problem on a bumper cover. It’s a different animal than what we’re used to and, in addition, proper compensation is an issue.
This is an assumption on my part, but I believe that it’s probably an accurate one: Many estimators and owners are unaware that there’s significant additional labor involved to refinish a new, raw, unprimed bumper cover than there is to refinish a new, primed bumper cover. So you ask, “What’s the big deal? The database has times that are given for the covers, right?” You’re right, it does give a time, but that time is based on new, primed parts that simply need to be scuff sanded, cleaned and painted, just like any other new paintable body part such as a metal fender or hood. The problem is that some manufacturers supply bumper covers unprimed. Proper preparation to get these parts to the same state as primed bumper covers in the box from your dealer is significant. And the total amount of preparation time that’s necessary to get the raw cover to the same state as the new, primed one is often not being charged for.
How do I know that this time isn’t being charged for? Because we’ve had insurers question us on it when we charge for “preparation for a raw cover,” and I’m astute enough to tell whether they’re sincere or playing dumb. So far, when I’ve explained that it’s a “not included” item, they understand why. Not all of the OEMs supply the covers primed, so any extra labor to get them to that condition is an extra, “not included” labor item.
When insurers ask why are you charging for this and state that they haven’t seen the charge before, that tells me that there are estimators and shop owners who are unaware of it and that the paint shop is doing the extra “not included” work for free. This is a big issue when you look at the whole picture. To put it in perspective, Toyota, the newly declared world’s largest automobile manufacturer, has supplied their paintable bumper covers in a raw, unprimed condition for many years. Can you really afford to give away a minimum of an additional hour of labor on every Toyota bumper cover that comes through your shop in a year? That’s real money, people.
Just In Time
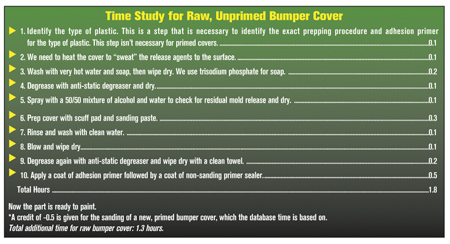
I did an in-shop time study to try to get a handle on what kind of time we were dealing with (see “Time Study for Raw, Unprimed Bumper Cover” chart at left). This was developed from my paint manufacturer’s recommended procedures. I simply made a list of all the necessary steps that weren’t included in a primed bumper cover labor charge and then timed our painter as he started and completed each task on the list. I added up the times and, as shown here, it was too much to leave lying on the table every time we painted a raw bumper cover.
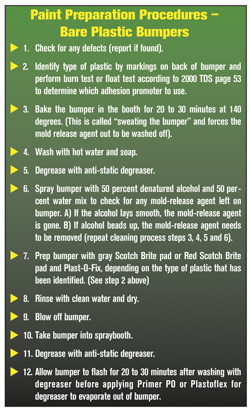
Every paint company manufacturer has a recommended procedure for raw, unprimed bumper covers (see “Paint Preparation Procedures – Bare Plastic Bumpers”). These procedures were developed for a specific reason, namely because there were a lot of adhesion problems occurring with raw, unprimed bumper covers. This isn’t a problem with primed covers, as long as you added a flex agent to your topcoats. However, as is usually the case, the problem occurs first and then the solution is created by the aftermarket. We can now get the paint to successfully remain on the front bumper cover, but we still need to be astute enough to realize that the solution that’s necessary has a labor component in it that’s above and beyond what’s necessary for a primed bumper cover.
Getting Technical
Some government genius decided that automobiles should be able to withstand a 5-mile-per-hour crash without significant damage. Of course, looking at my customers’ cars, one guy’s “significant” is another guy’s “Could you hand me my glasses? I don’t see nuthin’.” So, it’s a little subjective, but you get the idea.
We should be able to crash into one another or inanimate objects at 5 miles per hour or less without significant physical loss occurring to our “little beauties” and extreme damage to our wallets. It sounded like a good idea because minimal damage sure wasn’t the case prior to the creation of the federal mandate. This spawned many different and expensive configurations of energy-absorbing devices, and what we have today: stylish, painted bumper covers with lightweight, energy-absorbing capability and repairability. We reduced the re-chroming industry to a shadow of its previous self and helped meet fuel efficiency standards. When I look at all that was accomplished in 35 years, it seems pretty amazing to me. Of course, I was disassembling and assembling these units on a front-line perspective, so that adds to
the amazement.
A Sticky Situation
That brings us to chemistry, a favorite subject of mine. I know you’re thinking that this lack of adhesion problem is a fairly new phenomenon because we’ve had flexible bumper covers long before paint stopped sticking to them. And you’re right – paint used to stick to the earlier generation covers rather well, as long as you added a flexible agent to your paint.
The first mass produced flexible bumper covers were urethane, your basic two-component thermoset plastic structure which is injected into a mold and the excess or squeeze-out trimmed off and discarded. Once a thermoset plastic cures, you can’t melt it, reflow it or, most importantly, recycle it. Big problem! Not at first, of course, because in our great wisdom we never recognize a problem until we’re ankle deep in it and muttering, “Gee, I wonder what all this stuff is?”
To meet the problem of landfilling the excess waste generated by the manufacturing process, the OEMs turned to the plastics industry, which said, “Hey boys, why didn’t you ask us first? We would have told you to use thermoplastics. They’re flexible, hold their shape well, can be produced fast even though there’s a little more involved, are ideal for high-production runs and are very recyclable. The excess squeeze-out can be recycled because it’s a thermoplastic, which can be re-melted and re-injected into the mold.” Wow! Huge advantage. Not only were they able to stop any waste generated by the manufacturing process, they eliminated the landfilling and its environmental concerns, plus the expense of landfilling. A big win, but the polyolefin injection process required heat to liquify the thermoplastic pellets so that the molten plastic could be injected into a mold. When the plastic cooled, it was difficult to extract the part from the mold because it wanted to stick. Back to the drawing board.
Different mold release strategies were employed. Some were applied to the mold, and some were added to the thermoplastic itself until an easy release allowed production to proceed.
When it came to painting the bumper covers on the line, the OEMs that used thermoplastics immediately figured out how to breach the challenge that the release agent (think Crisco or Pam) provided, but of course they had the whole plastics industry helping them any way they could. The OEMs had negligible delamination problems when it came to bumper covers. In fact, if they had the adhesion they achieve on their bumper covers on the rest of their automobiles, their reputation for paint quality wouldn’t be hanging in tattered shreds as it is today. Memories die hard.
Of course, they immediately started pumping out replacement parts to meet the demand, and some of them decided to save a few yen by supplying the covers in a raw, unprimed condition. That’s what brought us to the point of this article: achieving adhesion while getting properly compensated for it.
Eureka!
So failures were widespread and often required part replacement rather than stripping. Of course, “Necessity is the mother of invention,” and a process was reasoned through, adjusted and applied to the aftermarket collision repair industry. When followed carefully and precisely, this process gradually began to eliminate the problem.
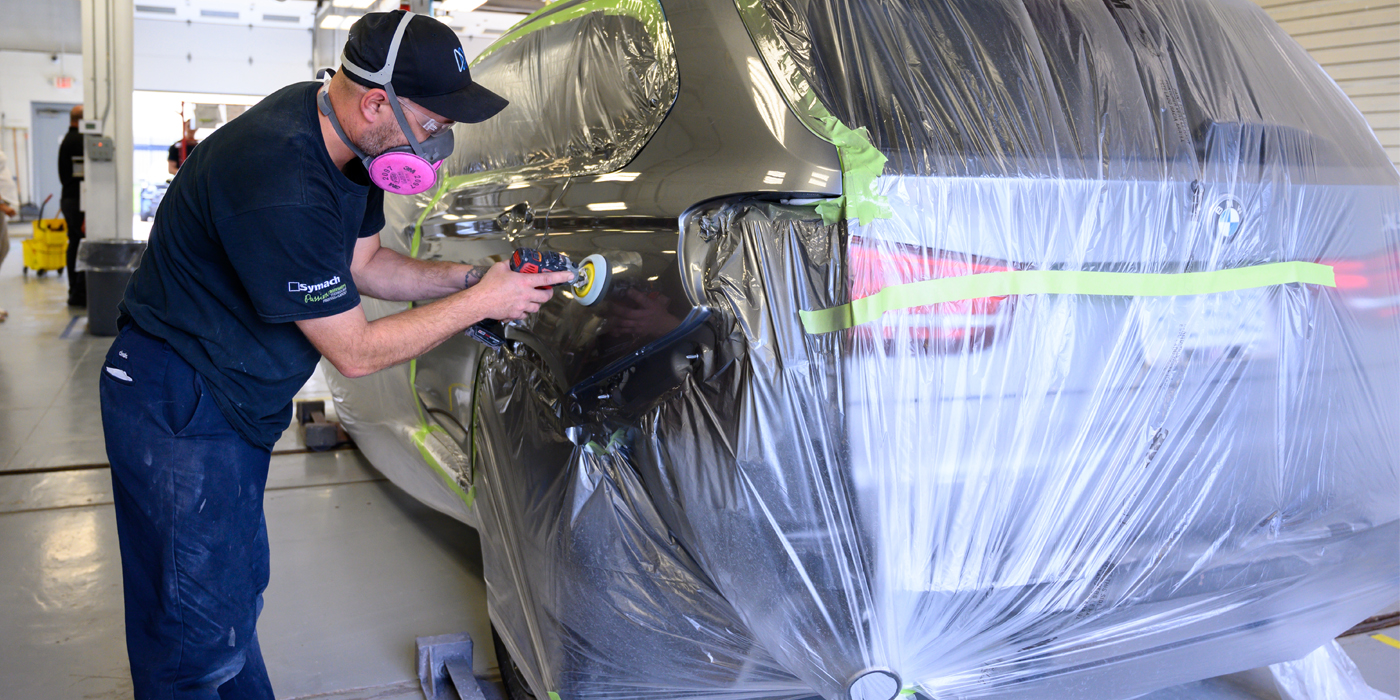
Painting raw, unprimed bumper covers is an unforgiving process compared to much of our other refinishing processes. Skip a step or do a little less than a complete job, and the consequences will be a lack of adhesion in obvious patches that leaves your reputation for quality looking as flaky as your customer’s bumper cover. There really isn’t any shortcut here. The fastest way is to precisely follow your paint manufacturer’s recommended procedures to a tee. It’s much faster than replacing the bumper cover and working for free to do the job again. At that point you’ve sensitized the customer and he or she is now on-point and on-guard for any defect real or imagined.
Step-by-Step
I’m going to walk you through the procedure to prepare a raw, unprimed bumper for paint as recommended by our paint manufacturer:
Step 1. Identify the type of plastic cover you’re working with. This is necessary if your system, like ours, has more than one primer for raw plastic. Our system uses one primer for TPO (thermoplastic polyolefin) and another for the other types of plastic covers, primarily urethane, polycarbonate and xenoy.
Calm down! It’s not that difficult, really. The bumpers on a large majority of high-production vehicles (75 to 80 percent) are polyolefin. Check it with a float test or grind test by cutting a sliver of plastic from the edge of the cover, at the bottom, in a not-visible place and placing it in a cup of water. If it floats, it’s polyolefin. You can double check with a grind test by grinding the inside, non-visible section at relatively high speed with a small grinder. If the surface smears instead of the grindings falling off in particles, it’s a polyolefin.
If your sliver sinks or your grind test doesn’t smear but removes a lot of grindings, you’ve got a non-polyolefin. That means that it’s either a urethane (which makes up around 20 percent of all covers on lower production cars – think of a funeral coach, for example) or a polycarbonate/xenoy, which is a hard plastic used on older Fords and newer, high-end Euro cars (about 5 percent of all cars
produced).
These simple tests take only a few minutes, and we use them on a daily basis. You may also use the ISO codes, which in most cases are visible on the back of the parts, and compare them to your paint manufacturer’s information to identify them as a polyolefin, urethane or polycarbonate/xenoy. This is a much quicker process to determine by simple test than it took for me to explain. It’s necessary and good to know what you’re working with.
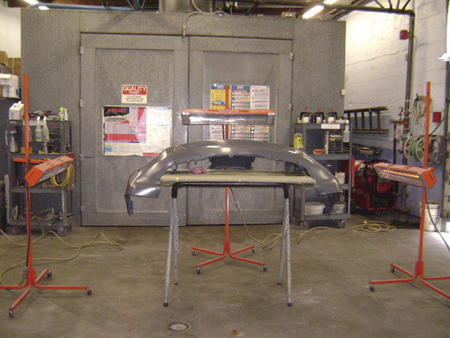
Step 2. Bake or heat the cover at 140 degrees Fahrenheit in a spraybooth or with infrared lamps for 20 to 30 minutes to force the mold release agents to the surface to be washed off (Photo 1).
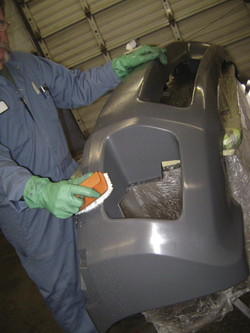
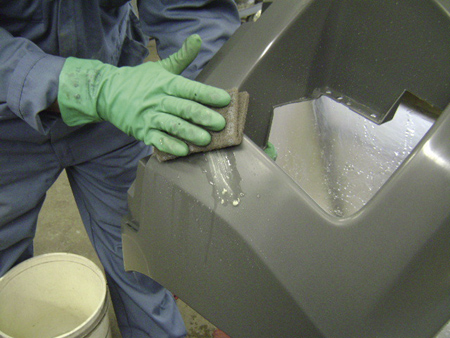
Step 3. Wash with hot water and soap. We use TSP (trisodium phosphate) in very hot water to wash off mold release agents. Be very thorough (Photo 2), and make sure to dry the surface.
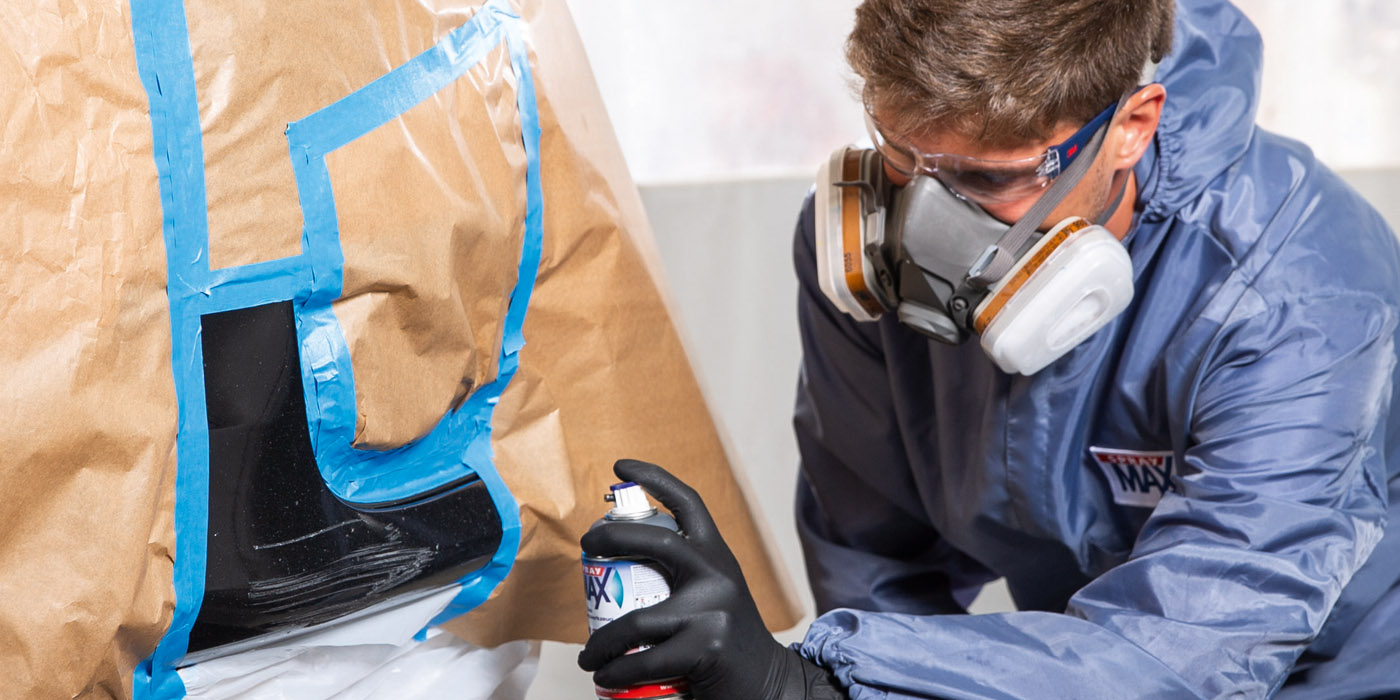
Step 4. Degrease the part with anti-static degreaser and dry (Photo 3). This is a water-based degreaser to remove any trace agents that may remain after Step 3.
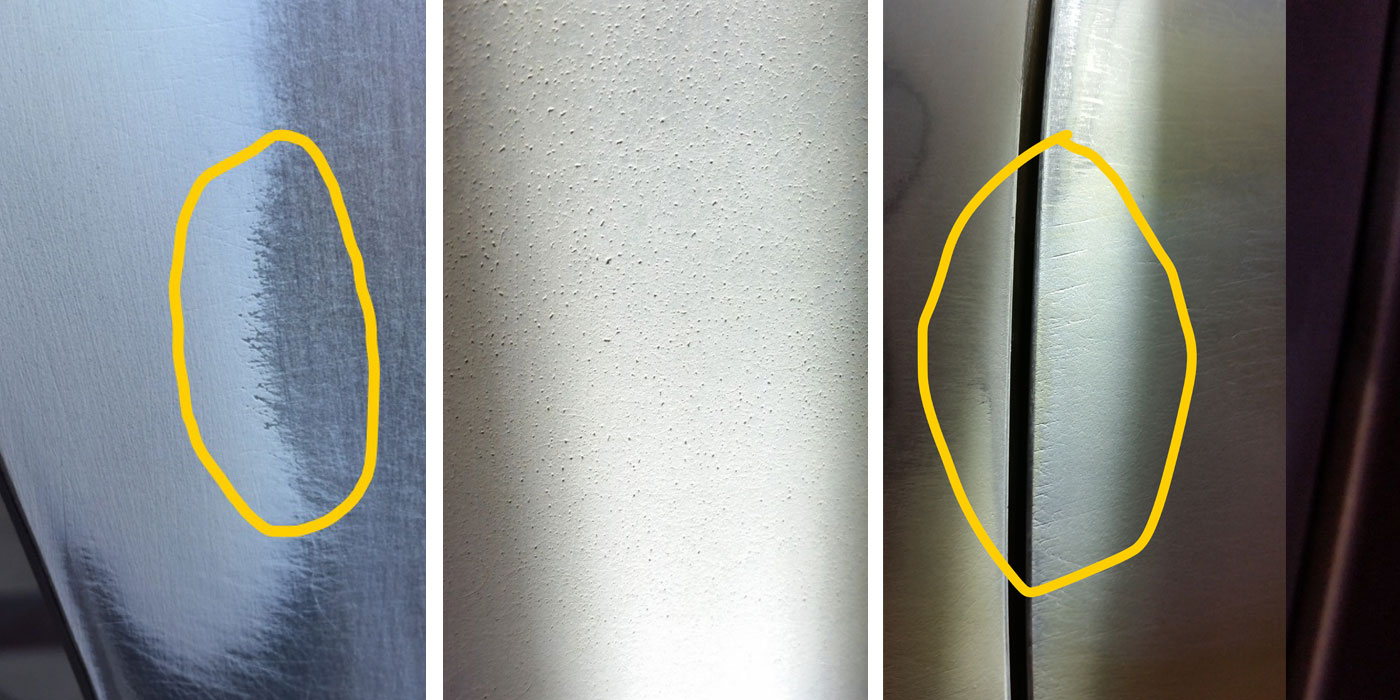
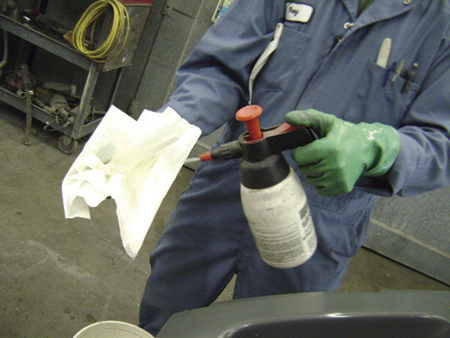
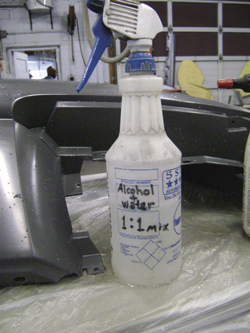
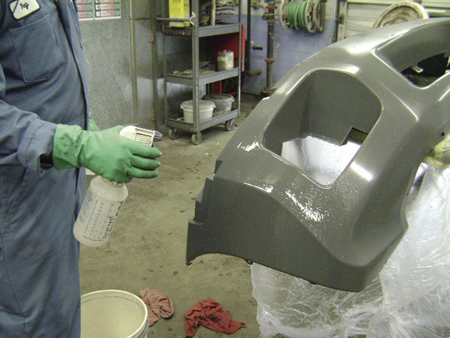
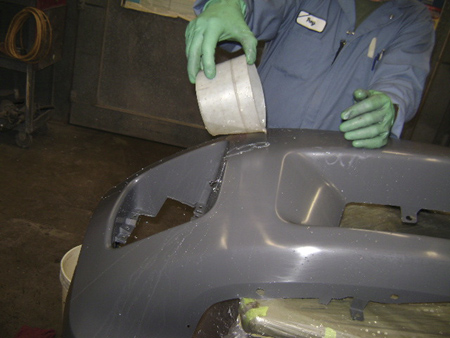
Step 5. Spray the bumper cover with a mixture of 50 percent denatured alcohol and 50 percent water to check the part for any mold release left on it (Photos 4 and 4a). If the mixture flows smooth and flat over the part, the mold release is gone. If the mixture beads up, the mold release agent is still there and needs to be removed. Repeat steps 2, 3, 4 and 5.
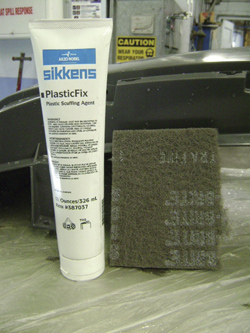
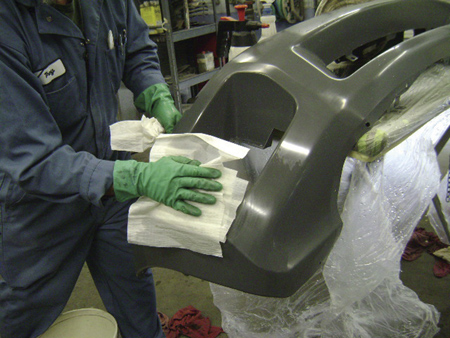
Step 6. Prep bumper cover with a gray Scotch Brite pad and Plast-O-Fix (abrading or sanding paste) for polyolefin covers or a red Scotch Brite pad and Plast-O-Fix for other types of plastic covers (Photos 5 and 5a). This is one of the reasons you need Step 1. If you use red on polyolefin, you’ll get sand scratch swelling, while gray on urethane won’t be aggressive enough.
Step 7. Rinse with clean water and dry (Photos 6 and 6a).
Step 8. Blow bumper cover off to remove trace water and lint (Photo 7).
Step 9. Place cover into spraybooth.
Step 10. Degrease cover again with anti-static degreaser and dry with clean towels.
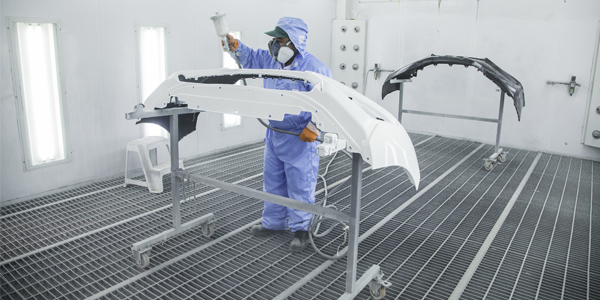
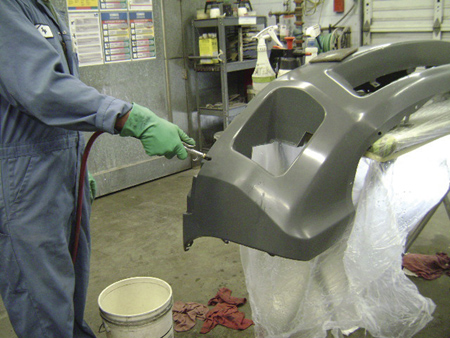
Step 11. Allow the cover to “flash off” for 20 to 30 minutes to allow degreaser to completely evaporate before applying the appropriate primer based upon the plastic type.
Follow your particular paint manufacturer’s recommendations. What I’ve given you is an example of one company’s procedures. These have worked extremely well and very successfully for the products we use.
I can’t overemphasize the importance of being diligent and following your particular paint manufacturer’s recommendations carefully and precisely, and success will be yours. Good luck.
Writer Mike West, a contributing editor to BodyShop Business, has been a shop owner for more than 30 years and a technician for more than 40 years. His shop in Seattle, Wash., has attained the I-CAR Gold Class distinction and the ASE Blue Seal of Excellence.