
 Keeping up with current vehicle repair methods and procedures can be a daunting task. As you prepare to evaluate and repair structurally damaged vehicles, there are many decisions that your entire team must face every day, such as:
• Should I repair the damaged area or replace it?
• Does the manufacturer have recommended and published repair procedures?
• Should I section this part or replace it with a complete piece?
• Does my technician know where the weld locations are?
• Do my technicians have factory-engineered measuring references available?
The most successful repairers will be those who address these issues proactively (prior to production) by sourcing available repair procedures. This approach will allow you and your team to prepare an accurate repair plan, minimize additional add-on repairs and expedite the repair process.
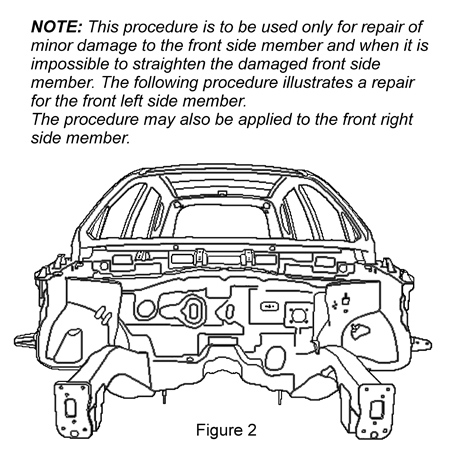
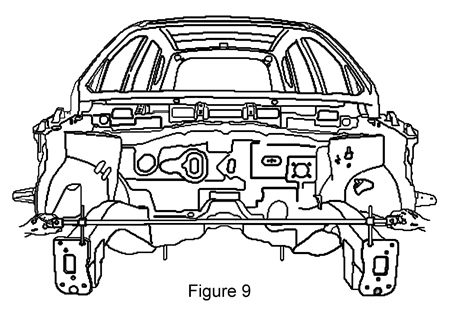
Below is an example of Kia’s recommended sectioning procedure for the front lower frame rail on a 2008 Rondo.
Service Information
Always refer to ALLDATA Collision for safety procedures, identification of material types, recommended refinish materials, removal and installation procedures. Always refer to Kia for questions relating to applicable or non-applicable warranty repair information.
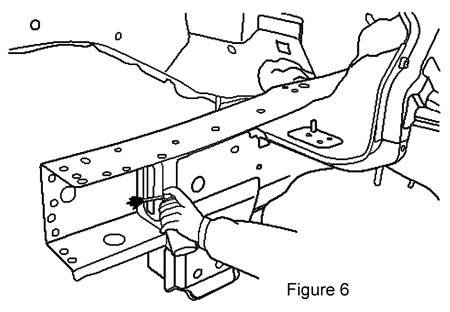
Removal Procedure
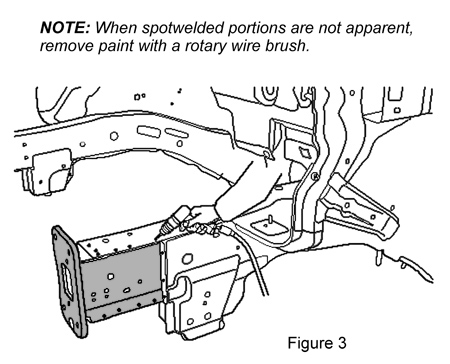
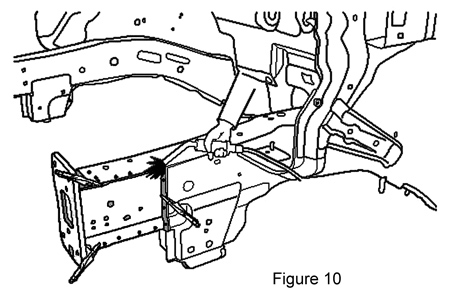
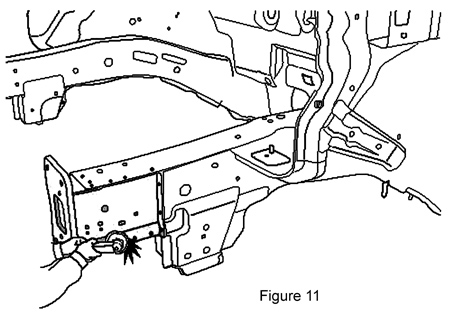
1. Drill out all the spotwelds (19) to front bumper mounting bracket from front side member assembly.
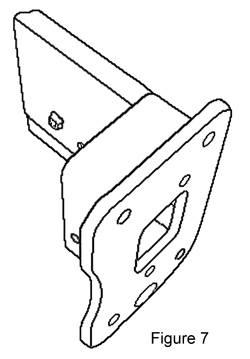
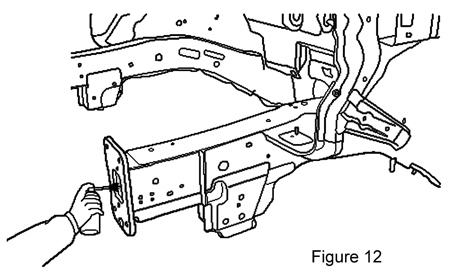
2. Remove the front bumper mounting bracket.
3. Prepare all surfaces to be welded.
4. After removing, apply the welding primer.
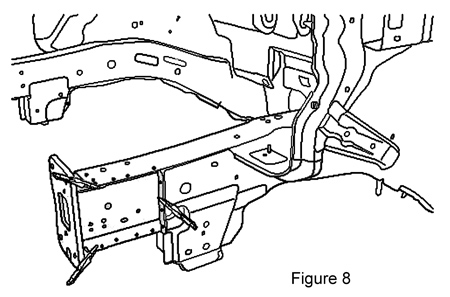
Installation Procedure
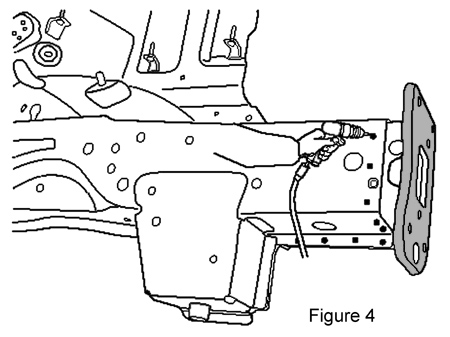
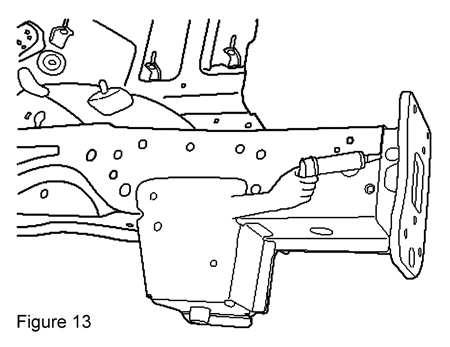
1. Drill 8 mm holes in the front bumper mounting bracket for MIG plug welding.
2. Fit and clamp the front bumper mounting bracket in place.
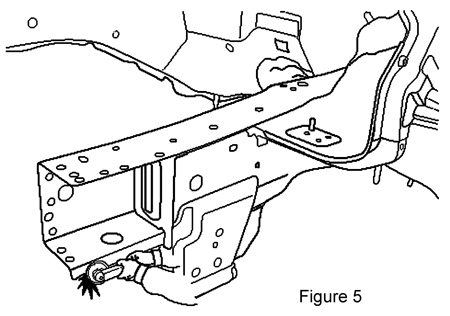
3. Measure each measurement point (refer to the body dimensions and specifications to correct the installation position).
4. MIG plug weld all holes.
5. Clean and prepare all welds, and remove all residue.
6. Apply the two-part epoxy primer to the interior of each panel.
7. Apply an anti-corrosion agent as required (refer to the body corrosion protection).
8. Prepare the exterior surfaces for priming using wax and grease remover.
9. Apply metal conditioner and water rinse.
10. Apply conversion coating and water rinse.
11. Apply the two-part epoxy primer.
12. Carefully apply the correct seam sealer to all joints (refer to the body sealing location).
Dan Espersen is the ALLDATA Collision Program Manager. He’s a Gold Pin Member of the Collision Industry Conference (CIC) and holds an AA Degree in Automotive Technology. He has 17 years of experience in the collision industry and 17 years of experience in the automotive industry. © 2009 ALLDATA LLC. All rights reserved. All technical information, images and specifications are from the ALLDATA Product. ALLDATA is a registered trademark of ALLDATA LLC. All other marks are the property of their respective holders. Kia and Rondo are registered trademark names and model designations of Kia Motors America, Inc. All trademark names and model designations are being used solely for reference and application purposes.


