For repair technicians, the decision to replace or repair a frame rail is a judgment call. But the proper decision has been made easier by all the current research done on the subject by such organizations as I-CAR and Tech-Cor.
An understanding of structural repairs will also help in your decision to repair or replace. Proper structural repairs are very critical today because of the wide use of air bags and because the stiffness and crushability of the structure dictates to the air-bag sensors when to deploy the air bags. If the structure is altered, an air bag can deploy early or late, either of which could result in greater injury or even death.
For this reason and others, it’s critical in the repair process to restore a vehicle to pre-accident crushability. If a structure is too stiff (e.g. by adding a reinforcement to the frame rail) after a repair, deceleration (activation of the air-bag system) will increase, which can cause the air bags to deploy too soon. If the repair results in an over-heated part, deformed crush zones or improper welds, it could lead to a “soft” structure. This condition will cause the deceleration to be too slow, and the air bags may deploy too late.
For guidance when it comes to replacing vs. repairing, consider the following information supplied by I-CAR and Tech-Cor.
Help from I-CAR
According to I-CAR, deciding to replace or repair should be based on the kink vs. bend test: If it’s bent, repair the part; if it’s kinked, replace it.
A “bend,” as defined by I-CAR, means “the change in the shape of the part between the damaged and unchanged area is smooth and continuous” and “straightening it by pulling restores its shape to pre-accident condition without any area of permanent deformation.”
A “kink” occurs when the part has a sharp bend of a small radius (1/8-inch or less), usually more than 90 degrees over a short distance, and “after straightening, there’s a visible crack or tear in the metal or there’s a permanent area of deformation that will not straighten to its pre-accident shape without the use of excessive heat.”
A kink has become work hardened and the resulting structure has been altered. This is the primary reason to replace a kink in a structural component.
… And from Tech-Cor
Sectioning repair, as defined by Tech-Cor, means to “straighten and align (pull and square) a unibody structure, cutting and removing only the damaged portion, and replacing that area with a new OEM part or a properly inspected salvage component of similar type and design at the manufacturer’s recommended seams.”
According to Tech-Cor, when it’s practical and cost effective, the first choice should be to replace damaged structural members at the manufacturer’s recommended seams. Replacing structural members at the specified seams using new OEM parts creates a straightforward repair procedure. In some cases, replacing damaged components at factory seams disrupts many undamaged factory-applied welds, disturbs OEM-applied corrosion protection beyond the damaged area and requires replacing a larger assembly than the damage-affected area. Also, limited access to some factory seams may prevent the ability to remove the entire damaged component economically or without damaging adjacent components. Sometimes, it may be more practical to perform a sectioning procedure.
Rules of the Game
The sectioning of a frame rail is an accepted I-CAR and Tech-Cor procedure, but a few rules must be observed before this procedure is used.
Sectioning cannot be done if it’s:
- Prohibited by the vehicle manufacturer.
- In or near the suspension mounting locations.
- In or near any structural mounting locations.
- In areas of compound structure.
- In crush zones (crush zones are intended to initiate and control the rail deformation during a collision).
- In or near engine or drive-train mounting locations (high amounts of load and vibration fatigue).
- In areas where proper welding can’t be performed. Note: Reinforcements are located in high-stress points in rail assemblies, and altering a reinforcement can affect the designed-in energy-management system of the vehicle structure.
Getting to Work
Three basic types of joints are used in the sectioning process as identified by I-CAR. They are the:
• Lap joint (utilized by most vehicle manufacturers when sectioning is demonstrated in their repair manuals);
• Offset joint; and
• Butt joint with insert.
The following steps outline a sectioning procedure using a butt joint with insert.
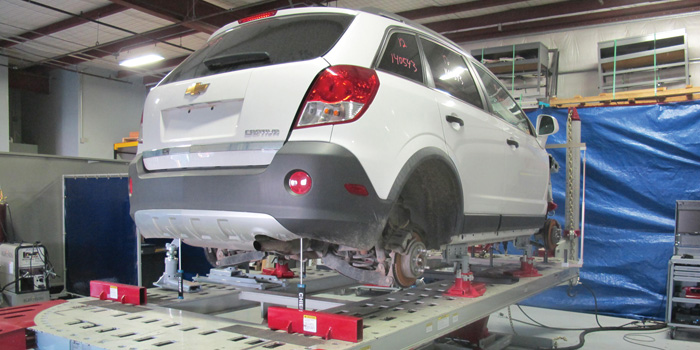
- Set the vehicle on a frame-pulling device along with a 3-D measuring system.
- Devise a pulling plan.
- Pull the vehicle to its proper datum, length and center line.
- Stress relieve the frame rail. (Only use heat as recommended by the vehicle manufacturer.)
- Identify the locations of internal and external rail reinforcements prior to determining a possible section joint cutting location.
- Measure and mark the damaged rail that’s to be cut, making sure the cut line is approximately 15 mm longer than the measure line. See Photo 1.
- Cut and trim the salvaged part.
- Transfer the cut line to the new or salvaged part less twice the thickness of the metal of the rail. See Photo 2.
- Cut the damaged rail and form the sleeve for the new rail. (The sleeve will aid in the alignment of the new section and form a welding platform for the butt joint.) See Photo 3.
- Remove as little as possible of the original rust-prevention material when grinding on both the old part and the new section part.
- Drill 8-mm plug holes approximately 25 mm apart into the new frame-rail section.
- Apply weld-through primer to all mating surfaces.
- Put the new section on, and spot weld the section.
- Check the location of the rail with a measuring device.
- Weld the two sections together. (Remember to alternate welding locations and keep the length of the weld between 13 mm to 20 mm.) See Photo 4.
- Re-measure the rail.
- Dress the weld. See Photo 5.
- Apply corrosion-resistant primer to all interior and exterior surfaces.
- Apply seam sealer.
- Apply cavity wax to interior surfaces.
- Refinish repair areas.
- Proceed with vehicle repair.
 Photo 1 |
 Photo 2 |
 Photo 3 |
 Photo 4 |
 Photo 5 |
It’s Your Call
As a collision repair technician, replacing or repairing a frame rail is ultimately your decision and your responsibility. One of the most important factors to consider when making that decision is whether or not the vehicle manufacturer recommends sectioning. If the manufacturer doesn’t recommend it, don’t do it. If the manufacturer does recommend it, then the decision to section that vehicle — along with the safety of that vehicle’s owner — is in your hands.
Writer Toby Chess is the Los Angeles I-CAR chairman as well as an I-CAR instructor. He’s also a certified ASE Master Technician.
| The information provided in this article is for educational purposes only. Although every effort has been made to ensure the accuracy of the information, Tech-Cor, I-CAR, Toby Chess and any other person involved in the creation, production or distribution of the article assume no responsibility or liability for any repairs performed using the information provided.
Any person performing repairs must determine whether any suggested or recommended procedures or repairs are suitable or appropriate for the particular vehicle being repaired. The repairer remains solely responsible for such determination, as well as for the proper completion of the repairs. |