That said, I want to take you through a few short scenarios before we delve into the details of writing better estimates.
Scenario No. 1
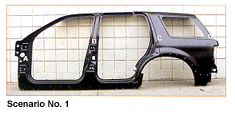
Look at the picture of the 2003 Ford Explorer. It’s the uniside (both front and rear sections put together for this photo). How much structural foam is necessary at the upper and lower “C” and the upper and lower “D” positions as recommended by Ford in their TSB Bulletin?
If you guessed 34 cartridges, you’re correct.
How did you know that number? Did you guess or have you seen the TSB for the application of structural foam?
Let’s say the retail value of the foam is $30 per cartridge. You’d need to add a separate line item for 34 cartridges at $30 per unit with a grand total of $1,020.
Let’s imagine that a person from the insurance company is conducting a desktop audit or, even better, an insurance adjuster who just graduated college is looking at your estimate with all that foam. In a fantasy land, he’d say, “No problem. We’ll pay the bill.” (If you believe this will happen, then please call me. I’d like to sell you the Brooklyn Bridge.)
The reality of this situation is that you’d get a call from that insurance person denying the charge. If insurance adjusters don’t understand it, they just deny – even if they’re totally wrong.
On the repairer side, most estimators would say that they need the foam, but – even though they have the knowledge – wouldn’t necessarily justify the charge. In this particular instance, the foam is part of the structure and has to be replaced. The entire procedure is spelled out in the Ford TSB, but this information isn’t readily available. (Go to the Collision Industry Conference’s Web site, www.ciclink.com to download the TSB for your records.)
Scenario No. 2
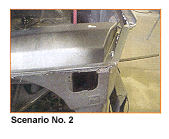
The vehicle here is a 2000 Chevrolet Corvette, and the rear body section has to be replaced. The part is glued to the passenger compartment and the rear frame rails. How many twin tubes of adhesive are necessary for the job?
The shop used seven cartridges of adhesive to secure the rear body section. The list price for one cartridge is more than $40, so you had better add a line for seven tubes of adhesive for this procedure at $40 per unit. There were also a half dozen brackets that were riveted to the old section that had to be drilled out and re-attached to the new part, and the labor and rivets weren’t included in the replacement process.
Scenario No. 3
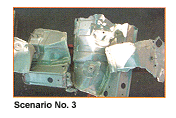
A rear floor is being replaced on a Lexus. There are more than half a dozen small brackets welded to the old floor panel that are not included with the new floor. Is the time to remove them and re-weld them included?
If you answered no, you’re correct.
But how many estimators know that this operation isn’t included? Moreover, how many estimators would even know that there are welded brackets on the floor panel?
Scenario No. 4
A quarter panel is being replaced on a Lexus SC 430. The retractable top system has to be removed for repair access. Do you have the Lexus Collision Repair Manual in your office?
If you answered no, you’d better not attempt this operation. Lexus devotes about 30 pages to the removal and replacement of the retractable roof. (You also need a special jig to align the top.)
If you need to sublet this operation, you’ll probably have to tow the vehicle to the dealership, tow it back and tow it again (for the top installation). Are you going to charge for the three or four tows necessary? Did you add a sublet line for the dealership?
Scenario No. 5
A 2004 5 series BMW is towed
into the shop with major front end damage (a front rail needs to be replaced). The insurance adjuster puts on his estimate to replace the entire front rail, and you agree to the process.
Did you know that the front rail is glued and riveted on? Did you know that BMW has a special tool kit for this operation? Did you know that BMW has a warning sticker stating that this operation should only be performed by a BMW certified technician?
Let’s assume that your facility meets all of the above requirements and that you write the replacement operation. You also need to add a line for the special rivets and one for the special adhesive.
In the above five scenarios, did you omit any of these items? If you did, it could cost your shop hundreds of dollars or even more.
It’s imperative that estimators know where to find all this information and comprehend it – or else be prepared for a much smaller bottom line.
Just in case you haven’t had enough technical questions, here are a few more:
What type of construction is the frame on a late model Corvette? Can the frame be sectioned? And what kind of joint is specified for the section? The answers are hydroformed; yes; and butt with insert.
Recently, I spent more than 15 hours reviewing three training CDs from General Motors to become GM certified (three different online exams). The three questions I just asked you were on the exam.
I’ve been writing and teaching about writing estimates for more than 10 years, and I still need to learn as much as possible in order to keep up with changes that are occurring in the industry. Everyone should take the new I-CAR enhanced delivery classes. Did you know that I-CAR will be delivering training for General Motors and DaimlerChrysler?
Scenario No. 6
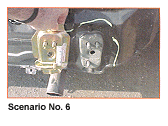
Check out the bumper reinforcement attachments on this 2000 Toyota Camry.
The replacement part is welded to the rear body panel. If you go to replace this item on one of the information provider’s system, it only shows the part, but no labor time. The omission of the labor could cost you at least an hour and a half of labor on the estimate. But the big question is, how do we as an industry correct this problem?
There is an answer to this question. March Taylor, a shop owner from Hawaii, has been working with the information providers to correct the problems that arise, and he’s submitted nearly 200 inquiries to date. Most of the inquiries have had positive results (correction and changes), but he’s only one man. If you have any corrections or feel that times in the databases are wrong, you can submit an inquiry at www.ciclink.com. Only we as an entire industry can effect changes. If we wait for someone else to do it, nothing – and I mean nothing – will ever change.
Put Your Skills to the Test
OK, let’s move on to the subject of estimating. I wanted to do something a little bit different than just writing another article on estimating. So, here’s what I want you to do. Take a look at the four estimates on the left and try to add labor and material lines to each estimate without the aid of any books or computers. You also need to be able to justify the addition of that line.
For example, you’re replacing the front hood on a Lexus SC 430. Would you apply cavity wax to the hood? If you answered yes, you’re right. But how would you justify the line item to an insurance adjuster? You cannot simply say that you need it, but you can open the Lexus Body Damage Repair Manual and show that person the manufacturer’s recommended procedure. This is what I mean by justification.
We’re using a 1999 Honda Accord LX with full power as our damaged vehicle.
- Estimate No. 1 is an estimate on the repair of a damaged driver’s side front door. There’s a dent about the size of a large grapefruit about 4 inches from the front leading edge of the door. You’ll need to blend only the driver’s side front fender.
- Estimate No. 2 is for the installation of a new driver’s side front door shell.
- Estimate No. 3, you’re installing a used driver’s side front door (the mirror is not needed).
- Estimate No. 4, you’ll be installing a driver’s side front door repair panel (a.k.a. door skin).
Think about the labor and/or materials you need to complete these estimates, and remember, you need to justify each entry.
How’d You Do?
Now that you’ve completed your estimates, let’s look at the following four estimates on the next page, which include some items that were omitted from the original four estimates.
- Estimate No. 1 (repair damaged driver’s side front door):
- Lines 1 and 2 specify for the removal and re-installation of the front bumper. The justification for this process is to prevent a bridging of the clear between the bumper and fender. The clearcoat might lift off and could peel. Moreover, the clear needs to be wrapped around the edges of the fender.
- Lines 4 and 5 specify for the removal and re-installation of the headlamp. The same reason holds as in line 1. If the headlamp is removed, it needs to be aimed.
- Line 19 specifies for the interior jambs to be masked. This procedure is a non-included item and can be found in the procedure pages.
- Line 20 calls for the replacement of the factory E-coat, and Line 21 calls for prime, featheredge and fill. The paint time for any panel is calculated for a new and undamaged part (spelled out in the P-time pages). But we’re not dealing with a new part. There are two additional non-included steps to get to the same level as a new and undamaged part, and you need to charge for them. The first step is coat the bare metal that was exposed to repair the dent, and the second is to apply a primer to the repaired area and featheredge the repair and the old paint. On a technical note, you want to use epoxy primer or a two-component self-etch primer as substitute for the factory E-coat primer (removed to repair the damaged sheet metal).
- Line 22 specifies for a car cover for the primer. The P-times provided by the information systems spell out this detail.
- Finally, Line 23 calls for a primer to be applied to the backside of the door. If a stud gun is used to remove the dent, a rust hot spot will occur on the back side of the door panel, and it becomes susceptible to formation of rust. I use a single-component self-etch primer in this area to prevent the formation of rust.
- Estimate No. 2 (install new driver’s side front door shell):
- As with the estimate No. 1, I added R&I of the front bumper and headlamp assembly (Lines 1-5), and its justification is the same.
- Line 27 calls for the interior jambs to be masked off. This procedure is a non-included item and can be found in the procedure pages.
- Line 28 specifies a coating of cavity wax to be applied to the inner door shell. This was taken directly from the Honda Accord Collision Repair Manual. Make sure you apply the cavity wax after the vehicle has been painted or you’ll have a mess (paint won’t stick to it).
- Line 29 specifies a soundproof pad to be affixed to the door shell, and the justification is self-explanatory.
- Line 30 calls for caulking/sealant to be applied. Many of the new factory replacement door shells don’t have any sealant applied to them, so you need to add it to the door.
- Estimate No. 3 (install used door):
- Line 30 specifies the interior jambs to be masked off. As I mentioned earlier, this is a non-included operation, and the justification can be found the in paint section of the P-times. You may have to R&I the door glass from one door to another due to the various types of tints on the market, and this operation is also not included. Line 31 calls for additional prep time on the used door. Remember that the paint times are for new, undamaged parts and that we’re dealing with a used part. On a new part, you scuff the panel with a Scotch Brite and a paste, followed by 800- to 1000-grit wet sandpaper (included). With the used door, you need to sand the entire door with 400-grit DA before you finish sanding the door for paint, and this extra step is a non-included item.
- Estimate No. 4 (install driver’s side door skin):
- Line 14 specifies the removal and reinstallation of the sash or pillar moldings. Most R&I moldings are non-included operations in the replacement of the door skin. This molding covers the upper part of the door.
- Line 17 of the estimate specifies the R&I of the door glass. This operation is necessary so the glass doesn’t get broken or damaged when welding. This is another non-included item.
- Line 22 calls for the removal and reinstallation of the belt molding reinforcement. A couple of the vehicle manufacturers have this part on the original door shell, but it doesn’t come with a new repair panel. It needs to be removed from the damaged door skin and re-attached to the new one. This operation is also a non-included item.
- Line 33 specifies a weld-through primer. This product forms a barrier around the weld site to prevent rust. I-CAR now recommends that any weld-through primer at the weld site be removed, leaving the primer adjacent to the weld. In other words, if you’re welding a plug weld, coat both sides of the mating surfaces and remove the weld-through primer at the 8mm plug hole. On another note, one vehicle manufacturer doesn’t recommend weld-through primer.
- Line 34 specifies the wire loom to be pulled back. This operation may be necessary for the removal of the door parts and is also a non-included operation.
- Line 36 specifies the replacement of non-structural foam at the intrusion beam. In the above picture, the tech used adhesive, but many other doors use foam. The foam or adhesive keep the door skin from vibrating, which could cause the seal at the door skin hem to become loose and allow moisture to creep into the seam and cause
it to rust. This is also a non-included
operation. - Lines 37 – 40 are other products that are necessary in the repair process to bring the vehicle back to its pre-loss condition, and these items are also not included.
I won’t repeat the non-included items that were outlined in the first three estimates, but I will concentrate on new non-included items.
Besides the non-included items that were listed in my estimate, there are a number of other items that may be needed to complete the door-skin replacement operation, and here’s a list of them:
- R&I battery
- Replace gravel guard
- Replace any broken clip that occurs during the operation
- R&I window channel
- Grind all weld nuggets
- Prime, featheredge and fill
- Clean up any broken glass
- Repair the inner door shell plus painting
- Trial fit the door
- Restore E-coat primer
Writer’s note: The pictures of the door skin replacement were taken from a training CD that the Society of Collision Repair Specialists (SCRS) has put together. The power-point presentation takes you from start to finish on the door skin, showing the many non-included items that are necessary for the procedure. This and the nine other operations on the CD are a great tool for estimators to gain a better understanding of the repair process. Call (509) 943-8919 for more information.
Can You Afford Not To?
If you look at the dollar differ-ence between the original estimates and the final estimates, they range from a low of $80 to more than $200. Let’s assume that you can now add $100 to every one of your estimates and can justify all the new items and that your facility repairs 70 cars per month. That $100 times 70 cars would add $7,000 per month to your bottom line or more than $84,000 per year! (I assume you’re already doing the various procedures but aren’t listing them on your estimate.)
And this is probably mostly profit.
Can you not afford to write better estimates? Can you not afford to get trained? Can you not afford the investment in books for justification?
Can you not afford to keep current with what’s happening in the repair industry?
Contributing Editor Toby Chess has more than 30 years of industry experience. Chess is an ASE Master Certified Technician, an Accredited Automotive Manager, an I-CAR instructor, a stud, the Los Angeles I-CAR Chairman, a stud, a technical presenter for CIC and let’s not forget, a stud.


