Good measuring practices aren’t an accident. The only accidents in your shop should be the ones you’re repairing. That said, we all know that structural repairs and pulling of frames and unibodies involves the need for measuring. What that means, why and to what degree is where the differences in opinions occur.
When taking a look at this topic, the first thing I did was to sit down and define the reasons for measuring. What I came up with is my list of “Top Ten” reasons to measure:
10. To provide sheet metal fit.
9. To elevate repair to a professional level.
8. To accomplish mechanical parts alignment.
7. To provide dimensional accuracy.
6. To have documentation, before and after
repairs.
5. To monitor repair progress.
4. To determine real damage, not suspected.
3. To monitor pulling progress.
2. To accomplish suspension and wheel alignment.
1. To create a proper repair plan.
Some of these items may appear to be similar – but they’re not.
Locations to measure will be based on the criteria set by these reasons and, when done right, will net a repaired vehicle that not only looks good, but drives and performs correctly.
If we look at structural repairs over the history of collision repair and the evolution of the learning curve, early in the process, sheet metal fit might have been considered the measuring system.
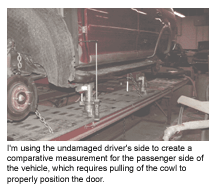
While it’s true that things like pickup truck cab-to-box gaps and vehicle fender-to-door gaps can visually display datum height or end section height misalignment, these same things can be displayed by correct measuring procedures.
Good measuring and repairing to the proper measurements will gain you proper sheet metal fit. But proper sheet metal fit alone doesn’t satisfy the other top 10 criteria.
When problems occur between measuring and the need to use sheet metal fit to determine proper end section height alignment, they’re usually due to set up of the vehicle for measuring and pulling versus specification requirements.
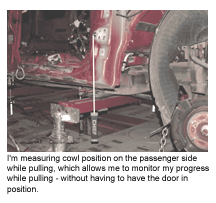
For instance, if you’re using brand C specifications for a brand D full-framed pickup truck and have the vehicle sitting with its wheels fully weighted, the rear may show that it’s 35 mm (1 3/8 inches) high, yet the cab-to-box gap looks correct. If you were to anchor or block the vehicle up in the base section and get all the weight off the wheels, the end sections would show no misalignment and the box-to-cab gap would be wide at the top.
The point of this is that you need to know how the specifications were acquired – with the weight on the wheels or with the vehicle anchored and no weight on the wheels.
Pickup truck frames are fairly flexible and can have a lot of end section deflection. Unibody structures, on the other hand, have gotten stiffer over time and don’t have the amount of deflection they once did. The vehicle’s drivetrain – in or removed from the vehicle – can also cause similar differences.
It’s still a good idea to confirm your sheet metal fit before completing a pulling process, but it shouldn’t be your method of measuring.
9. To Elevate Repair to a Professional Level
The professional feeling you get is the bonus for understanding the need to measure and believing in what it does for the repair. When vehicles are measured correctly, you know that sheet metal is going to fit and that wheel alignment won’t be a problem as it relates to the frame or unibody structure.
If techs record vehicle dimensions at the end of the repair, documentation will exist to show that this aspect of the repair has been properly completed. Technicians can then, without a doubt, know that the vehicle is square and restored to dimensional accuracy.
They also need to know and ensure that it’s structurally sound by understanding the metal has been restored following recommended guidelines for the vehicle being repaired.
Measuring gives you confidence in the repairs being performed. It makes the repair objective, rather than subjective.
8. To Accomplish Mechanical Parts Alignment
Like suspension and wheel alignment (at No. 2), mechanical alignment relates to non-body parts and has to do with performance and handling of the vehicle. And although they’re all similar and related, it’s important to understand each one.
Mechanical component mounting areas include drive line mounting locations. These areas will affect how the powertrain sits and is able to torque when power is applied.
If the drive line doesn’t sit level to the world or as designed to sit, conditions such as torque steer can occur when power is applied. If mounting locations are bent or distorted, it may cause engine mounts to bind transferring vibrations into the body of the vehicle. This can also lead to stress cracking of metal on a frame or unibody structure due to work hardening of the metal at these locations.
7. To Provide Dimensional Accuracy
Dimensional accuracy is the result of good measuring and pulling combined and will provide proper sheet metal fit. Sheet metal parts fit when frames and structures are properly measured and pulled to specification or vehicle tolerances.
If all distorted areas are restored to the proper shape without excessive overworking of the metal, both strength and designed energy-management areas will be restored. Also, dimensional referencing of suspension and mechanical component mounting locations will help to ensure their proper performance.
When using vehicle dimension specifications, it’s important to understand vehicle tolerances and how they relate to the repair. Industry guidelines are generally considered to be plus or minus 3 mm for unibodies and plus or minus 5 mm for full-framed vehicles. These are only guidelines, and vehicle-specific specifications should be followed when available.
Just as important as the specification is the comparison from right to left on the vehicle you’re repairing. The vehicle should be inside of these tolerances or tighter from right to left as well as being referenced to the specifications.
6. To Have Documentation
There are many stages when documentation can be used.
Before you begin repairs, measuring documents the actual damage and puts precise distances and direction of movement down for all to see.
During the repair, documentation helps you track your progress.
At the completion of the repair, documentation records the final readings and places them in the file for future reference if the need arises.
Documentation is a solid way to show that you’ve measured and completed the repairs to some specific dimension for that particular vehicle.
5. To Monitor Repair Progress
Monitoring of repair progress and monitoring of pulling progress (at No. 3) differ due to the reason they’re important to the process. Monitoring of the repair is the process of looking at the results of each pull after stress relieving and releasing the pulling pressure.
You should record the results and compare them to prior readings to determine the next step in your pulling plan. By doing this, you should be able to progress toward the end result in an organized fashion.
If some of the damage isn’t moving, examine previous pulls to see when progress was made and then use that setup again. This type of progress reporting could also become part of your documentation for the records.
4. To Determine Real
Damage, Not Suspected
To determine real damage is what it sounds like. This is the only true way to define the damage with accuracy.
Many qualified people can look at a vehicle and say what they think. But suspected damage isn’t something that can necessarily be repaired – since we never really knew if it existed. Confirmed damage can be repaired, if repairable. And you can show that it’s been removed and to what specification.
It’s also worth mentioning that if you ever have to testify about a repair, real damage – confirmed by measuring – carries much more weight than suspected damage based on your experience.
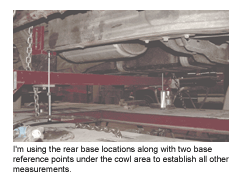
But if you’re going to get a true set of measurements of the damage, you have to start by establishing a good base for any measuring system. This requires that three of the four torque boxes or corners of the base section of the vehicle are undamaged. All other measurements are going to be referenced to these undamaged base section locations.
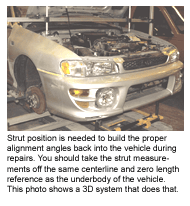
When upperbody and underhood measuring systems are used, they need to get their height, width and length references from these base control points to prevent your misinterpreting the vehicle damage. This becomes really important to strut tower locations under the hood, as it relates to wheel alignment angles. (More on this when we get to wheel alignment, at No. 2.)
You also need to measure the correct locations to get complete damage information. Besides the base section, you need to measure both ends of the vehicle even if they don’t physically appear damaged. This will confirm that the ends are, in fact, undamaged or that transfer of damage has occurred.
Once you’ve measured the base and ends, any area involved in the collision will need additional reference locations measured to determine the exact extent of damage. Emphasis needs to be placed on mounting locations for suspension and mechanical components.
In addition to measuring, you need to evaluate the structural integrity and shape of the part to ensure proper performance. Measurements are a simple way of plotting points in space relative to a given reference point and can’t by themselves determine strength.
3. To Monitor Pulling Progress
Monitoring pulling progress is something that’s taking place every time pressure is being applied and released. The measuring system needs to be in place and able to show the technician exactly what’s happening, and care needs to be taken to prevent damaging the measuring equipment.
You need to be measuring and monitoring the points being pulled throughout the entire process. You also need to monitor the entire vehicle each time pressure is applied. Why? Because pulling energy, just like collision energy, can travel through the vehicle’s frame or structure and can cause deflection on the opposite end of the vehicle or in the upperbody structure.
By monitoring this, you can avoid ending up with a twist in the vehicle from pulling, and prevent breaking a windshield or having diamond come into the frame of a pick-up. And when twist, diamond, upperbody movement and other unwanted movements start to show, you can stop them by changing or adding additional anchoring or redoing the pulling set-up as needed.
2. To Accomplish
Suspension & Wheel Alignment
Like mechanical alignment (at No. 8), these items relate to non-body parts and have to do with performance and handling. Suspension mounting locations are the start of the wheel alignment process, sometimes also referred to as suspension alignment and wheel alignment.
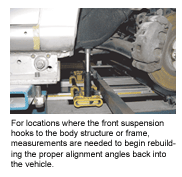
If suspension components aren’t properly positioned at their mounting locations, then it’s likely that wheel alignment procedures won’t be able to compensate for them. This is where 3-D measuring becomes critical – enabling you to rebuild horizontal and vertical angles needed between suspension mounting locations.
If you don’t use the same point under the vehicle to determine all length measurements for lower ball joint and upper strut tower mounting, the caster angle may be off during wheel alignment procedures. The same is true for the width measurements of these two locations.
If the centerline used isn’t identical or transferred up through the vehicle, the steering axis inclination and camber angles may be off. A difference of 3mm side to side on a unibody vehicle with a strut-type suspension will generally be equal to 1/4 degree difference when dealing with these angles.
If steering gear mounting locations on a rack-and-pinion steering system aren’t level or equal heights from the datum plane under the vehicle, bump steer conditions can occur.
When measuring during the repair, the tech really is verifying the correct suspension alignment, which when any bent or worn suspension parts are replaced, will allow for the wheel alignment to be performed. This particular area could be a whole article by itself. I gave you these few examples to illustrate why it ranks high on my Top 10 list.
If structural integrity and sheet metal fit weren’t issues, the suspension mounting locations could be used to measure and pull vehicles, and the vehicle would likely drive well. But since this isn’t the case, we need to take into account all these areas.
1. To Create a Repair Plan
A proper repair plan is something you can develop once you’ve measured reference points. This allows you to formulate a pulling plan that will reverse the direction of the damage by seeing all the damage accurately from the start. By looking at the direction each measured location has moved, you can plan multiple pulls that will move each area back out in the opposite direction as it’s been pushed.
But for this theory to work, you have to measure enough locations in the damaged area to get an accurate picture of the damage. Emphasis needs to be placed on suspension mounting locations as well as structural or frame dimensions at specification data reference points. By doing this, you can more accurately identify all the damage.
Just Do It
To properly measure and use specification data, your techs need to have proper training so they can fully understand and interpret the information – and then effectively use it. And this may involve upgrade training, which may or may not be specific to the system being used in your shop. It certainly involves reading and understanding the P-pages or instructional manuals for both the specification data and the measuring system they’ll be using.
The need to measure is great, and the urge to avoid doing more of it is definitely an issue. Yet I can’t make a list of 10 good reasons not to measure. Any reason I come up with eliminates more than one of the reasons to measure.
Despite the fact that today’s shops are expected to accomplish more in less time, measuring is part of restoring a vehicle during structural and frame repairs. And no matter how rushed your techs are these days, you can’t guarantee that they’ve performed the job correctly if they didn’t properly measure to begin with.
Writer Tom Brandt is an autobody collision technology instructor at Minnesota State College Southeast Technical Campus in Winona, Minn. The program is a post-secondary, two-year diploma program and is NATEF certified. Brandt has 16 years of teaching experience, has been an I-CAR instructor for 15 years and, prior to that, was a combination technician.

