It’s been said there are two critical moments in the collision repair process for vehicle owners:
Moment No. 1: When they drive up to the body shop the first time. What they see sets the tone for their experience. If the shop grounds, office and personnel are neat and professional looking, customers are reassured their vehicles will be OK under the shop’s care.
Moment No. 2: When they come to collect the finished product. If the car is carefully detailed (even over-cleaned), the customer is reassured the entire repair was equally well done.
In both cases, the watchword is clean. Customers want to leave their car at a clean facility and want a super clean car when they reclaim it from that facility.
Unfortunately, in many shops, car cleanup is left to one of the lowest people on the totem pole. And as you know if you’ve tried to hire one, the person who signs on to wash and clean cars for a living tends to switch jobs frequently.
Though you probably can’t have your head painter or shop foreman detailing cars, you can hire someone who does a good job. You’ll have to pay him more than minimum wage and often dangle a better job – possibly as a painter’s assistant – to keep him working for you, but the payoff is more satisfied customers.
One survey suggests that collision repair customers’ initial satisfaction will increase by as much as 40 percent when their vehicles are truly sparkling clean on delivery. After all, they don’t know whether your painter used corrosion-resistant primer or whether the frame tech got the steering axis inclination just right, but they do know their “baby” has been carefully cleaned inside and out by someone who cares.
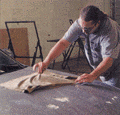
But finding that caring employee is only part of the battle. That employee must also know what to do to the car to garner the customer’s high opinion. Follow these 10 steps to achieve a quality post-repair detailing – and to increase customer satisfaction:
1. Wash the car.

Use car-wash soap and lots of warm, soft water. Car-wash soap will do a better job – and do it faster – than dish-washing soap (which is designed to dissolve food grime, not road grime) or laundry detergent, which leaves a film behind. Powdered or liquid car-wash soap works well. Just make sure it’s mixed in the correct proportion and agitated to disperse completely. Using more soap than the directions recommend won’t make the car any cleaner and will definitely cost more money. Like so many things in our business, you’ll achieve the best results when you follow the mixing directions exactly.
Wet the car with plenty of water before washing and allow the soapy suds to sit on the paint for a few moments after scrubbing and before rinsing off. Whether you begin washing on the top and work down or begin at the rockers and work up isn’t important. The important part is stuffing the soaking wash mitt inside every nook, cranny and grill opening on the car. It’s amazing how far the sanding dust and dry overspray can travel while the car is in the shop being repaired. Trust me, it will somehow find its way under the gas filler lid and behind the outside mirrors – so make sure your first washing gets it all off. If you have to re-wash some portion of the car, your costs go up markedly.
Opinions differ on the merits of using a high-pressure washer. I think it’s a great tool to wash the dirt from the car before repair begins, but I’m less convinced that a blast with 1,000 PSI is the best thing for fresh paint. Whichever method you use, the car needs to be soaked, scrubbed and thoroughly rinsed.
If the car has been machine polished or compounded prior to the final detail, make sure to get all the sling and spatter out of the doorjambs and off the tailpipe and tires. Removing dried rubbing compound is often the most difficult part of the final detail. Several brushes of varying stiffness and shapes go a long way toward making this difficult job faster and easier (faster being the key word).
When you choose your rubbing/polishing compound, look for how well it levels the imperfections in the paint, how quickly it comes to a gloss and how easily it removes residue. Several compounds on the market do a great job removing fine sand scratches and dust nibs but adhere like cement to the doorjambs. Try another brand of compound/polish at least once a year to make sure the system you’re using is still the best for your situation.
2. Dry it quickly.
After the car is washed and rinsed, dry it quickly enough to prevent water spots. Not only are water spots on the clearcoat unsightly, they can actually stain fresh paint. Any air-dry finish (your brand included) is susceptible to water spotting for the first 30 days. Caution your customer to avoid washing the freshly painted car in sunlight or with hard water for the first month. (Factory clearcoats won’t water spot because they’re set with 300-degree heat.) You also want to dry all the chrome moldings before they water spot to attain the “car show clean” look your customer wants.
After much personal experimentation, I believe the quickest way to dry a freshly washed car is to use an artificial chamois and a couple of terrycloth towels. The purists out there won’t dry with anything other than a genuine sheepskin chamois cloth. But in my experience, the real chamois weighs too much when wet, won’t hold as much water as the fake and costs too much to drop on the dirty floor every day. Artificial chamois won’t rot or mildew if you put it in a closed package while it’s still wet either.
3. Glaze or wax the car.
If you final glaze or wax the car by hand, choose your products carefully. A glaze will help hide any remaining swirl marks from polishing the car and offers a nice shine without a protective coating. Waxing freshly painted cars can be a problem. Any enamel paint resin needs contact with the oxygen in the air to cure properly. If you smear a thick coat of waterproof wax over the paint, how will the oxygen find the enamel resin to crosslink? Some waxes, however, are suitable for use over fresh paint. Just make sure the one you choose is. In either case, you’re probably better off applying and removing the wax or glaze by hand. Even though it takes more time, machine waxing tends to throw sling and spatter around on your clean car.
4. Clean the glass inside and out.

Here’s a secret that professional car detailers know: What’s one difference between having the neighbor kid wash your car for $10 and a professional detailer for $75? The glass. The professional knows that clean glass inside and out sends the absolute best message about the car.
Use special glass cleaners, not just car wash soap, to get the best result. Aerosol cans, gallons of concentrate or spray bottles of glass cleaner are all designed to leave a streak-free surface behind.
Take extra time cleaning all the way to the very edges of the glass, including all mirrors – the first place customers look as they drive away. If you use paper towels to dry the glass, make sure you don’t leave paper shreds scattered about the interior.
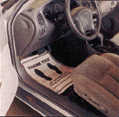
5. Scrub the interior

A spotlessly clean interior is critically important as your customer departs with the repaired auto. Scrub the seats, carpets and door panels with upholstery cleaner. Upholstery cleaner is different from car wash soap because it’s designed to dissolve the soda pop and coffee stains, not road grime and brake dust.
If you’ve never tried one, a steam cleaner will work magic in removing stains from fabric of any kind, and the hand-held units are perfect for auto interiors. The live steam will lift out stains from many years ago. The whole object of a thorough detail is to reassure the customer that your technicians did a quality repair on the collision damage. How impressive is it if the six-year-old coffee stain on the armrest is gone when your customer gets his car back?
6. Clean the obvious stuff like the dash and gauge faces.
I’ve seen detailers spend 30 minutes vacuuming every particle of dust from the carpets and then give the dash and console a lick and a promise with a damp rag. Remember where your customers sit. They can’t see the color match from the right rear door to the quarter from the driver’s seat, but they can sure see the dusty smudge across the speedometer face.
Household dusting products may contain silicone, so you’re probably better off using special automotive dusting sprays. Vinyl or rubber dressings can make the interior really shine but may also make the seats so slick the customer slides onto the floor at the first turn. Worse yet, they can cause fisheyes that will plague the painter for weeks afterward. My advice is to get the interior truly clean and leave the shiny dressings for another day.
7. Don’t forget to clean the trunk and the hood.
Every body shop washes the outside of the car and makes an attempt to clean and vacuum the interior, but the best shops also detail the trunk and under the hood. Your customers may not open the trunk or the hood during delivery, so open it for them and show off what a great job you did. Just as you’d hoped, they’ll be much more at ease with your repair work.
Vacuum the trunk mat, dust the inner quarters and rubber dress the spare tire if they can see it. And don’t forget the underside of the deck lid and the weather-strip around the drip rails.
All the flying dust during repair coats the engine compartment thoroughly. Wash it off. These days, it’s very difficult to get water into any electric components where it doesn’t belong. Largely gone are the days when the distributor cap had to be plastic bagged before hosing down the engine. If you’re using a 1,000 PSI pressure washer, you need to exercise more care. But if you’re using a regular water hose, spray away! And don’t forget the area behind the grill and above the firewall.
8. Add those special touches.
Added touches like re-setting the radio stations, clock and memory seat make a good impression, but they may not be appreciated by the customer unless you point them out. The absolute best way I’ve ever heard of to get credit for a thorough detailing is to leave a completed checklist inside the clean car.
A good checklist serves two purposes: The detail technician knows what to do, and the customer knows what he did. List everything done to the car, and provide a box for the tech to check off completion. Leave the completed list on the seat or, better yet, go over it with the customer as you re-sell the job on delivery. Where your checklist says, “Top off windshield washer solvent” or “Bring spare tire to 40 PSI,” open the car and show your customer that you’ve done it. They’ll think that anyone who took that much care cleaning their car surely did a quality repair. (And that’s just the message you’re after. Plus, it can increase your CSI numbers a bunch!)
9. Perform a final inspection.
Have a supervisor (maybe you) check the car over before the customer sees it. Peeling the big hunk of masking tape off the tailpipe while the customer watches doesn’t give him much confidence in your repair.
10. Deliver the car to its owner.
A good delivery is a chance to re-sell the job to your customers. Point out the careful color match and the superb panel fit, along with the sparkling clean engine, interior and trunk. And be sure to deliver the car in the best setting. Move the clean car around until the customers can see the results of your work in the best light. They’ll drive away delighted that they let your shop fix their car. And guess what? They’ll tell (and show) their friends!
|
Getting Your Detail Department Started It’s also important to spend enough money on tools, materials, training and especially wages to get a great job fast. I know several shop owners who pay their detailer a per car bonus in addition to his salary. In most shops, putting the body and paint technicians on some kind of commission makes for more production. Offering the detailer some training and incentives works wonders, too.
Tips for Creating an Efficient Detailing Stall In these ideal stalls would be plenty of big buckets to hold the soapy sponges and wash mitts, several artificial chamois, piles of Turkish towels to dry the car and a rolling cart with all the stuff necessary to produce a showroom shine in minimum time. |
Writer Mark Clark, owner of Professional PBE Systems in Waterloo, Iowa, is a well-known industry speaker and consultant. He’s been a contributing editor to BodyShop Business since 1988.
Special thanks to Martin’s Collision Center ltd. in Copley, Ohio, for letting us invade the shop to take detailing photos.


