When we ponder the liability of the shop in general, we don’t typically consider the paint shop. Proper repair procedures come to mind governing the repair process with body techs, and for good reason — we’ve learned that the liability rests with the shop (and technician), regardless of whether the insurance company denied our supplement or not. Thus far, it appears insurers hold zero liability, and perhaps that’s as it should be, as we’re the ones doing the repairs. While the question of who shares the liability of a repair isn’t the focus of this article, I would submit that there is no excuse that ever justifies not doing the repair safely and properly.
Furthermore, there is indeed liability associated with paint. First and foremost, there is the liability that could land you in court as a defendant — for example, too thick of a film-build over a sensor.
We’re all familiar with ALLDATA, OEM1Stop and the various OEM sites dictating proper repair procedures. Contained within those repair procedures are often details regarding mil thickness limitations over sensors — both extruded and hidden — that must be observed for the sensor to function properly.
Sensory Overload
When many of us old guys learned to drive, we were taught the acronym S.M.O.G. — Signal, Mirror, (look) Over the shoulder, Go. We relied on mirrors, eyes on the road, attention to detail and defensive driving habits to avoid accidents.
With today’s ADAS technology, distracted driving would appear to be less of an issue, as sensors alert us to objects invading our space (or when we invade others’ space). When a sensor fails to alert us as designed in a timely fashion, resulting in a collision, we can be reasonably certain the lawyers will get involved. Can we prove we did not exceed paint film thickness limitations as directed by the OEM? We can if we have a plastic mil gauge and are armed with the manufacturer requirements.
Recalibration following a repair may not even be possible in some cases if there is excessive film-build, commonly caused by multiple refinish attempts to “match” a color. I find it incredible how many shops do not have a mil gauge that reads all substrates. It’s a bit expensive for painters to buy one themselves, though it should be a shop tool.
The Other Liability
On the flip side of the liability coin is paint consumption resulting from redos. This is also a financial liability but one that will not likely bankrupt a shop — although it may feel like it.
What is the cost of a redo, and what are the causes and preventions? We’ll break this down and address the first question: What is the cost of a redo?
We need a couple pieces of information — the average dollars of a repair order (RO) and the amount of redos in a month. Next, we’ll make a few presumptions: First, the redo is paint-only, and second, we’ll use the industry sales targets Mike Anderson taught us:
- 30% body labor
- 20% paint labor
- 10% paint sales
- 35% parts
- 5% sublet
We’ll also use the target factor of 7% paint and material cost (5% liquid, 2% associated products). Additionally, we’ll factor in the revenue we lose by having the “same-old-job” in the booth rather than a new, paying job. Lastly, you can calculate in an “aggravation factor” if you like because a redo will almost always negatively affect the painter’s attitude, rhythm and efficiency, possibly impacting the entire shop.
One redo a week multiplied by a $2,500 average RO equals $10,000 a month. Now hold on — we’re just establishing a baseline: $10,000 a month. From that number, we’ll take 20% refinish labor and 10% paint sales and add to that 7% materials cost. These percentages are derived from the baseline number and look like this:
- $2,000 paint labor
- $1,000 paint sales
- $700 materials
Thus, we come to a total of $3,700, plus the lost revenue opportunity of the $10,000 worth of ROs that didn’t get painted, resulting in $13,700 … in a month. You can extrapolate that over the course of a year for yourself. Perhaps you add 10% or so more into the mix due to the aggravation and interruptions redos cause the entire operation and how they negatively affect cycle time.
Obviously this isn’t perfect and is for demonstration purposes only; you can plug your actual numbers into the formula to see what redos cost your shop. You can claim to further tweak the number down by “only using half as much paint the second time around.” Okay, but let’s not lose sight of the fact that there is nothing faster or more profitable than painting the car once.
Now we’ll examine some common causes and cures for the dreaded redo. After monitoring a two-painter shop for seven months, we found the following: 66 redos — 21 caused by bad color, 19 by scratches or burns after paint, 10 by bad bodywork, eight by lack of communication (missed damage), six by poor prep and two by the wrong part. Keep in mind that this is empirical, but it does give us some points to discuss and clearly demonstrates that most redos are self-inflicted wounds.
Color
If the color is wrong, then we’re likely repainting the job in its entirety. The question we must ask is, “Why did we paint the vehicle with a color that doesn’t match?” I cannot think of an answer that isn’t rubbish. Still, let us examine the procedures that got us to choosing the formula, mixing the color, deciding the color was good and painting. Perhaps there is something we could have done differently:
- What year is the vehicle? Did we pick a formula with the same vintage?
- Did we do a camera shot to guide us?
- Did we choose the formula based on a chip from our color documents?
- Did we have a spray-out in our personal color library? You’re saving the efforts of creating spray-outs, aren’t you?
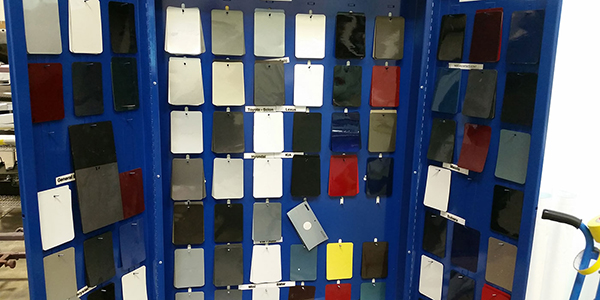
A spray-out card sprayed by the painter with their equipment will always be the most accurate representation of the formula.
You’re making spray-outs, aren’t you? My money will always be on the personal color library the painter has created himself, but in the absence of that, let us not haphazardly pick the first formula we come across.
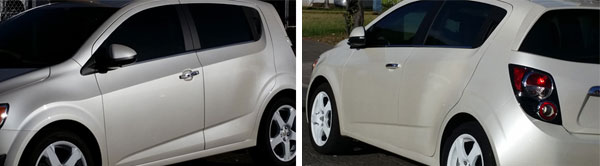
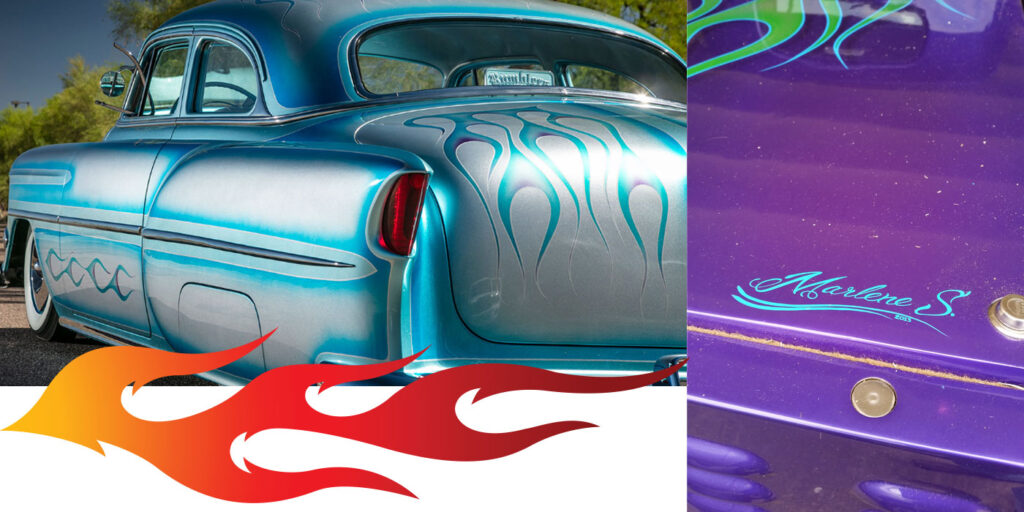
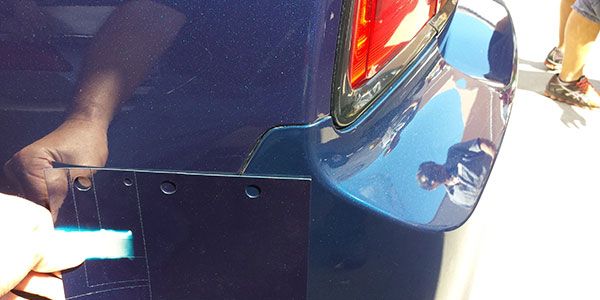
Here we see a pearl flop from light to dark on the rear door depending on the angle — which illustrates the importance of Checking all angles for color match.
Presuming we’ve chosen a formula with intelligence, did we:
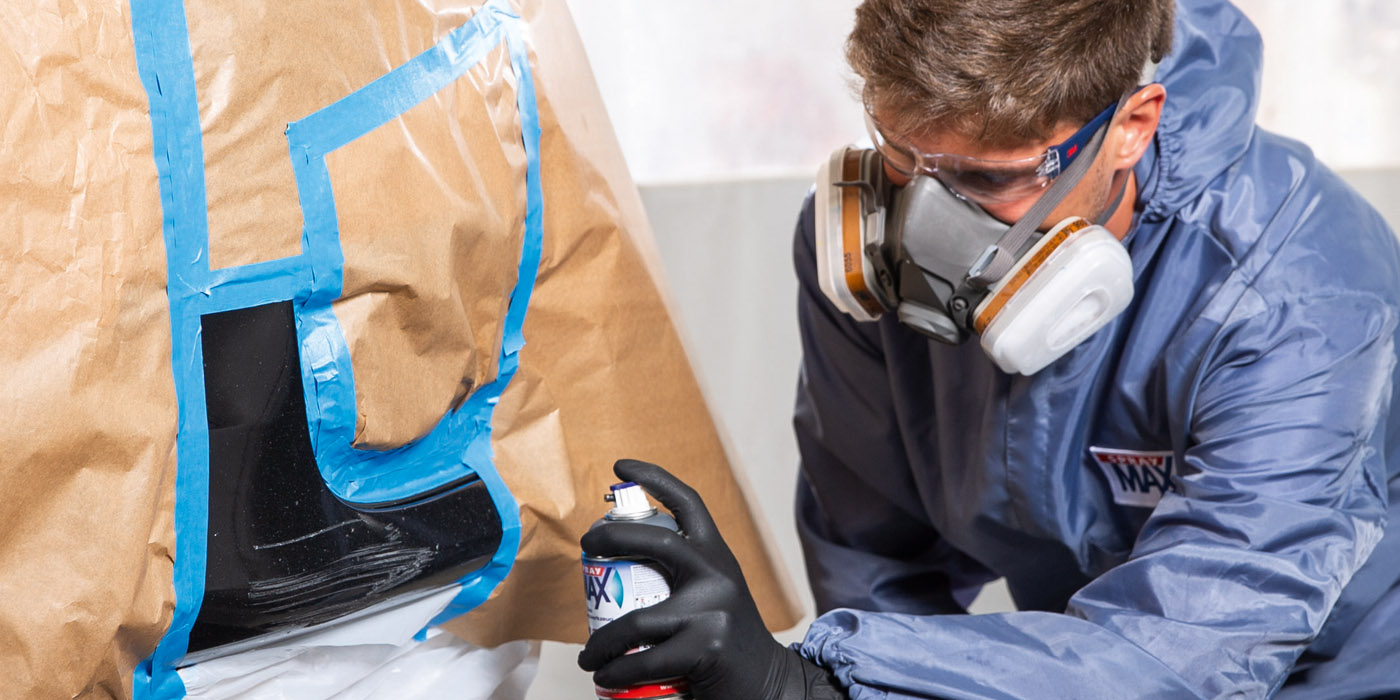
- Make a spray-out of the color? Even if you already have a spray-out, make a new one to ascertain the match because sometimes formulas change. Also, always make a card while finally painting the car and check the color. More than one transparent job could have been avoided with another coat of color — which the spray-out card reveals.
- Apply clear to the spray-out prior to checking color? This is critical for butt-matches.
- Check the spray-out in the blend zone, the appropriate position on the vehicle? Do not check color on the hood when you’re replacing a bumper — check the fenders/quarters.
- Check all angles?
- Get another set of eyes to confirm?
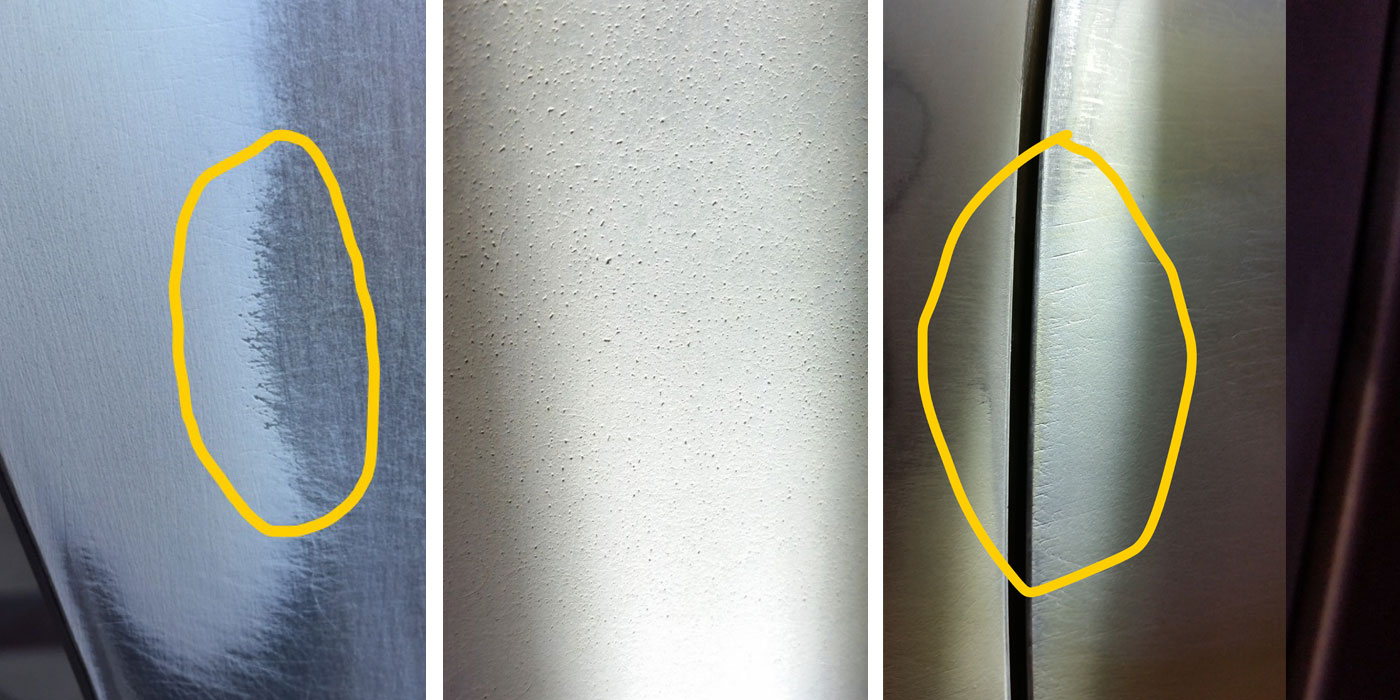
After the customer called to say the paint doesn’t match, I asked to see the spray-out that was made. It was apparent that the shop did not get enough color on the new part — and did not know it because they failed to make an additional spray-out while actually spraying the bumper. The bumper color is transparent, and here you’re seeing the light gray sealer through the color.
As often as not, there will be multiple “colors” on different panels — sometimes from the factory, sometimes due to a previous repair. When replacing a bumper cover, check both sides of the vehicle. Check the color where it matters — sometimes there are multiple areas that matter!
The punchline is: Verify that the color matches before painting the entire job! I have an acronym for this: T.O.M.L., or Take One More Look. I assure you, this alone saves time and dollars. Take one more look after prepping, after sealing, after applying color and finally after clearing. The best and easiest time to correct any preparation or application deficiency is now. This is particularly true when assessing a color match.
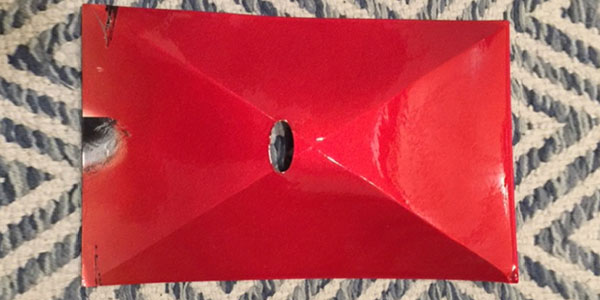
Take a properly sprayed and cleared spray-out card and crease/fold it diagonally from corner to corner, leaving a slight bend in the creases. This illustrates perfectly to the customer how a color can “change” due to differing angles.
At this juncture, let’s talk about the estimator’s responsibility and setting proper customer expectations. It’s the duty of the estimator to point out preexisting deficiencies and mismatches to the customer. This is a time to upsell and, at the very least, to document. Additionally, when replacing/painting a bumper cover only, the use of a diamond card is helpful to illustrate how a color will shift due to differing angles. Demonstrate this up front and a slight, acceptable mismatch is easier for the customer to live with. Attempt this same education during delivery of the vehicle, and it sounds like excuse making — and often results in an unnecessary repaint.
Okay, we have a color we like. Why doesn’t the painted outcome match when our spray-out card did? I believe the most common reason is a lack of consistency of application or lack of coverage. This is particularly evident with a butt-match.
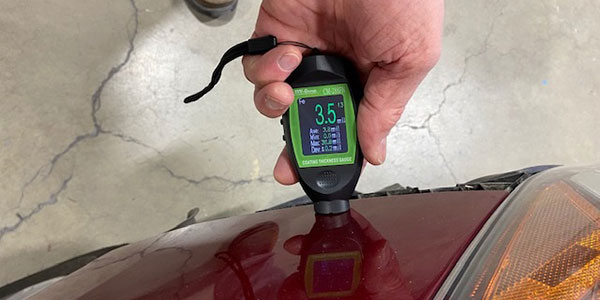
It’s not uncommon to see the fender edge at the bumper be thinner than elsewhere on the fender. Here we see over half a mil difference; think this won’t affect color match if we fail to match the color where it counts?
Often from the factory, the film build on a fender is thinner at the bumper edge than at the hood edge. You think that doesn’t affect color match? Again, where are we checking the spray-out card?
Another cause of inconsistent application is gun attitude. When we paint a fender off the vehicle on a stand at chest height and then blend the door on the vehicle at waist height, you can bet the gun distance from the panel is different. Particularly when painting parts off the car, you must pay attention to gun distance, speed and overlap. It’s amazing how making a short video of the painter while painting can reveal application inconsistencies. It may not matter on solid colors, but it certainly does on metallics.
Carelessness
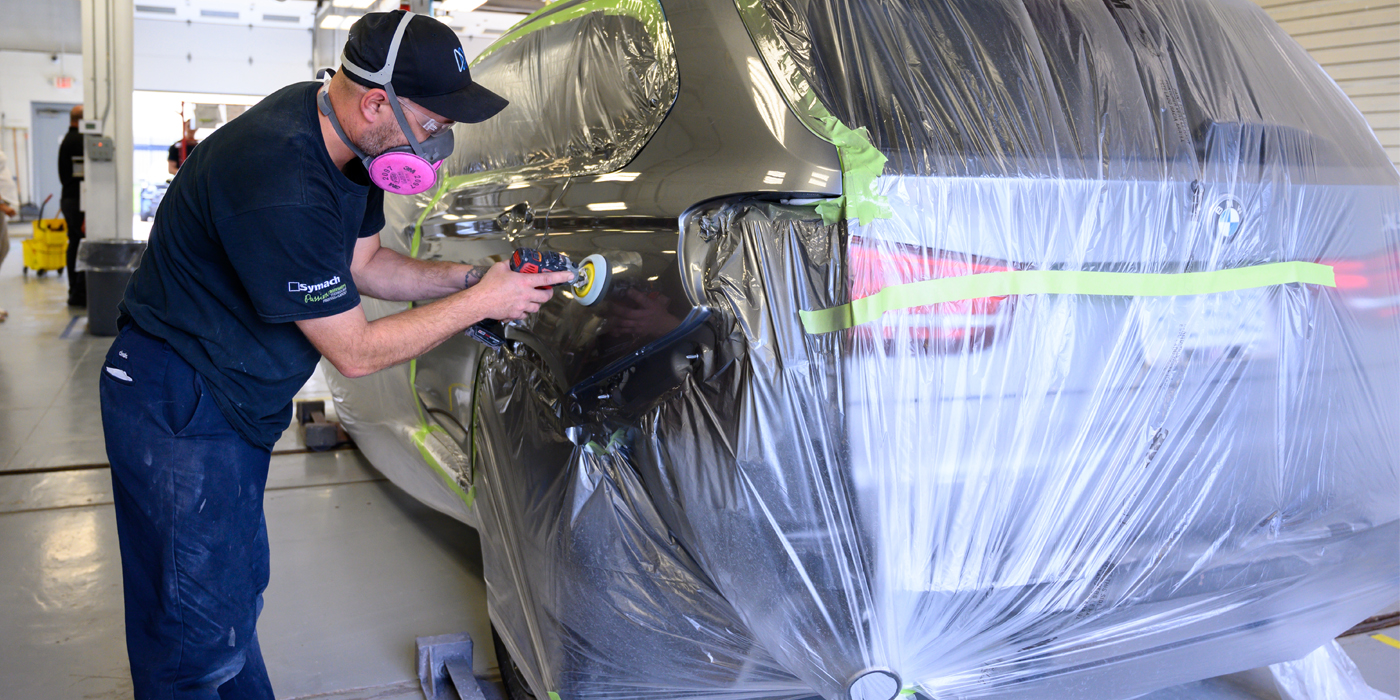
The next most offending causes of redos from our list are scratches and burns. Both are post-paint and possibly not at the painter’s hand. We may be able to say “burns” are the painter’s problem, but it depends on who’s doing the buffing. Where are the burns? Are they the result of runs or inexperience with the tool? Is the painter doing his own buffing, or is it a kid off the street? Or, is it a detailing professional? The cause of burns needs to be investigated.
As far as scratches are concerned, are they assembly casualties or lot damage? This is another repaint cause that will have to be examined more closely to pinpoint the culprit. Regardless, in both cases, we can be fairly certain that carelessness is the underlying cause.
Summary
It is probable that greater attention to detail will lend itself towards a good and proper repair, reducing the likelihood of a redo and the liabilities associated with it.