From the owners, managers, technicians and even the detailer, I make it a conscious effort to learn something every day.
Recently, I was in a shop speaking with the owner. The parts delivery driver interrupted our conversation, so I politely stood aside and waited for them to conclude their interaction. After the parts representative left with the returns, I had to ask the owner more about the exchange of OEM bumper covers I had just witnessed. Randy went on to explain that they had ordered a brand-new OEM bumper cover and it was delivered with gouges and a tear on the front fascia.
Not thinking much of it, I asked how bad the gouges were on the bumper.
“Well, not that bad,” he said. “A couple of them are pretty deep, one going through the bumper completely, but the rest were OK. I paid for a new bumper, and I want a new bumper for my customer’s vehicle. I should be able to deliver it to prep without having to mess around with it.”
Fair enough. As a shop owner, you should get what you pay for and you should get an undamaged part, especially from an OEM parts supplier.
But, Randy’s next statement set my hair on end.
“We’ve been waiting for that bumper for a week now.”
Sometimes, we all just get caught up in the day-to-day operations and miss the big picture. The big picture is that Randy killed his cycle time and dramatically increased the rental days on this repair.
Which leads me to this month’s topic on plastic repairs. Between materials and a couple of hours of labor, Randy’s techs could have repaired the original bumper cover and delivered the car a week earlier.
Why Repair?
Plastic repair is all about productivity, shop efficiency and profitability. But it won’t be profitable to perform plastic repairs on all items that come through your shop, especially when the cost of the part is less than the labor involved in the repair. However, there will be times when it will make sound business sense to repair a bumper, headlamp mounting tab and other items.
Factors that are influencing a shop to perform plastic repairs include:
- Shrinking replacement parts margins
- Increasing your labor hours
- Outside parties and customers looking to reduce repair costs
- Focusing on reduction of cycle times and length of rentals
- Retaining OEM parts for correct fit and improved color matching
Training
More and more shops are repairing plastics today. Success usually follows for those who take the time to learn the correct methods to do it. And there’s plenty of training out there for newcomers in this area of collision repair. As with any technology your shop is looking to employ, you need to adequately train your technicians.
I recommend when you’re first dipping your toes into the plastic repair waters that you work with one plastic repair manufacturer’s product line first. Get familiar with their product lines and become competent in completing high-quality plastic repairs. Once you have one manufacturer’s system in place, you can experiment with other products and determine the best products for your shop long-term. The key is developing your technicians’ skill sets to allow for high-quality and repeatable plastic repairs. Switching between repair material product lines at first is going to prolong this goal.
Both plastic welder manufacturers and the companies providing the repair materials have training available for your shop. It’s suggested that you work with your sales representatives to take advantage of this training. Leaving your technicians to learn a new technology without proper training and instruction will produce suboptimal results immediately.
Plastics, Tools and Repair Materials
There are a great number of different plastics being used in vehicles today. Each plastic part should come with a mark that allows you to quickly identify the plastic composition. With a focus on recycling, you may even see different blends of plastics being used in identical parts coming directly from the OEMs. In other words, two identical bumper covers from the same OEM may have different plastic blends. It’s important to properly identify the plastic being repaired and select the proper materials to repair that part. Plastic identification guides are available from both plastic welder and repair material manufacturers.
After you identify the plastic type, you need to understand the repair materials and methods to be used in the repair process. Most shops either use urethanes or two-part epoxies in the plastic repair process. A factor in deciding correct repair materials is knowing the amount of time you need to work with the product and the plastic type you’re repairing. Select the repair materials that meet those needs. If you need 10 minutes to work the materials, choose a 15-minute product and not the two-hour product.
Nitrogen Welders
Yesterday’s hot air plastic welders have made way for the next generation of welders: nitrogen plastic welders. Nitrogen plastic welders use hot nitrogen as a welding medium, much like shielding gases used when welding steel or aluminum with a MIG welder, to prevent the plastic from oxidizing during the welding process. Industry experts will tell you that you get a stronger and more durable repair using nitrogen plastic welders.
Nitrogen welders are manufactured to be used with an external nitrogen tank or equipped with a nitrogen generator. Carefully consider the cost differences between choosing your nitrogen plastic welders as it takes quite a bit of nitrogen purchases to make up for the cost difference between the nitrogen-generating version and the type that uses an external nitrogen tank. Also, consider just how critical the nitrogen plastic welder is to your daily operations. If your production processes will come to a halt when you run out of nitrogen, then consider a nitrogen-generating plastic welder for your facility.
Something else to consider when purchasing a nitrogen-generating plastic welder is your air supply. Nitrogen generators are made with membranes that trap the nitrogen and separate it from other particles. Unfortunately, if you provide humid air with oil particles, this will not bode well for your nitrogen-generating plastic welder. The rule of thumb is that you should have dry, clean air in your shop. If this isn’t the case for your facility, stick with the external nitrogen tank version.
Another tool for plastic repairs involves using heated “stakes” or “staples” and pressing them directly into the plastic. After pressing the stakes directly into the plastic, you allow them to cool and then remove the ends. These tools are handy when you have parts that have large tears. You can quickly stitch a part together and get onto the cosmetic repair and refinishing on the front side of the bumper.
Best Practices
It’s always best to clean any part with soap and water. Make sure to dry the part completely before starting repairs. Follow the manufacturer recommendations for using any plastic cleaner products after the initial soap and water cleaning.
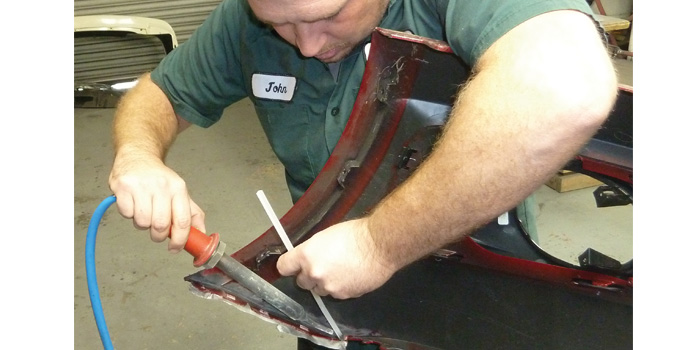
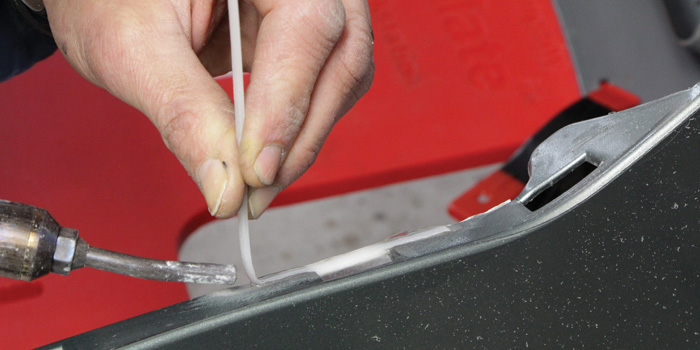
On your damaged bumpers, you’ll want to work out any deformations in the plastic. Using a heat gun and working the product will allow you to get the part close to its original shape. This process takes some patience, as you need to keep the heat gun moving as you’re heating the part. Make sure to get your stretched plastic back into place. You can use the blunt side of a screwdriver or the end of a utility knife to push it back into place. Use a DA sander to reveal any remaining low-spot areas of the bumper by removing most of the paint. Continue to shape the heated plastic until you work out all of the deformations. Sand again to reveal any remaining low areas, and repeat the process until you’re satisfied that the bumper has been returned to its original shape.
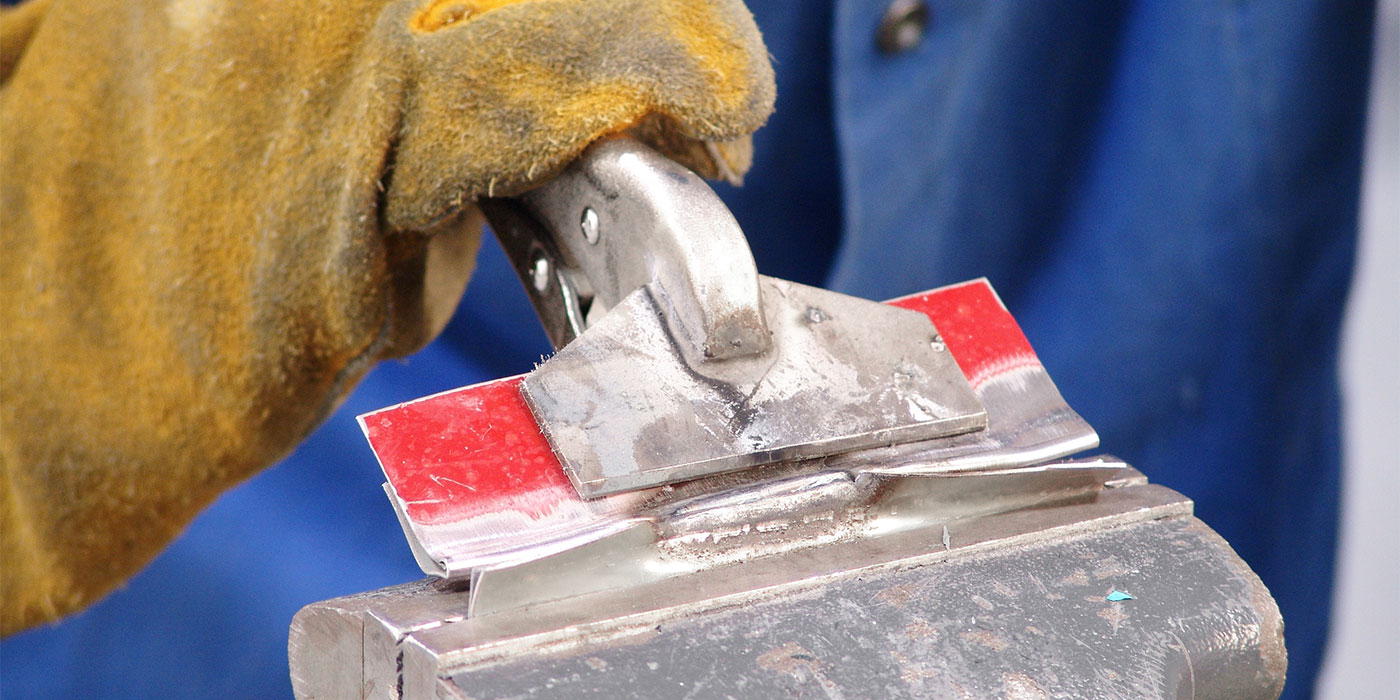
In the cases where plastic welding fits the bill, you’ll want to prep the panel with plastic cleaner and follow the welding manufacturer’s recommendations for welding plastic. Remember, the goal is always to create a strong bond between plastic pieces using the plastic welding rod. Make sure to adequately penetrate the surfaces of the plastic through to the backside of the surface. In the case of welding the backside of parts with front side cosmetic surfaces, using thick aluminum tape on the cosmetic side of the part will keep the shape and profile of the part in place. This will also prevent the weld materials from pushing through the weld. Complete the welding process per manufacturer recommendations.
There are times when stitching the plastic bumper or other broken plastic pieces back together will make the most sense. Again, clean the parts with soap and water. Allow to completely dry before beginning the work. Select the correct “staple” for the job. There are several shapes that can be used to accomplish different repairs. Place the staple into the device head, position the staple on top of the plastic piece and apply current to the staple. You’ll begin to see the staple melt into the plastic. At halfway through the plastic, remove the current from the staple and allow several seconds before removing the staple from the device head. Once you have successfully added enough staples to the plastic to accomplish a strong repair, you can begin removing the staple heads and grinding the plastic down to a smooth surface. Perform cosmetic repairs as necessary to complete the repair.
Examples
For examples of plastic welding, visit www.youtube.com and search for “nitrogen plastic welding.” If you’re using a particular product or welder, add that company’s name to your search to bring up any training videos posted by the company. These videos really give you some great strategies to use when tackling some of the common problems associated with plastic repairs.
Contributors to this article include David Barleen – president, Motor Guard Corporation; Kurt Lammon – president, Urethane Supply Company; Timothy Morgan – managing director, Spanesi-Americas; Carl Seaboldt – senior product marketing manager, Evercoat; and Randy Schneider – marketing director, Rubber Seal/Medallion Refinish Systems.