 “/>
“/>
 Technological advancements change the way we work on cars constantly. Today, almost all insurance companies require some sort of photography from the shop’s estimator or their own adjuster to document the damage that will be covered by the driver’s insurance policy. Therefore, it’s important to train your estimators to take the best pictures possible. As Fred R. Barnard wrote in 1927, “A picture is worth a thousand words.”
Three Parts
The process of taking a good photo can be broken down into three main parts. First, an understanding of a camera’s features, which allows the user to correctly frame the shot so he or she can take the best picture. Second, natural or synthetic lighting, which needs to be positioned correctly to reduce glare and reflections. Third, insurance company requirements. Each insurer has different requirements for photos, so the estimator needs to understand how to upload and e-mail them.
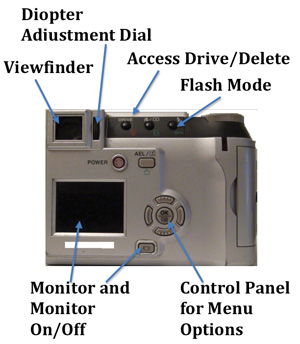
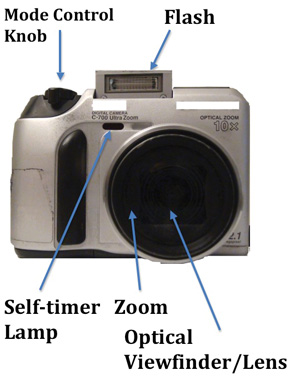
Almost all digital cameras have the same features and parts, and the manufacturers of these cameras generally use the same terms for them. In this article, I will use the terminology from the diagrams on this page for consistency and accuracy.
Framing
Framing is the act of positioning the damage the estimator is trying to document within the view of the
camera lens.
Focus and exposure are the two automatic features that tend to give estimators the most trouble. Adjusting the focus changes the way light converges on an object in the image, which makes it more or less clear. Adjusting the exposure changes the aperture, which is literally a small hole that exposes the image sensor to light reflected off an object.
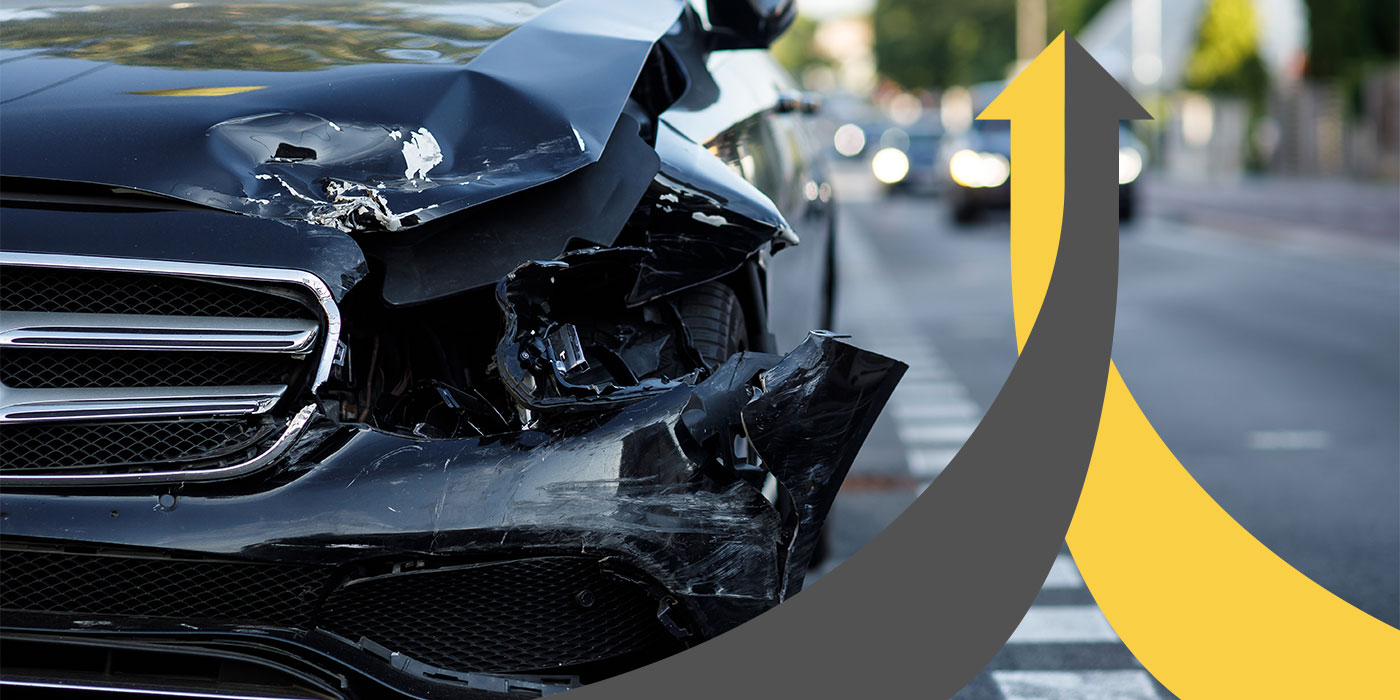
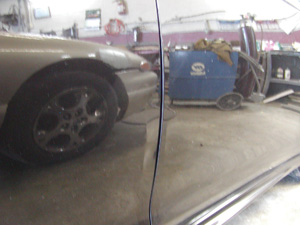
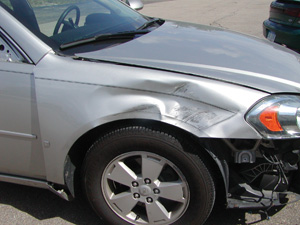
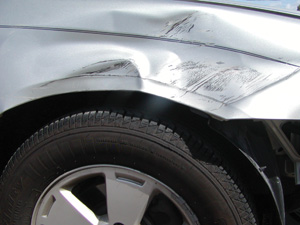
Always take at least two pictures of each damaged area on the vehicle. The first photo should capture the damaged panel(s) and at least one undamaged, adjacent panel to show the context of the accident (Photo 4). The second photo should be a close-up that details the damage (Photo 5).
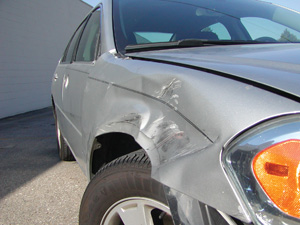
Try to have the camera level with the damage, but not aimed straight at it (Photo 6). If the photographer looks straight at it, the panel will likely reflect his or her image.
Always try to have the damage take up the entire photo so that the automatic focus and exposure features adjust to the damaged area specifically. By introducing multiple layers of depth, the camera’s automatic focus will simply choose one.
When documenting a damaged vehicle, there isn’t normally a lot of physical depth the camera needs to adjust to, except when you’re dealing with backgrounds that are reflected off the shiny, damaged panel. When this happens, it means that there was more light cast onto the objects behind the camera, which made the camera adjust its exposure and focus to detail the objects in the reflection rather than the damaged panel itself.
Lighting
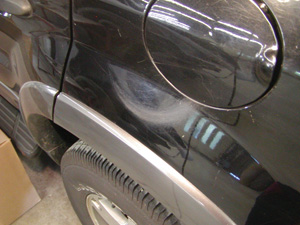
Photos 1 and 7 show what can happen when there are multiple layers of depth and the camera is allowed to choose for itself which layer to focus on. The camera tried its best to focus on the reflection, so the aperture increased in size to compensate for the small amount of light being cast onto the objects in the reflected background.
Notice the bright white toward the bottom right of Photo 1. There was a significant amount of light being cast onto the damaged panel and the floor, but since the camera decided it wanted to focus on the reflected background, it increased the aperture size to “brighten” it. This allowed too much light to be accepted from the floor, creating the white cloud seen in the corner of the image.
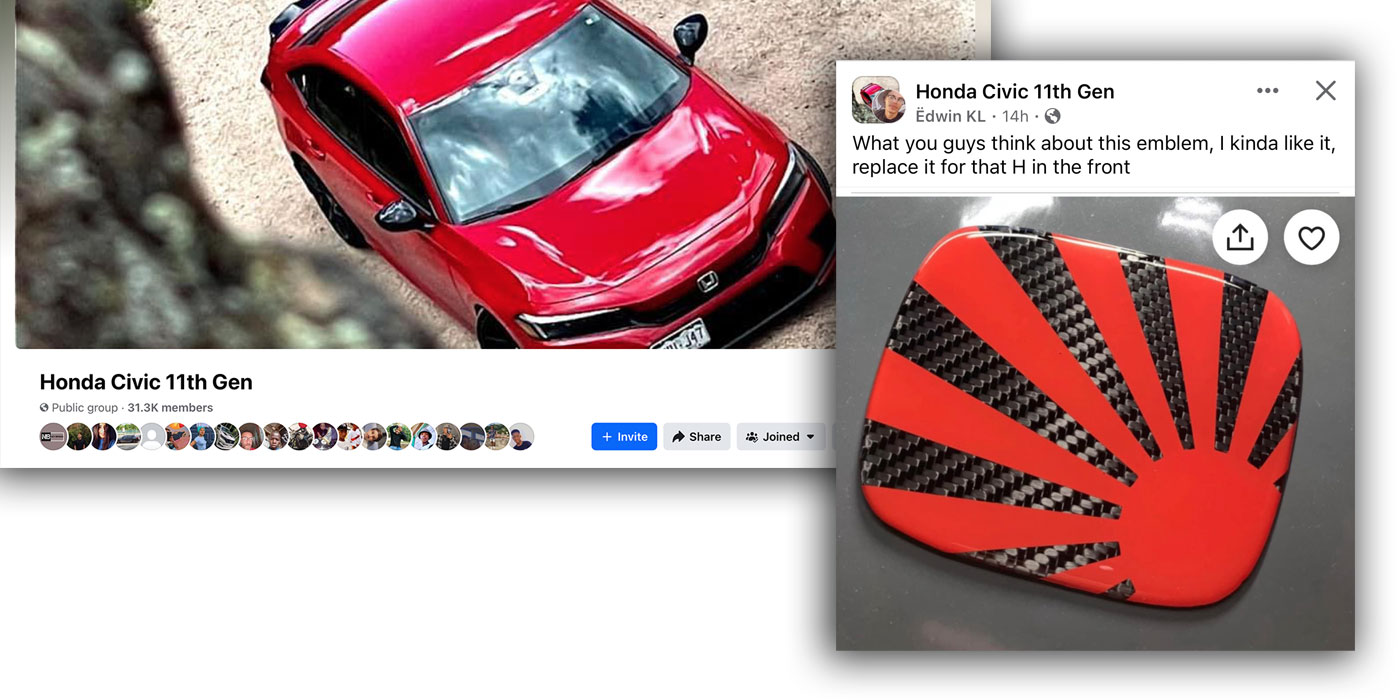
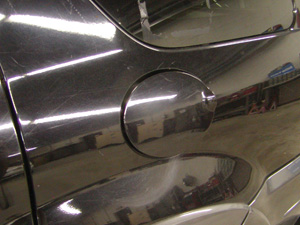
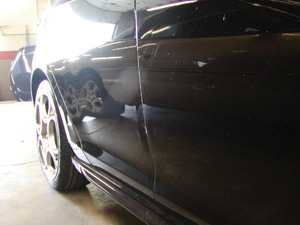
Photos 2 and 3 show damage from the fuel cap rubbing the quarter panel. It’s difficult to see the damage in Photo 2 because the camera tried to focus on the reflected background. By shutting off a few of the lights that brightened the objects in the reflected background and pointing a small work light directly at the damage, the automatic focus and exposure features adjusted to the damage specifically.
Eliminating Glare
By following a few simple rules, any estimator can eliminate glares or reflections from photos. Always try to keep the light source behind and above the camera at a 45-degree angle. Doing this allows a significant amount of light to shine on the area, reducing the chance that the damaged panel will reflect the light source and that a back-light (a light source behind the damaged area that’s in view of the camera lens) will cause glare or cause the aperture to adjust.
Insurance Requirements
Regardless of which insurance company you’re dealing with, it’s important to understand the different file formats they require for
their photos.
In general, insurers want their photos as JPEGs. A JPEG is a file format that doesn’t require much image compression, which helps maintain the quality of the original image. A digital camera snaps the picture and immediately compresses it into the JPEG file format. Compression is important because an 8-megabyte (MB) flash card can hold 15 or more high-quality JPEGs but only one uncompressed TIFF photo.
The JPEG files normally have a 1600×1200 resolution quality and can be opened with any image viewing software. They can be stretched (enlarged) without changing the resolution, which maintains the quality of the image. JPEGs are also useful because they can be attached to an e-mail due to their relatively small size.
Another format insurers want their photos submitted in is a Portable Document Format (PDF). A PDF can’t be edited or changed, but nevertheless is important to large insurers because it can be opened by any PDF reader, which comes standard on most computers.
Most multi-purpose printers come with software that can convert any file into a PDF. Also, there are many free programs on the Internet that allow for file conversion to PDF. To use these programs, import all of the photos onto the computer in JPEG format. Then, print the images using image viewing software on the computer. In the print menu, there should be options to use different printers. Click the drop-down menu that lists the different printers and look for a PDF “printer.” Printing through the PDF printer converts the file into a PDF, which can then be attached to an e-mail.
Other Tips
Use the viewfinder instead of the monitor to take pictures. The diopter meter can be adjusted to help those with glasses to see the image clearly. Since it only adjusts the image the photographer sees through the viewfinder, the actual photograph won’t be affected.
Use photos to document the placement of decals, logos and side body-panel moldings.
Dark-colored cars will almost always reflect the background, so it’s important to use a dry erase marker to help highlight the damage. Draw arrows or use circles to guide the insurance company to the damage.
It will be hard to eliminate all reflections in body panels because vehicles have a lot of different angles to reflect light.
Although you may not shoot the ideal picture on the first try, a little patience and a little planning will result in better photos to document your damage.
Joey Struhar, Jr., helps manage work flow at his father’s body shop, Lucky’s Collision in Farmington Hills, Mich., which has been around for 40 years. He holds a degree from Eastern Michigan University and is constantly studying different industries for a better understanding of technical communication, specifically in the auto industry. He can be reached at [email protected].