With the advent of blending techniques over the past 15 years, a perfect paint match isn’t always necessary. However, you will occasionally have a need to paint a panel, such as a bumper fascia, spoiler or air deflector, without blending. When those times arise, having the ability to match a color is a very valuable asset.
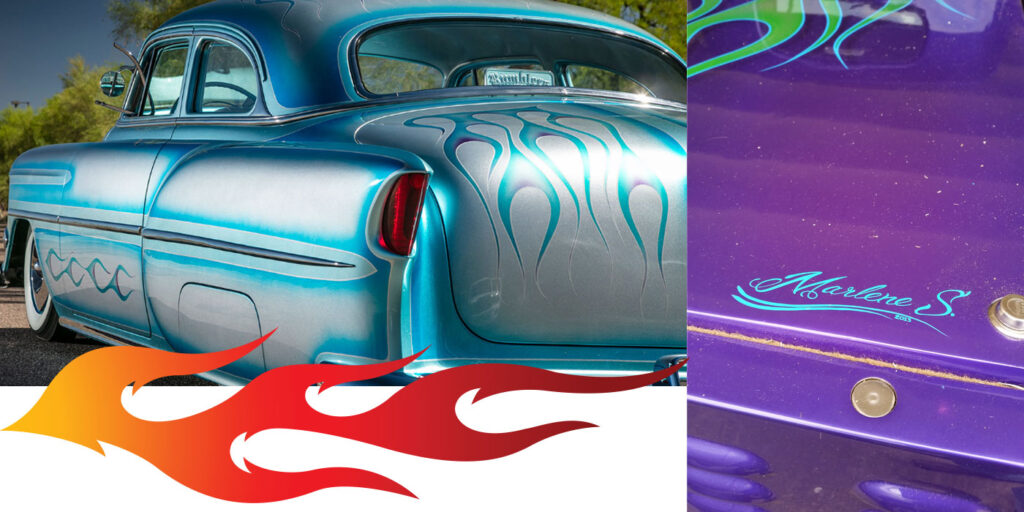
More than likely, you’ve come across vehicles built at the same plant with the same paint code that didn’t match each other or the color chip standard – usually metallic or pearl colors. This is typically caused by the constant agitation of the paint at the factory. The constant motion causes the metallic and pearl flakes to collide, causing some to get broken into smaller pieces. And these smaller flakes reflect less light, giving the paint a darker appearance.
Whatever the reason for the differences at the factory level, it’s your job to make sure your paint matches as closely as possible to the actual paint on the vehicle. So, without any further ado, let’s get started.
Use the right paint formula. When evaluating a match, make sure you have the right paint formula. More than one painter has discovered that he’s mixed the wrong formula, and sometimes this is just a case of reading the paint code wrong.
Most paint companies today offer more than one formula for the same paint code. These alternate formulas give you a starting point for mixing the proper color.
Are you trying to match a vehicle that’s faded over time? To find out, polish the adjacent panels to make sure they haven’t faded.
Mix the proper alternate per the paint manufacturer’s recommendations. Did you mix all the paint as directed from the manufacturer? Make sure there’s no metallic or pearl left in the bottom of the can.
Agitate the paint for at least five minutes. This ensures that all the tints have been mixed properly.
Choose the right reducer for the air temperature and application. When spraying a metallic color, a slower-drying reducer will create a darker-looking finish.
Use the right gun technique. Gun technique also determines if you have a match. If you’re spraying a metallic, the heavier you apply your paint, the darker it will appear. Heavier coats of paint allow the metallic to sink to the bottom, giving the paint a darker appearance. Conversely, if you apply your paint in lighter coats, the paint will appear lighter.
Air pressure and gun nozzle size will give the same result. (Lower pressure = darker; bigger nozzle = darker.) The rule of thumb is that if the coats of paint are heavier, the color will appear darker.
Apply enough color; use a ground coat when needed. A lot of today’s paints are very poor hiders and require a color-keyed ground coat. If you don’t have enough paint on the vehicle, it won’t match.
Evaluate the color in the right light. The last variable to consider before attempting to tint a color is your shop’s lighting. You should evaluate all colors in natural daylight. Many times, a color will appear to match in your shop, but it won’t match in the daylight.
Incandescent lights tend to give off a red cast, and fluorescent lights can give off a yellow or blue cast. Color-corrective lighting, a type of light that mimics daylight, will help ensure that you have the proper cast on the vehicle when trying to evaluate a match.
If necessary, tint to match. When all else fails (you’ve chosen the proper alternate and are using the proper reducer and gun technique), you’ll need to tint a color to create a match.
When tinting your paint, always use tints that are in the original formula. Never use tints outside of the formula unless your paint supplier has told you that it’s compatible. A lot of tints aren’t designed to be used with each other, and some tints cannot be used in metallics. The biggest problem when using tints outside of the original formula is that they tend to cause “metamerism.” This is the term used in the paint industry to describe a finish that changes color, or hue, under different lighting conditions. Although this effect is used in custom painting, it’s not a desirable thing to have when trying to match a factory finish.
Evaluate the three dimensions of color. It’s time to evaluate the differences in the vehicle finish and your paint formula. To do this, you’ll have to evaluate the three dimensions of color: chroma, hue and value. See the box called, “I Don’t Like My People Green” for detailed information on the three dimensions of color and how to adjust them correctly.
Choose the right size metallic flakes. When matching metallic colors, always be sure that the metallic flake is the proper size. You can actually have a paint color match, but it’ll appear differently than the car because of a mis-matched metallic. Coarser metallic makes the paint look darker, while a finer metallic makes the paint look lighter. When choosing an alternate formula, choose the one with the right metallic that matches your vehicle.
Apply the recommended amount of clear. Most clearcoats are two-coat applications. Applying more than the recommended amount of clear will actually cause light to hit the color differently, causing a mismatch. This happens because the clear acts as a prism and breaks down the natural white light to different colors of the spectrum. These different colors of light reflect off the surface of the car differently, causing a less-than-acceptable match.
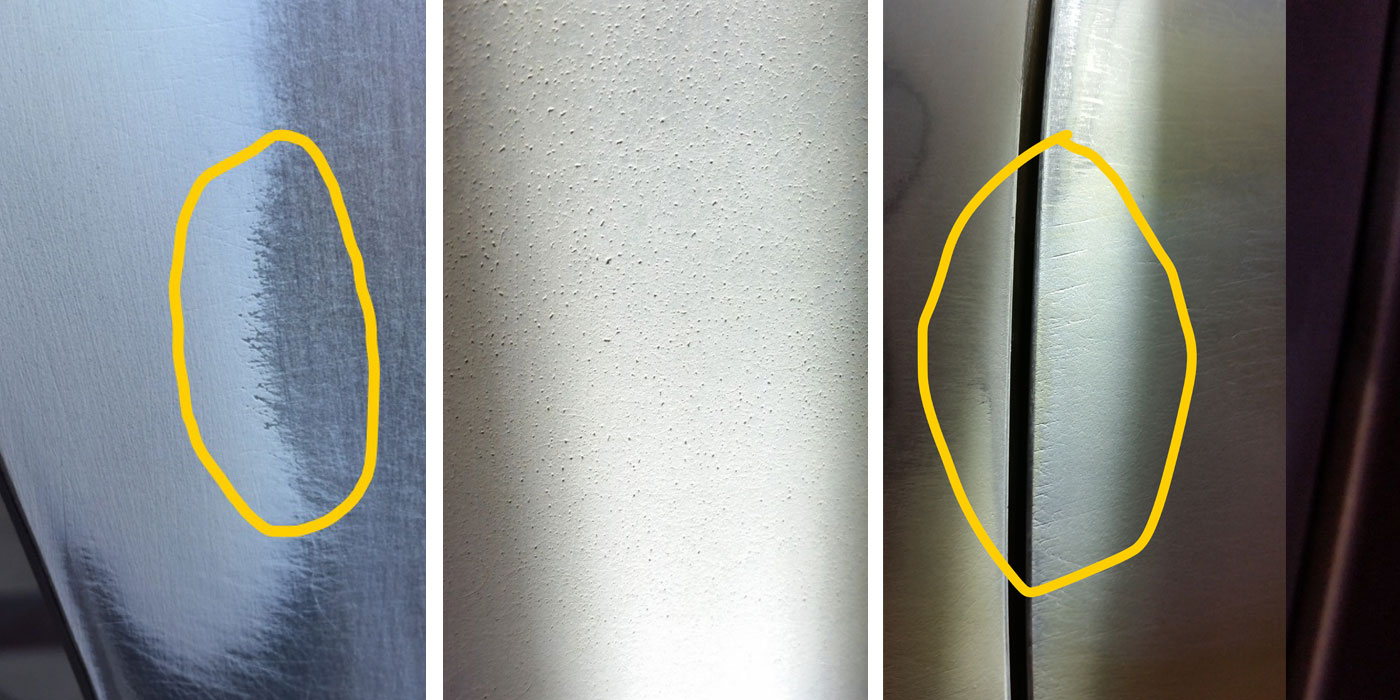
The same thing will happen if the texture of your clear doesn’t match the texture of the vehicle. All painters have that internal desire to make the paint look as smooth as glass. However, the fact is that a very low percentage of factory paint jobs are that smooth. A lot of vehicles come right from the factory with an orange peel surface. So, if you’re painting a vehicle that’s not smooth, make sure your paint isn’t perfectly smooth either.
Make It Match
A few tips to avoid common paint-matching mistakes:
Make sure you have the right paint code. It’s hard to make the wrong formula match. On more than one occasion, I’ve gone in to mix the paint and found that I’d read the paint code wrong. Double check to make sure you have the paint code right.
Confirm the tint numbers. Don’t assume that everyone puts tints back in their proper place. Always confirm the part number of the tint before adding it into the paint. I’ve made the mistake of grabbing the fourth pearl on the shelf, assuming it was the correct one – only to find that it wasn’t.
Mix it right. Be patient when mixing your paint, and be careful not to overpour the tints. It’s impossible to remove a tint once it’s in the can.
Less is better. When tinting, go slowly and evaluate the color shift each time you add a tint. Never add more than one tint at a time.
Take notes. Keep track of the tints you add, and never assume you’ll remember how you achieved a match. I had a vehicle that I needed to tint the formula for. I matched the vehicle, but when the owners had another accident (bad streak of luck), I couldn’t remember how I’d tinted it. I always take notes now.
Live and learn I guess.
But there is a smarter way. If you follow these guidelines, along with my 11-step plan, you don’t have to learn entirely from your own mistakes. Learn from mine and avoid many of the paint-matching mistakes that have cost me both time and money.
Writer Mike Muir manages a dealership shop in North Conway, N.H., and has been with the dealership since 1985. Back then, he had one bay in the back of the service department. Today, his shop is in a separate building from the rest of the dealership and specializes in collision repair – though Muir’s been known to restore classic cars for certain customers. In his spare time, Muir plays electric and acoustic guitar, and writes music.
|
I Don’t Like My People Green
Use your TV to help you understand the three dimensions of color The three dimensions of color – chroma, hue and value – are similar to the three adjustments on your television set – color, tint and darkness. Think of chroma as the color knob, hue as the tint knob and value as the darkness knob. When comparing the paint on the vehicle to the paint in your spray gun, always compare the car to the paint, such as the car is “redder” or “greener” than the paint. Doing it this way will allow you to know what needs to be added to the paint to make it match. Usually, you’ll find that more than one dimension needs to be changed. When this happens, you should always change the most obvious one first. You may decide the car is greener and slightly darker than your paint. Adding green will not only make it greener, but darken it as well. This example illustrates why you should never add two tints in an effort to change more than one dimension at a time. I always adjust hue first, just like on my TV. I don’t like those talk show people to look green or red. The easiest way to determine what has to be added to a paint to make it match is to think of a clock on the wall. Twelve o’clock is yellow, 3 o’clock is red, 6 o’clock is blue and 9 o’clock is green. Colors can only be shifted toward the colors that they’re adjacent to. To make this easier to understand, let’s say you have a yellow can of paint, and it doesn’t match the vehicle. That paint can only be moved toward the 9 o’clock position (green) or the 3 o’clock position (red). If you determine that your paint needs to be redder, then look at the formula and find the tint that has a red cast. If it needs to be greener, add the tint that has a green cast. You cannot make the paint bluer because blue isn’t an adjacent color. If you can’t figure out which way the paint has to go, take a few drops of paint and mix a drop of the first adjacent color. Then take a few drops and mix in a drop of the other adjacent color. This should at least point you in the right direction as to which way to go. One little batch will move closer to the desired color, while the other will move away from it. After you’ve added your first tint, use a spray-out card to compare it to the vehicle. Keep all your spray-out cards as a reference for future paint jobs. Mark the back of the cards with the formula and alternate number, as well as the tint added. You may find that after you add a tint, you’ll need to add a second or third tint to bring the hue to where it needs to be. Patience is the key. Don’t get anxious and add too much tint at once, or you’ll end up having to start over. After I get my hue to where I’m happy The chroma is usually the hardest dimension to change. If your yellow paint isn’t yellow enough and you add more of the yellow tint, it can often change the hue (tint) as well. Value (darkness) is the easiest to change. When there were no metallics and a limited amount of colors in the automotive industry, people would add black to darken and white to lighten. But that doesn’t work today unless there’s a black or white tint in the formula. Don’t use black to adjust the value. Just find the darkest tint in the formula and start with that. Some paint companies offer a chart or booklet that describes all the color movements caused by the tints in their system and if they’re compatible with other tints. These are very useful to help determine which way to go when tinting. |