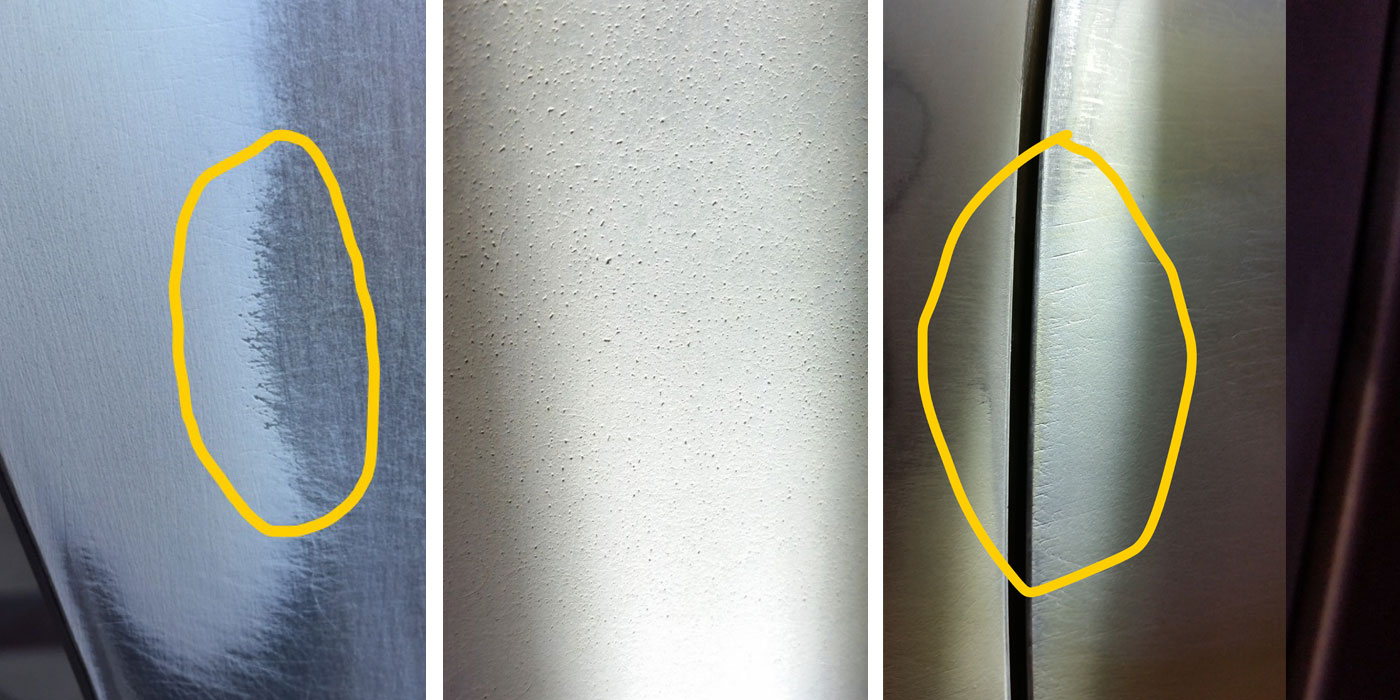
I couldn’t help but notice the rear bumper on the Hyundai I was following the other day. The finish was peeling, which is an all-too-common occurrence these days, and I was reminded of body shops’ need for understanding the proper techniques for applying coatings to flexible parts. I also was reminded of shops’ inconsistent or sometimes nonexistent following of those procedures.
Bill Warner, technical manager for Pro-Spray Automotive Finishes, confirmed my suspicions.
“During our training classes, and from handling calls from our tech line, we’ve noticed a trend showing that many of the recommended procedures are not being completely followed or even followed at all,” said Warner. “It has been somewhat of a surprise that some shop technicians have no idea what the proper procedures are by not only the paint companies but by the auto manufacturers as well. During field visits, we’ve witnessed firsthand the inadequate preparation and improper use of products or a mix of various brands rather than sticking to a system.”
Plastic Evolution
The lion’s share of automotive plastic development, at least on the exterior of vehicles, has been in bumper systems. Many of you might recall the 1969 Pontiac GTO with its “revolutionary” Endura front bumpers, which were famous for taking a sledgehammer on the nose in TV commercials. You might also remember all the mistakes the industry made in its attempt to paint these bumpers. The mere addition of a flex additive wasn’t nearly enough. The fact is that painting bumpers and making the finish stick has been a challenge ever since.
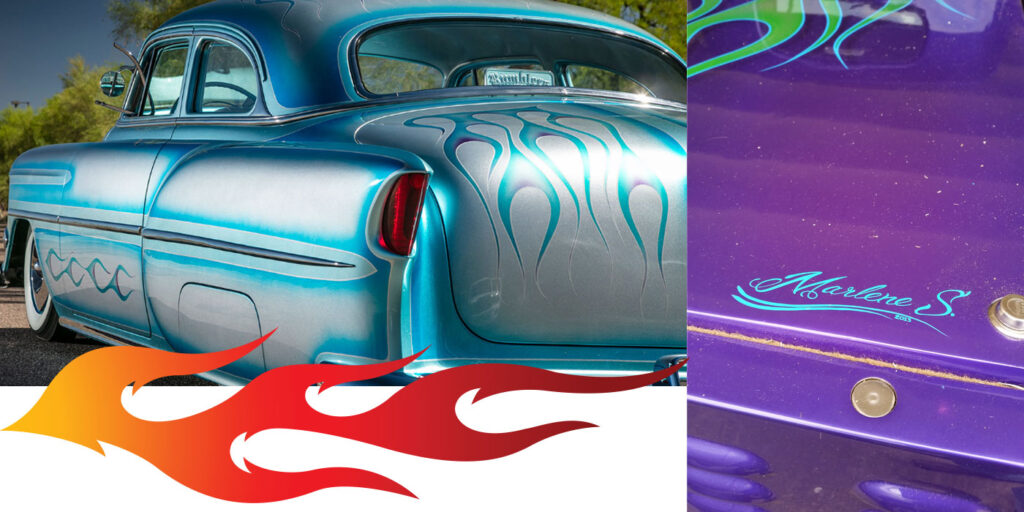
A bumper is the leading edge of a vehicle’s paint finish, which is the primary aesthetic quality of a car. It’s the first thing people see and notice.
Due to its primary role in appearance, the durability and quality of the finish applied to a bumper cover is important to a body shop trying to recreate the pre-loss state and appearance of a customer’s car. It’s for this reason that it’s crucial you make sure your paint jobs aren’t cracking and peeling the way so many do.
Identifying the Substrate
Users of all paint brands must first identify the substrate they’re painting. Raw, unprimed bumper covers are the source of many adhesion problems, as they’re rarely shipped in primer and tend to have residual mold release on them, which will cause your paint to go the way of the wind the moment it’s bumped by a shopping cart.
The most severe impacts to an OE bumper cover won’t cause the color to peel or crack. This is because OE covers aren’t painted, at least not in the way replacement covers are. The colors are molded into the fascia at the manufacturing plant, so they won’t react to impacts in any way like a refinish coating will.
Thermoplastic polyolefin (TPO) is the leading material from which bumper covers are constructed. It’s the “greasy” material from which plastic trash cans and many other outdoor products are made, an alloy of several plastic compounds that often contain other elements such as fiberglass and carbon fiber mixed to reinforce the plastic. Because TPO doesn’t degrade in the sun’s UV rays, it’s the material of choice for roofing, outdoor furniture and construction applications.
Due to its properties, TPO is inherently difficult to get paint to stick to. The problem stems from low surface energy, and that’s one reason bumper cover adhesion problems are notorious in the industry.
At the OE level, there are reportedly methods such as plasma or the application of flame that have been effective in overcoming the adhesion issue by oxidizing the TPO surface and raising its surface energy, or ability to stick.
Adhesion Promoters
Another well established and widely practiced method of eliminating the adhesion problem is through the use of sprayed adhesion promoters.
Adhesion promoters are typically formulated with chlorinated polyolefin (CPO), as well as conductive resins. These conductive resins are particularly important because they provide a continuous conductive surface once the adhesion promoter film has combined with the surface of the unfinished bumper cover.
Adhesion promoters are available as one-part (no mixing with catalyst) waterborne and solvent-based systems. Primer or topcoat is
then applied after the adhesion promoter has been flashed. Adhesion promoters are typically applied to achieve a dry film thickness of .5 mils or less.
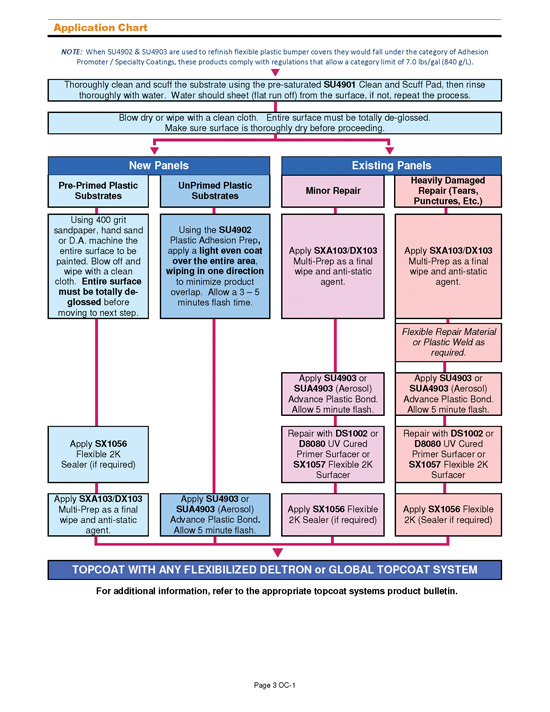
No more excuses for peelers: here are the paint manufacturers’ recommendations for the application of their coatings to flexible parts, primarily bumper fascia.
AKZONOBEL (SIKKENS & WANDA)
Test Methods for Plastics I.D.
The common plastics used in the auto industry can normally be identified by a marking on the back of the part. When this marking cannot be found, there are two tests that work fairly well to help determine whether to use Primer PO or Plastoflex Primer. These tests are as follows:
1. Burn test
2. Float test
Burn Test: Shave off a small sliver of plastic from the back of the part. Ensure that the part is free of paint, mold release agent or any other coating. Hold one end in a tweezers and light the other end of the sliver. If the sliver burns with a black heavy smoke or releases spirals of smoky plastic, it indicates the use of Plastoflex Primer. If the sliver burns clean with no smoke (like that of a candle), it indicates the use of Primer PO. NOTE: Conduct this test in a safe, ventilated environment.
Float Test: Shave off a small sliver of plastic from the back of the part. Ensure that the part is free of paint, mold release agent or any other coating. Submerge the sliver in a glass of water. If the sliver floats, it indicates the use of Primer PO. If the sliver sinks or submerges, it indicates the use of Plastoflex Primer.
Sanding: Prior to Primer PO, abrade the panel or part to be painted with a grey scuffing pad and Sikkens Plastic Fix. Before the application of Plastoflex Primer, sand the panel or part to be primed with #P360 grit paper dry or #P500 to #P600 wet. These parts may also be prepared with a red scuffing pad and Sikkens Plastic Fix.
Flexible Plastics Pretreatment: As the refinishing of flexible plastic parts requires the highest consideration from the technician, it’s necessary to assess the plastic part that is being refinished. Refer to the heading, “Test Methods for Plastics I.D.,” to determine the type of plastic that is to be refinished. The technician should address the situation by using the following guidelines:
OE and Aftermarket Primed Untreated Solvency Test
1. Wash with hot, soapy water
2. Anti-static surface cleaner
3. Stable dissolves to solvent
4. Anti-static
5. Surface cleaner
6. Autoclean
7. Surface cleaner sand, #P400 grit dry or red scuff pad
8. Sand, #P400 grit dry or gray scuff pad with Plastic Fix
Polyolefin Type
1. Gray scuff pad with Plastic Fix
2. Urethane type sand, #P400 grit or red scuff pad with Plastic Fix
3. Anti-static surface cleaner
4. Autoclean surface cleaner
5. Anti-static surface cleaner
6. Colorbuild + Elast-O-Actif
7. Allow to dry out for 20-30 minutes
8. Topcoat + Elast-O-Actif: Extend flash time to 30 minutes at 70°F (20°C)
9. Primer PO or Plastoflex Primer
10. Topcoat + Elast-O-Actif*
*After the application of Plastoflex Primer or Primer PO, if the filling qualities of Colorbuild are required, proceed. Remember, Elast-O-Actif should be added to Colorbuild for flexible parts.
Repairing OE Plastic Parts
1. Repair damage if necessary
2. Use 2-component plastic repair filler
3. Featheredge with #P320 grit paper dry
4. Final sand with #P400 grit paper dry
5. Good featheredge/peeling featheredge
6. Anti-static surface cleaner
7. Remove existing finish
8. Allow to dry out for 20-30 minutes
9. Anti-static surface cleaner
10. Primer PO or Plastoflex Primer on exposed plastic
11. Sand, #P400 grit or red scuff pad with Plastic Fix
12. Colorbuild + Elast-O-Actif anti-static surface cleaner
13. Topcoat + Elast-O-Actif
14. Allow to dry out for 20-30 minutes
15. Plastoflex Primer or Primer PO
16. Colorbuild + Elast-O-Actif
17. Topcoat + Elast-O-Actif
Having decided on the type of repair system for the plastic part worked on, apply the necessary products to complete the job.
Sanding: Prior to Primer PO, abrade the panel or part to be painted with a gray scuffing pad and Sikkens Plastic Fix.
Prior to Plastoflex Primer, sand the panel or part to be primed with #P360 grit paper dry or #P500 to #P600 wet. These parts may also be prepared with a red scuffing pad and Sikkens Plastic Fix.
 BASF (GLASURIT, R-M, LIMCO)
BASF recommends using separate and distinct products and processes when refinishing flexible or non-metal parts.
Beginning at the preparation stage, the process is considerably different between metal parts and flexible parts. Flexible parts require a more thorough cleaning than metal parts, using products specially designed for this purpose.
Sanding requirements are different for non-metal substrates. Because many flexible substrates can deform at relatively low temperatures, force dry temperatures can be different than metal parts. Because of this, it’s usually better to paint flexible parts separately from metal ones.
For R-M products, use 869 1K Low VOC Adhesion Promoter, a ready-to-spray product.
For Glasurit applications, use 934-70 2K One-Step Plastics Adhesion Promoter.
Primed OE Part (Leave Primer)
1. Clean with soap and water, use scuffing paste.
2. Scuff completely.
3. Use gray, gold or white pad.
4. Clean with water-based cleaning agent.
Raw OEM Part
1. Clean with soap and water, use scuffing paste.
2. Scuff completely.
3. Use gray, gold or white pad.
4. Clean with solvent-based cleaning agent.
5. Use plastic adhesion promoter.
Primed Aftermarket Part
1. Solvent test.
2. If test fails, strip primer (treat as raw).
3. If solvent test is successful, lightly scuff with gray pad.
4. Seal or basecoat.
Plastic Refinish Best Practices
1. Flex agent is required in the clearcoat for all flexible plastic parts.
2. Failing to properly clean the part will cause paint failure.
3. If solvent test fails, primer must be removed completely.
4. Do not let scuffing paste dry. Rinse thoroughly; if part dries before rinsing, re-wet surface and scrub again to remove residue.
5. Flex agent is not required for rigid plastic parts.
6. Follow BASF recommendations.
7. Allow solvent-based plastic cleaner to flash 15 minutes under ventilation.
Glasurit 934-70 2K One-Step Plastics Adhesion Promoter Low-VOC version
Application: Adhesion promoter for repair of all paintable plastics on cars.
Properties: Good adhesion on all paintable plastics used in car production. Suitable for use as an adhesion promoter in three stage systems.
Remarks:
• 30 minutes of forced drying at 140°F/60°C are necessary when more than one coat is applied.
• Suitable for both raw plastic as well as (non-soluble) primed plastic.
• 934-70 cannot be used over “pure” polypropylene or polyethylene
CHEMSPEC
OEM Finished Bumper Covers
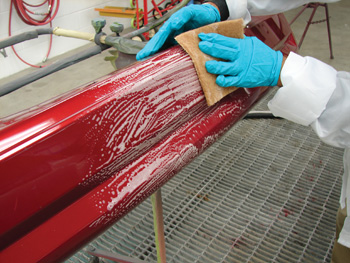
Wash the entire bumper cover with a good cleaning solution (soap and warm water) to remove water-soluble contaminants. The use of a gray scuff pad and/or scuff agent will help to break up contaminants and start to abrade the surface at the same time. Rinse thoroughly and dry the part off before repairing. Clean and scuff corners and crevices well for maximum adhesion. It’s easy to clean and scuff the big flat parts; peeling usually occurs at the hard to get areas first. Rinse completely and dry thoroughly.
Use a solvent cleaner designed for removing wax and grease and other road contaminants. Recommendation: ChemSpec TH5951 Mild Wax and Grease Remover. Do not allow cleaners to dry on the surface. Be sure to wipe off the solvent cleaner while it’s still wet on the surface. Check to be sure the surface is “squeaky-clean” and has no slickness to it. Re-clean if necessary.
Follow the plastic repair manufacturer’s recommendations for maximum results. Generally, any bare plastic requires cleaning with a plastic cleaner or pre-treatment prior to applying plastic repair materials. Recommendation: AP100 Flexible Plastic Cleaner. After a thorough cleaning, allow the plastic part to flash off for 15 to 30 minutes to release solvent and then continue with the repair.
Apply an adhesion promoter before priming or sealing. Make the necessary repair and featheredge the repair area, finishing with 400 to 600 grit. Finish sand the entire bumper cover with a 600 grit or finer. This can be done during the original cleaning process with a gray scuff pad to save time.
Following the repair, re-clean the surface with AP100 Flexible Plastic Cleaner to remove residue. Allow the plastic cleaner to flash before continuing. In most cases, a plastic adhesion promoter is recommended over bare plastic and repair areas before priming or sealing. Recommendation: AP200 Plastic Adhesion Promoter.
Apply 1 to 2 coats of adhesion promoter allowing for a 2- to 5-minute flash between coats. Allow a 5-minute flash before applying primer or sealer. Prime or seal, then apply color. After applying any necessary undercoat, apply topcoat color according to manufacturer’s directions. Remember to keep film builds to a minimum to optimize performance.
Replacement (Pre-Primed)
The first step is to test the factory primer for solvent resistance. Lifting may occur during the painting process when a plastic part or bumper cover has been coated with a poor quality primer. Also, note that solvent-borne basecoat may lift some waterborne primers. To avoid lifting or peeling, follow the proper steps.
Solvent test: Apply a quality lacquer thinner or basecoat reducer on a rag to soak a spot on the bumper cover. Allow the surface to stay wet for at least 5 minutes. If the primer lifts, remove all affected areas. *Use caution not to build up static by continuously rubbing on the plastic surface.
Tape test: Taking a piece of 2-inch masking tape, firmly press a strip onto the bumper cover surface about six to eight inches long. Pull the tape off quickly. If the coating comes off, the entire part must be stripped.
If the primer starts to lift or peel, completely remove all the affected primer. All affected primer must be removed to ensure there is no lifting during the paint process. Treat the part as a bare plastic repair. Use caution while stripping primer with solvents. You may need to periodically wipe the surface with isopropyl alcohol or a damp rag with water to avoid static buildup.
• Wear a respirator.
• Wear goggles and gloves.
• Work in a well ventilated area.
• Dispose of solvent-soaked rags appropriately.
• After stripping the plastic part, allow to flash for 30 minutes.
1. Clean the part completely. After stripping the bumper cover, wash completely with a good cleaning solution (soap and warm water) to remove water-soluble contaminants. The use of a gray scuff pad and/or scuff agent will help to break up contaminants and start to abrade the surface at the same time. Be sure to rinse thoroughly and dry the part off before continuing. Be sure to clean and scuff corners and crevices well for maximum adhesion. Rinse and dry thoroughly.
2. Use a plastic cleaner designed specifically for pre-cleaning plastics. Recommendation: AP100 Flexible Plastic Cleaner. Traditional solvent cleaners may not clean the surface properly and may actually re-contaminate the surface by soaking into some plastics, later releasing the solvent cleaner or mold release agents that float to the surface causing delamination of paint. Do not allow cleaners to dry on the surface. Be sure to wipe off the plastic cleaner while it’s still wet on the surface. Check to be sure the surface is “squeaky-clean” and has no slickness to it. Re-clean if necessary. After a thorough cleaning, allow the plastic part to flash off for 15 to 30 minutes to release solvent and then continue with the repair.
3. Apply an adhesion promoter before priming or sealing. Be sure the entire bumper cover has been cleaned and abraded. Re-clean the surface with plastic cleaner to remove residue. In most cases, a plastic adhesion promoter must be applied over bare plastic areas before priming or sealing. Recommendation: AP200 Plastic Adhesion Promoter. Apply 1 to 2 coats of adhesion promoter allowing for a 2- to 5-minute flash between coats. Allow a 5-minute flash before applying primer or sealer.
4. Prime or seal, then apply color. After applying any necessary undercoat, apply topcoat color according to manufacturer’s directions. Remember to keep film builds to a minimum to optimize performance.
Replacement (Unprimed)
Pre-baking or tempering plastic: If a bumper cover will be baked after the topcoat has been applied, we recommend pre-baking the part to help remove additional release agents and contaminants prior to refinishing. After pre-baking the bumper cover, allow to cool and proceed with the cleaning and preparation process. Pre-baking a bumper cover can be done in a booth while another vehicle is going through a bake cycle, or positioning a heat lamp 3 to 4 feet away and warming the plastic for 15 to 30 minutes per exposed area. Do not over-heat bumper covers. After pre-baking, continue with the repair and refinish process.
1. Clean the part completely. Wash the entire bumper cover with a good cleaning solution (soap and warm water) to remove water-soluble contaminants. The use of a gray scuff pad will help to break up contaminants and start to abrade the surface at the same time. Rinse thoroughly and dry the part off before continuing. In addition, a scuffing agent should be used during the washing step. Use a gray scuff pad to apply the scuff agent. Be sure to clean and scuff corners and crevices well for maximum adhesion. Rinse and dry thoroughly.
2. Use a plastic cleaner designed specifically for pre-cleaning plastics. Recommendation: AP100 Flexible Plastic Cleaner. Do not allow cleaners to dry on the surface. Be sure to wipe off the plastic cleaner while it’s still wet on the surface. Check to be sure the surface is “squeaky-clean” and has no slickness to it. Re-clean if necessary.
After a thorough cleaning, allow the plastic part to flash off for 15 to 30 minutes to release solvent and then continue with the repair. Apply an adhesion promoter before priming or sealing. Be sure the entire bumper cover has been completely abraded. This can be done during the original cleaning process with a scuff pad and scuffing agent to save time. Re-clean the surface with plastic cleaner to remove residue.
3. In most cases, a plastic adhesion promoter must be applied over bare plastic areas before priming, sealing or topcoating. Recommendation: AP200 Plastic Adhesion Promoter. Apply 1 to 2 coats of adhesion promoter, allowing for a 2- to 5-minute flash between coats. Allow a 5-minute flash before applying primer, sealer or topcoat.
4. Prime or seal, then apply color. After applying any necessary undercoat, apply topcoat color according to the manufacturer’s directions. Remember to keep film builds to a minimum to optimize performance. Additional primer or sealer may not be necessary. When priming or sealing plastic bumper covers, it’s important to keep film build to a minimum. Excessive coats of primer, sealer, color or clear will reduce flexibility and may cause premature paint failure.
Existing OEM Finish Bumper
1. Clean the part completely. Wash the entire bumper cover with a good cleaning solution (soap and warm water) to remove water-soluble contaminants. The use of a gray scuff pad will help to break up contaminants and start to abrade the surface at the same time.
Rinse thoroughly and dry the part off before continuing. In addition, a scuffing agent should be used during the washing step. Use a gray scuff pad to apply the scuff agent. Be sure to clean and scuff corners and crevices well for maximum adhesion. Rinse and dry thoroughly.
Use a mild solvent cleaner designed specifically for final cleaning before topcoating. Use AP100 Flexible Plastic Cleaner if there is ever any bare plastic exposed. Traditional solvent cleaners may not clean the plastic properly and may actually re-contaminate the surface by soaking into some plastics, later releasing the solvent cleaner or oils that float to the surface causing delamination of paint.
Use TH5951 Mild Wax and Grease Remover if there is not any bare plastic exposed. Do not allow cleaners to dry on the surface. Be sure to wipe off the solvent cleaner while it is still wet on the surface. Check to be sure the surface is “squeaky-clean” and has no slickness to it. Re-clean if necessary.
2. Make any necessary repairs. Some plastics require a pre-treatment prior to applying plastic repair materials or fillers.
3. Final sand, scuff/sand the entire part with a gray or red scuff pad or 600 grit or finer sandpaper. This can be done during the original cleaning process with a scuff pad and scuffing agent to save time. Do not break through the existing color. Re-clean the surface with mild solvent cleaner to remove residue. To further clean the surface, TH5952 Fast Evaporating Solvent Cleaner may be used prior to refinishing.
4. Mix and apply undercoats and topcoats according to manufacturer’s directions.
Generally, the entire bumper will need to be topcoated due to the difficulty of melting in blend edges. Excessive coats of primer, sealer, color or clear will reduce flexibility and may cause premature paint failure.
PPG
PRO-SPRAY AUTOMOTIVE FINISHES
Many of the plastic refinish recommendations are the same. Four of the most neglected steps are as follows:
1. Washing with very warm to hot water and a good detergent is the first and most important step that many shops sidestep or avoid. Some shops don’t even have hot water in the paint building or where they prep bumper covers. A simple analogy is this:
Why do we wash dishes in hot water vs. cold? Hot water cleans better! It’s the same with paint preparation. Water must not bead up anywhere on the plastic; it isn’t clean if it does.
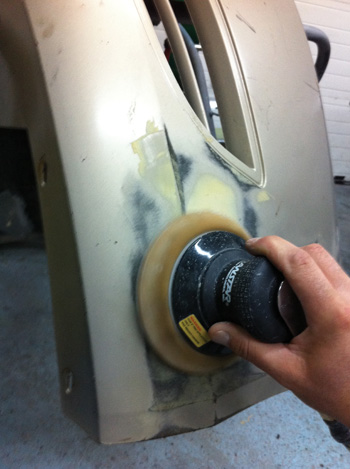
2. Next, properly and completely abrading the raw plastic or the pre-primed part is necessary. Sand all areas, including crevices and corners.
3. Follow this by properly applying plastic primer if and when needed. Do not over wet and puddle the primer. Allow it to dry properly before topcoating.
4. Using a sealer and catalyzing the basecoat improves intercoat adhesion greatly.
 TRANSTAR AUTOMOTIVE TECHNOLOGIES
Transtar Automotive Technologies makes three systems for the repair of flexible body parts:
• Bond-Tec Repair System 1 for rigid and semi-rigid plastics.
• Bond-Tec Repair System 2 for flexible parts.
• Bond-Tec Repair System 3 for polypropylene and related materials.
Repair System 1 is used for promotion of adhesion to rigid plastics, which are classified as the following materials: PMMI, SMC, GTX, ABS, PPO, PAB, PB, PAS, AAS. PBT, GRP, SMC, PPE PRP. POM, TMR, PA, AES, Noryl, Nylon, Polyester and Xenoy. While you may not be familiar with all these acronyms, you’ll recognize SMS as the sheet molded compounds that formed the outer body panels of Saturn cars.
All repairs of parts including new unprimed replacement parts; new pre-primed parts; existing parts requiring minor repairs; and those which require repairs of heavy damage will begin with a wash with warm soapy water. Then, all but the new unprimed parts will be cleaned with either Aqua SCAT 2 or SCAT cleaner. The unprimed part is cleaned with SCAT 2.
New Unprimed Replacement
Cleaned with SCAT 2 and a gray scuff pad or with the use of an alcohol-based cleaner. Then, heat (sweat) for 30 minutes at 140°F to remove the mold release agents. Then, re-clean with Aqua SCAT 2 or the alcohol-based cleaner, followed by a clean lint-free cloth. Check the part’s surface with the Transtar Clean Check Procedure: pour water on the part. If the water “sheets” off the part, all release agents have been removed. If the water “beads” on the part, then heat/sweat and re-clean the part again.
Repeat as necessary until the part is clean and water “sheets” off the part.
After the part is thoroughly cleaned, abrade it with the 633B Scuff and Prep Paste using a gray scuff pad. Then, clean it again with Aqua SCAT 2, a gray scuff pad or with an alcohol based cleaner with a clean lint-free cloth. Then you have one or two options: apply sealer (Hydroflex, Epoxy Primer, Hydro-base, Kwik Prime or Kwik Seal, or apply Adhesion Promoter 1023-F or 1033/4 Mul-TIE. Then, apply sealer using Hydroflex, Epoxy Primer, Hydrobase, Kwik Prime or Kwik Seal.
New Pre-Primed
After cleaning with Aqua SCAT 2 or SCAT, scuff with a gray pad or sand with 320-600 grit paper. Once the part is abraded, clean again with Aqua SCAT 2, SCAT or Speedi SCAT. Then you’re ready to apply sealer using Kwik Seal, Kwik Prime, Hydrobase or epoxy primer. Then apply the topcoat of choice.
Existing Parts, Minor Repairs
After cleaning with Aqua SCAT 2 or SCAT, perform the necessary repairs and finish sand with 320-600 grit paper. Then, do the Aqua SCAT 2, Speedi SCAT or SCAT cleaning process. Then, either apply Hydroflex, EZ Sand, Kwik Prime or Hydrobase, or Kwik Seal, Hydrobase or an epoxy primer.
Block sand with 320-400 grit and finish sand using 600 or finer. Once the sanding is complete, clean with Aqua SCAT2, SCAT or Speedi SCAT. After cleaning, apply sealer (Kwik Seal, Kwik Prime, Hydrobase or epoxy primer) and topcoat with your choice of colors.
Existing Parts, Heavy Repairs
After the standard wash with warm soapy water and the cleaning with Aqua SCAT 2 or SCAT, abrade the repaired area with 180-240 grit and clean the surface with 6354 Aqua SCAT. If necessary, apply 1478 Rigid Plastic Repair to the back side of the panel to reinforce the repair. Sand with 36 grit and clean with Aqua SCAT 2 or an alcohol-based cleaner, after which you can apply 1023-F or 1033/4 just prior to the repair with 1468 or 1478. Once cured, sand it with 180 grit and finish sand with 240-320 grit.
Next, clean the repaired area with Aqua SCAT 2, SCAT or Speedi SCAT. Apply Hydroflex, EZ Sand, Hydrobase or Kwik Prime. When dry, block sand with 320-400, then finish with 600 or finer grit. Finally, clean with Aqua SCAT2, SCAT or Speedi SCAT and topcoat with the color system of choice.
The Bond-Tec Repair System 2 is for flexible materials such as PRIM, PUR, TPU. Bexloy and Lomod. (Bexloy and Lomod are proprietary materials used by the carmakers).
As always, the repair process begins with cleaning with warm, soapy water, then cleaning with Aqua SCAT 2 or SCAT, with the exception of a new unprimed part. For those parts, move directly to clean/wash with Aqua SCAT 2 with a gray scuff pad. After that, heat (sweat) the part for 30 minutes at 140°F to remove the residual mold release agent.
Next, clean the part with Aqua SCAT 2 or an alcohol-based cleaner and dry it with a clean, lint-free cloth. Then, perform the previously mentioned Clean Check Procedure.
Next, abrade the part with 6338 Scuff and Prep Paste using a gray scuff pad. Then, clean with Aqua SCAT 2 and a gray scuff pad or an alcohol-based cleaner followed with a clean, lint-free cloth. Then use either sealer or Adhesion Promoter 1023-F or 1033/4 Mul-TIE.
Finally, apply the sealer (Hydroflex. epoxy primer, Hydrobase, Kwik Prime or Kwik Seal).
For a new pre-primed part, clean with warm soapy water, then clean with Aqua SCAT2 or SCAT or Speedi SCAT, then apply sealer.
The repair of an existing part with minor damage one always starts with cleaning with warm soapy water. Perform the repair, then sand with 320-600 paper. Clean using Aqua SCAT, SCAT or Speedi SCAT. If necessary, apply Hydroflex, EZ Sand, Kwik Prime or Hydrobase. Once dry, block sand with 320-400 and finish sand with 600 or finer. Wash with Aqua SCAT 2, SCAT or Speedi SCAT, then apply sealer (Kwik Seal, Kwik Prime, Hydrobase or Epoxy Primer. Finally, topcoat with the color system of choice.
When repairing heavy damage on the