 Note: this story is Part 1 of a six-part series.
Few things are more frustrating to a painter, body man and shop – or detrimental to cycle time and margins – than a redo, a comeback or an OMT (one more time). Whatever you call it, efficiency and profitability suffer when we make mistakes. Yet we all make mistakes because we’re all imperfect humans. And while no one “bats a thousand,” we can often pitch “no hitters.”
There is nothing faster and more profitable than accuracy – doing the job one time. In fact, there are few things more unprofitable than doing it a second time. I’m certain we can all agree that doing it a third time is one of them.
 Pinholes
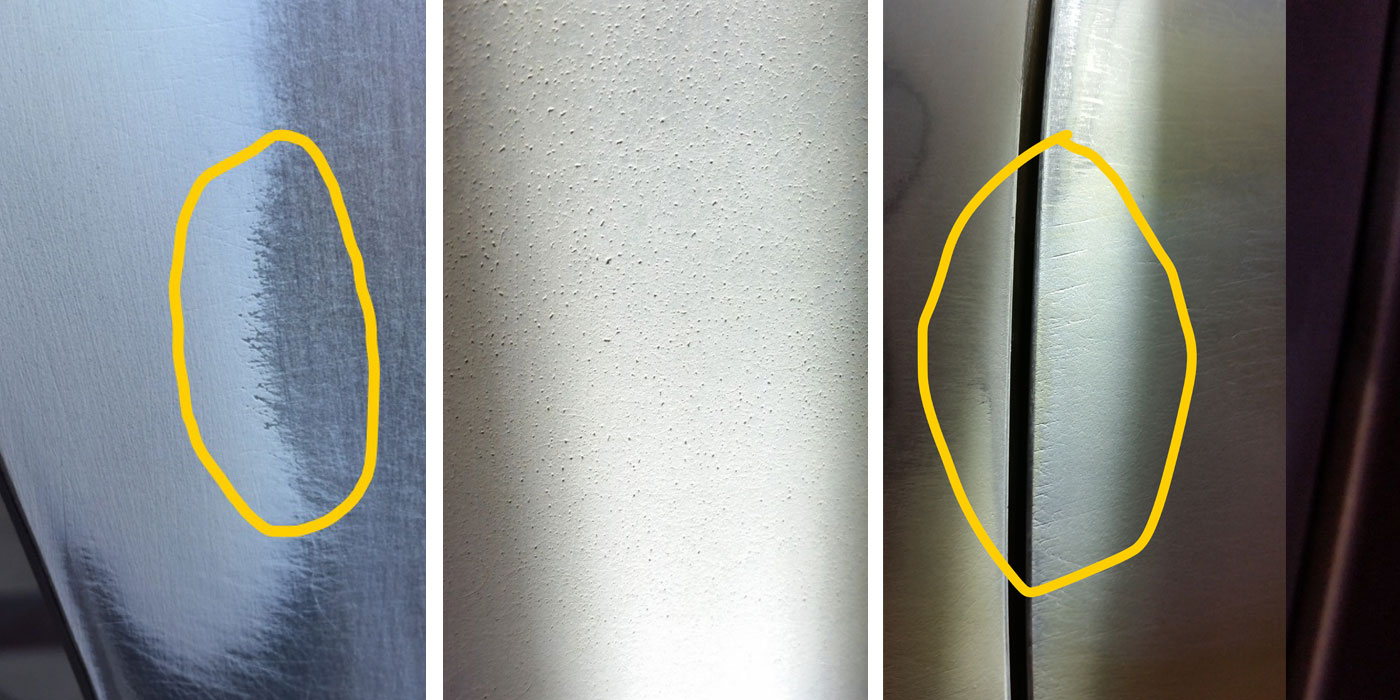
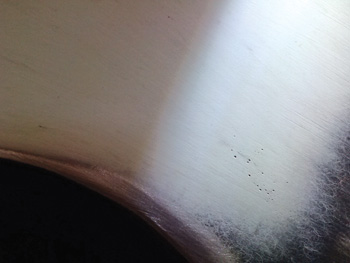
In this article, let’s consider those pinholes that “show up” after the painting is done and the sand scratches that weren’t there before. Where did they come from?
Pinholes are caused by air entrapment within the plastic body filler and are exposed during the sanding operation of the filler by the body man. Yes, we painters all know that pinholes come from the body man. And there are plenty of resources available to the body man that deal with the cause and prevention of pinholes. Our purpose here is dealing with them once we have the job in the paint shop.
 Sand Scratches
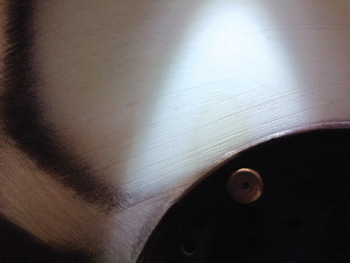
Sand scratches are too coarse a scratch pattern in the filler, or an improperly feathered paint edge surrounding a repair that has been primed over. The primer-surfacer appears to initially fill the scratch, but the problem is that the primer-filled scratch behaves differently than the surrounding body filler and eventually telegraphs its presence to the surface. Think of it like an expansion joint in concrete.
Sand scratch issues must ultimately be dealt with by the body man to ensure they aren’t ongoing problems. The grits of sandpaper (40, 80, 120, 180, 220, etc.) must be worked through by the body man, with a final grit scratch of 220 or 240. So, 220 or 240, which is it? It’s 220 if the scratch pattern is left by a random orbital; 240 if the scratch pattern is left by straight line hand sanding. A random orbital scratch is always less aggressive than a straight line scratch of the same grit.
A proper featheredging of the surrounding scratch-filled paint film generally falls to the painter. In most cases, you should figure nearly 2 inches of featheredging per modern day paint job. That is, a factory finish. If it has been refinished and there are two paint jobs on the vehicle, feather the edge 4 inches. Be aware of and be faithful to the paint manufacturer’s excessive film build recommendations and warnings. A smooth bed for the primer to lay in helps ensure success. Asking the primer to do more than it’s designed to guarantees failure. We’ve all seen the results of priming over an improperly prepared repair.
Passing the Blame
Pinholes. Excessively aggressive sanding scratches. Yeah, they came over from the body man, but we primed it. How can we possibly blame him for not seeing it and sending it to us if we didn’t see it ourselves?
Let’s think about this: the body man didn’t see it. The painter didn’t see it. Was there a production manager or other quality control person who didn’t see it? Is this work even being inspected? I mean really inspected? Properly? Or are we more concerned about getting onto the next job? Hmmm.
Since these preventable problems in paint affect us painters by way of a redo, frustration, enmity toward the body man, lost production time, etc., it’s in our best interest, the shop’s best interest and the customer’s best interest to discover them before we invest too much time in preparation. Let us consider procedures to detect these potential shop disrupters that will help us avoid priming over them as well as dealing with them after the fact.
A Few Fundamentals
Before we do anything, we must blow the repair area off really well with some decent air pressure. At this point, you may as well feel the repair for straightness; there’s no point in fixing pinholes if the repair needs a trip back to the body man. And it shouldn’t need a trip back as I’m certain the body man has already felt his work and is satisfied with it.
Now, I did say “fix pinholes,” as in fix them in the paint shop. We’re trying to improve cycle time, not have a grunting contest with a troglodyte, so unless the body man has an epidemic pattern of sloth (which would need to be addressed), we’re going to fix things in the paint shop and maintain continuity of motion through the refinish process.
Presuming the repair is straight and has been blown off, we’re going to inspect the body filler for pinholes and sand scratches. You should be close and utilizing proper lighting. By proper lighting, I mean a flashlight illuminated across the surface. In the same way the light will cause a shadow to be cast from a paper clip, it will put the crevice of the scratch or the base of the pinhole in a shadow, making it easier to see.
If your rapport and diplomacy with the aforementioned cave dweller is such that you can introduce this technique to him, you can further minimize the pinholes and sand scratches that make it to the paint shop. If you don’t have the rapport, he’ll probably just kick your butt, so tread carefully. (I should probably mention I was raised by a genius metal man who transitioned from the days of tinning and lead work to plasma cutters and resistance welders. I have nothing but respect for my co-worker the body tech, and it’s my hope that my satirical approach in this article doesn’t get my butt kicked!)
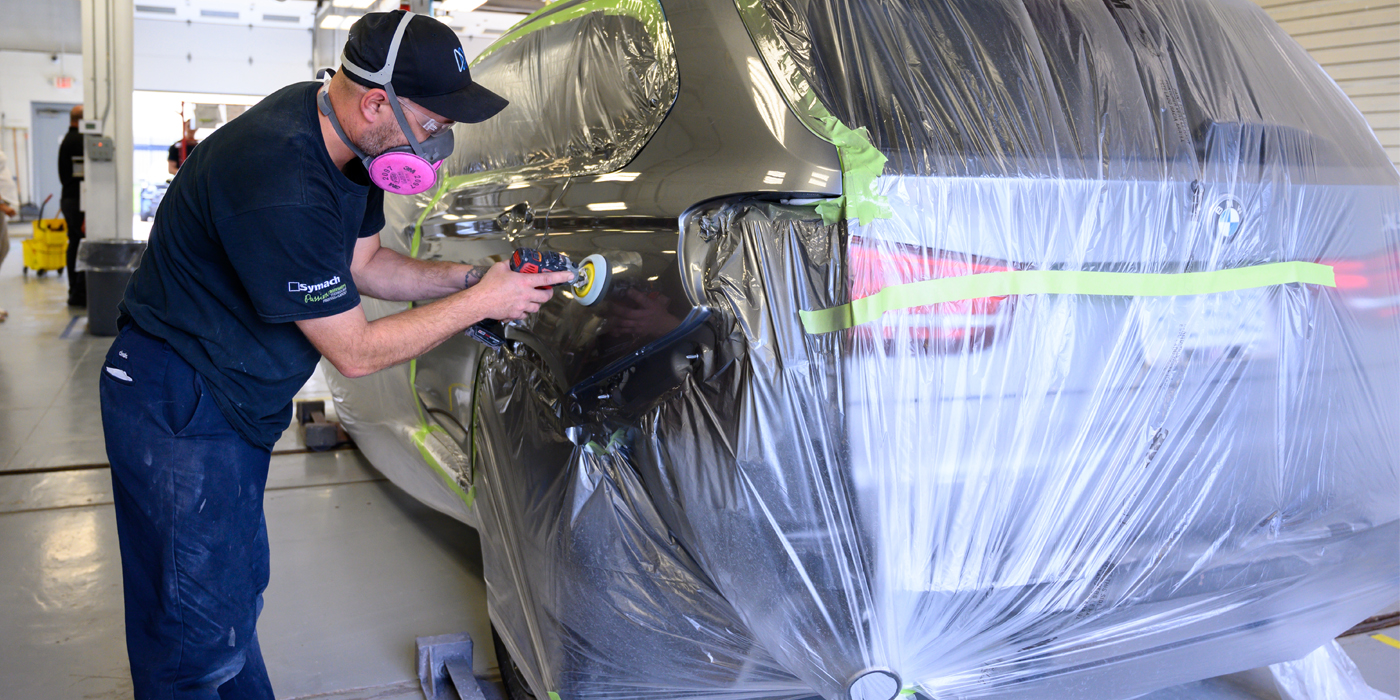
Once identified, we can easily swipe a small dab of putty with a small steel spreader, or even a razor blade, over the problem to fill it. A quick hand sanding with a small block and that problem has been eliminated prior to priming. And when you prime, observe proper flash times between coats. You’ll get a better film build of the product than if you simply “poured on” three coats, one on top of the other.
Once your blocking and sanding is finished, you need to clean off all the sanding dust again. Blow the panel off and then spray on a waterborne, low-VOC cleaner and wipe it off. The panel is really clean now – dust-free and ready for another inspection. We’re attempting to avoid discovering the pinholes in the booth. You know, that room with the best lighting in the shop. Use the flashlight before you’re in that position.
Slipping Through the Cracks
Still, there will be a job that slips through the fingers of our imperfect hands. And when that happens, we discover the pinholes in the middle of the refinishing process. Perhaps we see them in the sealer or, worse yet, the basecoat. We must honestly deal in reality and ask ourselves, “Do we pretend we don’t see them and ‘finish’ the job, or do we fix them now?” Do we even care? We need to care. Whatever the shop’s quality standard is, your personal standard should be slightly higher. I’m not talking perfection, I’m talking excellence. Of course, we fix them now. Despite the apparent disruption to the flow of production, this is the fastest way to deliver the vehicle with certainty, with respect to the painter’s portion of responsibility.
Now if, God forbid, we finish the job before we discover the pinholes, we may be able to fix them without a total repaint. If it’s a dark-colored metallic or a solid color, you may be able to dab a bit of catalyzed clear into the pinhole. Allow it to dry, then sand it, flush and polish. Silvers, golds, pearls and candy colors are not typically so forgiving. Incidentally, the occasional errant “fisheye” can also be addressed in this manner.
Sand scratches in dark-colored metallic and solid colors can often be sanded out and polished if they’re not too deep; the problem is that they’ll likely return, and the more clear you remove through sanding and polishing, the less effective the UV protection of the clearcoat. Each time you sand and polish, you reduce the film build and, in time, you’ll eventually have clearcoat failure. This is why sand scratches ultimately have to be dealt with by the body man when they’re in filler and by the paint shop when they’re in the feather edge – in both cases, prior to priming. If the sand scratches appear in a light-colored metallic, you’ll have to re-paint to fix it.
No Hitters
We cannot affect every variable that hinders cycle time, but we can address more than a few things in the paint shop. By identifying and understanding some of the causes of redos, we can minimize their frequency and pitch a few more “no hitters.”
Carl Wilson has been painting for nearly 30 years, with formal training from the GM Training Center, ASE, I-CAR, and multiple product and color courses. He currently works as a painter at RPMS Auto Body & Paint in Kailua, Hawaii. He can be reached at [email protected].