 Note: this story is Part 2 of a six-part series.
On the surface, sanding appears to be an elementary task, so much so that we put sandpaper in the hands of greenhorns and let them go at it. We veterans of the paint wars ourselves are often too busy and valuable to be bothered by such a menial task. Sanding? Come on! We should be engaged in the act of making money. We’re painters, after all, and therefore we ought to be painting. However, as with most anything you can think of, from the universe to the paint job, there is a beginning.
A Proper Repair
No, we’re not going to examine the big bang theory or intelligent design, but we will be taking an in-depth look at what it takes to perform a proper paint job.
In my area of expertise in collision repair, when we say “proper repair,” it’s the culmination of an incredible quantity of tasks and knowledge that ultimately results in what we refer to as “pre-accident condition.” The lion’s share of those tasks are prepping, much of which is sanding.
So, back to sanding. It isn’t a haphazard application of various pieces of grit-impregnated parchment paper we drag across a surface in order to scratch it up. Nope. Not haphazard at all, but very deliberate and fundamental to the refinish process. Crucial in most every case, save for a very few such as raw plastic components (which I will not venture into in this article), sanding is fundamental.
 The Fundamentals
Let us consider the fundamentals of sanding. I believe it’s prudent to point out that while techniques are many, the fundamentals are few. A proper grasp of the fundamentals will lend itself to the development and application of techniques. This helps explain why there seems to be as many ways to “skin a cat” as there are painters. Yet few, I believe, could articulate the fundamentals. Why? Well, back to the opening paragraph, it’s so elementary, you just…you know…sand.
OK, fair enough. To understand the fundamentals, we need to know the task we’re performing and what we’re asking the sandpaper to do. For example, sandpaper for the rapid removal of material, such as that which a body tech would do as he grinds through the paint film down to bare metal, will generally not be found in the paint shop. Unless we’re dry stripping material to the substrate, which is a topic for another day, we don’t even touch anything in the 40- to 80-grit range of any sandpaper product.
I know the panel has been cleaned properly before we start, yes? Relax, I won’t belabor that point again, but I will offer a simple test you can perform to ascertain the panel’s cleanliness. This isn’t for every job, but if you want to spot-check the effectiveness of your cleaning technique from time to time, then apply this test to a white or silver vehicle blend panel that’s factory paint.
Clean the panel(s) as you would normally. When you’re satisfied it’s clean, prior to sanding, spray the panel with a little lacquer thinner and observe the results. Miniscule streaks of road tar and contaminants will reveal themselves if the panel isn’t clean. Let’s be certain we have a clean surface prior to sanding it.
Three Functions
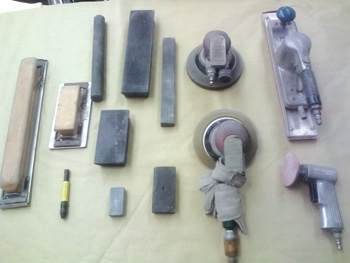
In a nutshell, we basically have three functions of sandpaper: cutting, smoothing and simply abrading a surface for adhesion purposes – also known in the vernacular as rough sanding, finish sanding and scuffing. Techniques such as hand sanding, machine sanding, dry sanding and wet sanding, or equipment choices in the way of rigid pads, interface pads, vacuum pads or even homemade blocks and pads as well as sandpaper options of open coat, closed coat, aluminum oxide, silicon carbide, linen mesh screens, sanding sponges and scuff pads, etc., all have application considerations specific to technique. Yet they must all conform to the basic fundamentals in order to be productively profitable. For an extreme example, you wouldn’t block sand primer surfacer with 800- or 1,000-grit paper because you wouldn’t be able to cut and level the primer…you would only succeed in making it “wavy smooth.”
In the paint shop, our cutting or block sanding of primer surfacer is generally done in the 180 to 240 range – on a rigid block using a crosshatch sanding pattern for the most rapid removal of material. You
shouldn’t apply too much pressure because you want the grit of the sandpaper or mesh to do the work, not your muscles. Too much pressure and you sand a distortion into the panel rather than level it.
Furthermore, you must leave enough material for the ensuing grits of paper to do their job. This is where powdered guidecoat really shines as you can use it between each grit change to ensure you’re removing the scratches you’re after step by step until you’ve reached your final grit and sand scratch pattern.
 No Change
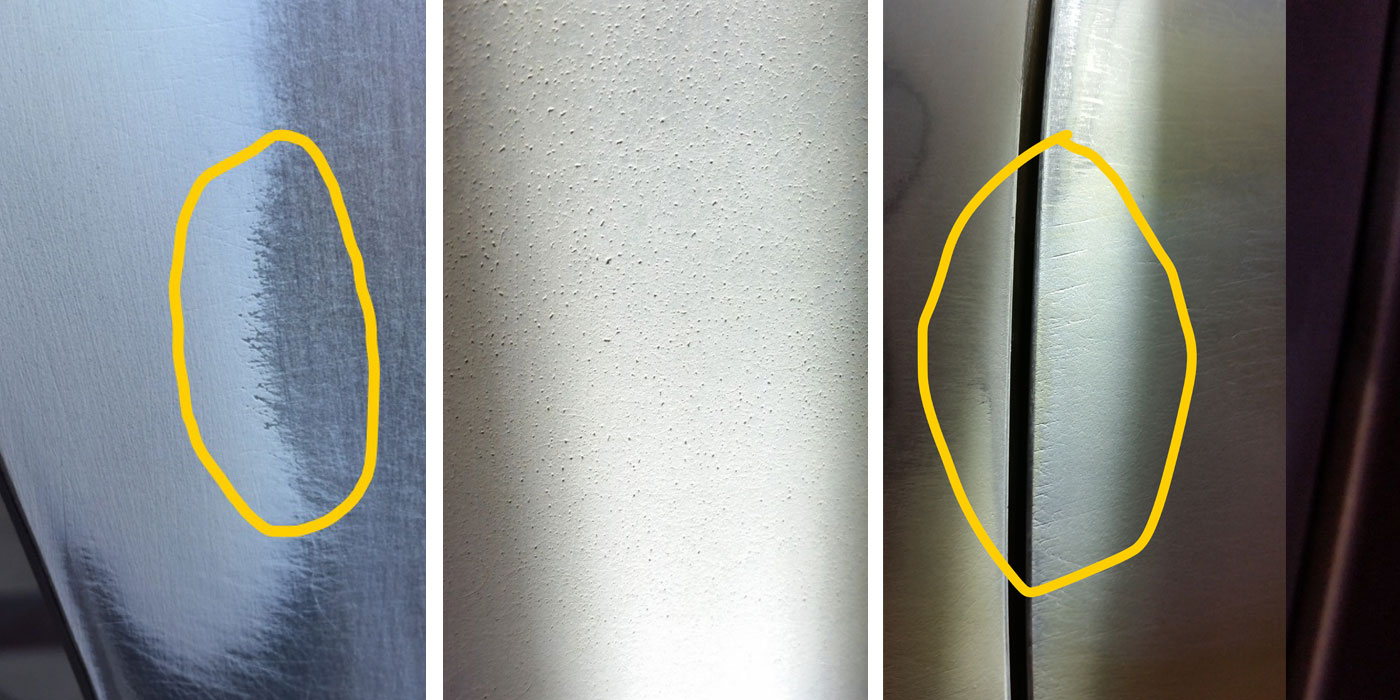
Whether you’re sanding for primer application, sanding primer, final sanding prior to sealing and painting, preparing a panel for a blend or even nib sanding prior to buff and polish, the fundamentals don’t change. For example, if you’re nib sanding a speck of dirt prior to buffing and you fail to cut it flat, you’ll see the ghost by way of a tiny “pitcher’s mound” where the dirt was. You must level it, then smooth and polish it. Of course, there are situations where cutting and leveling aren’t needed where you simply need to abrade the surface for adhesion purposes, or scuff sand. Or, smooth out the scratches left by a body tech surrounding the repair (featheredging).
The products you choose to use largely determine the techniques you’ll employ. I don’t want to get into the weeds with every technique known to man because, frankly, I don’t know every technique and we don’t need to know every technique. We need to know what’s pertinent to the products we’re using and the task at hand.
 You may experience a need to change technique due to a decision to change products made, above our pay grade, by the office and suppliers. No problem; we’re professionals and we can adapt and overcome any obstacle we face, including a change of technique brought about by a change in material or supplies – because we understand the fundamentals.
ANSI-CAMI-FEPA
I’m aware that, at times, I babble on about the challenges of yesteryear – the proverbial “uphill walk to and from school.” I hear you. Notwithstanding, one example in particular decades ago comes to mind.
Ever hear of ANSI, CAMI or FEPA? They are, respectively, the American National Standards Institute, Coated Abrasives Manufacturers Institute and the Federation of European Producers of Abrasives. You may say, “Who cares?” Well, we had to care because ANSI established a numbering system to indicate grit size: 80, 120, 220, etc.
 That was all well and good until FEPA abrasives became widely available in our country. The FEPA rating system and the ANSI rating system did not correspond to one another. Furthermore, they were confusing. For instance, grit designations of about 180 and below (120, 80, 36, etc.) were similar enough to cross over from ANSI to FEPA. But north of 220, the grit designations parted ways. For example, 320 ANSI is more like 500 FEPA, and 500 ANSI is more like 1,000 FEPA. See the problem? The numbering systems are not interchangeable.
If you had European paper, you needed to know, and that was easy enough if you knew that FEPA abrasives were indicated by the letter “P.” “P paper,” we called it. Simple enough. But, of course, it didn’t stay simple. One of the major American abrasives manufacturers also started making a P-designated abrasive. However, American P paper and European P paper were not interchangeable, but the American P paper and the old ANSI stuff were. Phew!
These days, it appears that FEPA P paper has gone the way of nitrocellulose lacquer. It’s around, but it’s not mainstream, at least not in the markets where I’ve worked. P paper today seems to mirror ANSI
paper – 220 is 220, 400 is 400, 800 is 800 and so on. You can pretty much order the grit size you know and want and that’s what you get.
The Heat Is On
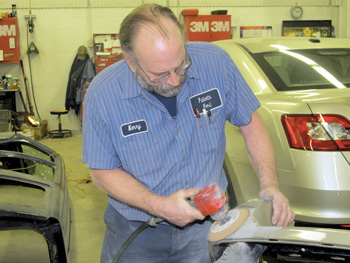
One thing that was consistent between the grading systems is how heat shortens the life of the paper. When machine sanding, too many RPMs of the tool generates heat between the substrate and the sandpaper and the sandpaper dies early. You’ve seen that guy running his DA so fast that you know he’s not only burning through the sandpaper, he’s also shortening the life of the tool.
The other extreme is too slow an RPM, which results in poor sandpaper performance and increased labor inputs. The sweet spot is a balance that results in good production and paper life. Experiment! There’s no need to run the tool wide open.
Back to the fundamentals: cut, smooth and polish. I can illustrate the techniques I utilize, but please understand that these are not the only techniques that work. My techniques are based on the materials and supplies I use. Your approach may be different, and that’s perfectly fine. I’m not attempting to convince you that my way is best, or convert you over to it. I have no idea what your specific situation is. Take from it what you will – your choice. But apply the fundamentals.
Starting with a panel that has been body worked and primed (and yes, there are priming fundamentals that ensure success), I apply dry guidecoat to the area I’m going to sand. I put 220 paper on the longest block I have that is proper for the job at hand. Every time, I use the longest block practical, using a crosshatch sanding pattern until the panel has been cut level. Reapply the dry guidecoat and block again with 400 – I’m cutting out the 220 scratches here. Reapply the guide coat and sand with 400 on a DA with an interface pad, stopping short of total guidecoat removal. Then switch to 600 on the interface pad to finish removing the scratches and guidecoat. The entire process is dry. A mesh screen produces fantastic results with a dry sanding technique, and you have the option of using a vacuum system for dust control.
Don’t let anyone tell you that you shouldn’t use the DA in this process for fear of destroying the body work. You cannot destroy the body work with 600 grit on an interface pad any more than you could straighten out body work with 600 grit on an interface pad. That is the wrong grit and the wrong pad to cut with. Still, keep your tool flat and pay attention to edges and body lines.
Nib and Polish
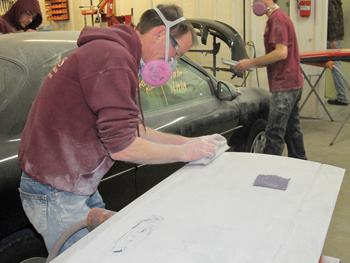
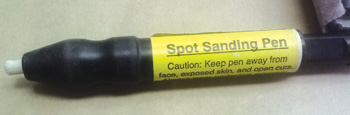
Another example of the fundamentals can be found in the labor operation “nib and polish.” We’re not talking flat sanding a panel prior to buffing, just “chicken pecking” the dirt. I do use water for this operation but no bucket, just a spray bottle.
With either a 1,000 or 1,200 sanding stone, or even a piece of wet sanding paper wrapped around a short length of paint paddle, cut the dirt out, keeping it small. Some guys like to use a razor blade with the corners taped or a 1-inch section of a vixen file to do the cutting. The important thing is to cut it flat, then, with a 3-inch DA and 1,500- to 2,000-grit paper, smooth the cut marks out. I then use a 3,000-grit sponge pad on the baby DA and sand out the 2,000-grit scratches. Finish it off with a spot buff and polish, easy and fast. All my DA paper is hook and loop, aka Velcro, so switching paper doesn’t mean wasting paper.
The fundamentals don’t change – techniques do. When you separate the techniques that are as seemingly vast as the stars in the solar system from the fundamentals, it’s easy to see that sanding is indeed elementary.
Carl Wilson has been painting for nearly 30 years, with formal training from the GM Training Center, ASE, I-CAR and multiple product and color courses. He currently works as a technical rep for Hi-Line Distributors in Oahu, Hawaii. He can be reached at [email protected].