 A few weeks ago, your shop replaced a tailgate on a Hyundai Santa Fe. Everything looked great, and the fit and finish was to OEM standards. You took all the right steps, and your customer was happy when she picked up the vehicle. Now, your customer comes in stating that the paint is wearing in the area of the tailgate where it and the rear tailgate garnish panel meet.
Without hesitation, you apologize to your valued customer, explaining to her that you may need to perform some adjustments and will have to repaint the tailgate. Being the savvy and conscientious person that you are, you provide her with a rental vehicle at no charge and explain to her that the vehicle should be repaired by tomorrow. Under normal circumstances, this could mean de-trimming and refinishing the tailgate.
Has this ever happened to you? Maybe. Could this have been prevented? Possibly.
This condition is not a fault of the repairs you performed, but you could have prevented it if you and your team had known about the Hyundai Technical Service Bulletin related to this part. This bulletin provides the procedure to repair the tailgate if contact has occurred between the tailgate and the tailgate garnish.
Service Information
Always refer to ALLDATA Collision for safety procedures, identification of material types, recommended refinish materials, removal and installation procedures. Always refer to Hyundai for questions relating to applicable or non- applicable warranty repair information.
CAUTION: Read and follow all of the instructions from the manufacturer’s line of painting materials, equipment and protective gear.
Parts Required
• Vehicle production date range: all
• Pad-anti-noise – 84175-26000
Repair Procedure
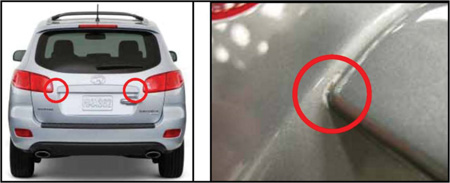
1. Inspect the tailgate garnish for paint blemishes where it contacts the tailgate. (Photo 1).
NOTE: If adjustment or repair is required, use the following procedure:
Open the tailgate:
a. Remove the pull strap and four screws securing the trim panel.
b. Release clips from trim panel by pulling down.
CAUTION: Do not remove the access panels. Removing them could cause unnecessary damage.
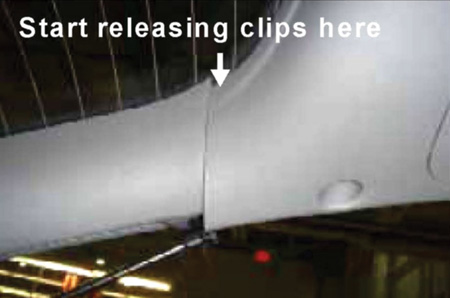
CAUTION: Start where the side upper trim panel and main trim panel meet, then proceed by releasing clips around the perimeter until you reach the opposite side. (Photo 2 and 3).
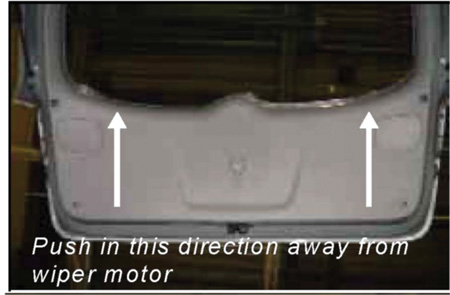
c. Remove trim panel by pushing it in the direction of the glass, which will allow proper clearance of the rear wiper motor. (Photo 4).
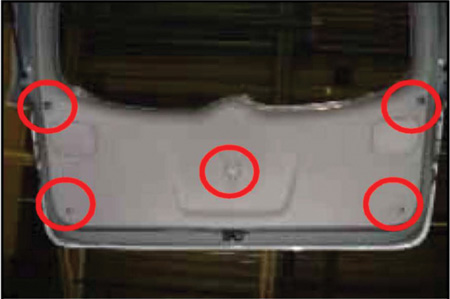
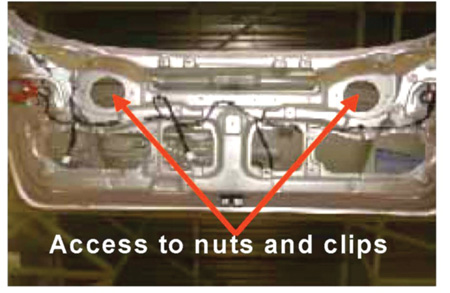
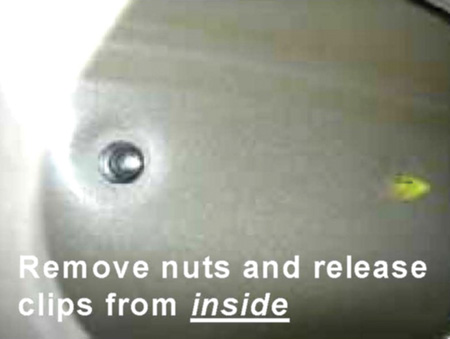
d. Remove the four nuts from inside of tailgate. (Photo 5 and 6).
e. Release three clips from inside of tailgate.
(Photo 5 and 6).
NOTE: Clips must be released from the inside. Do not attempt to pry the garnish from the outside.
NOTE: Remove the speaker from the tailgate if the vehicle is equipped with the Infinity sound system in order to access the mounting nuts and clips.
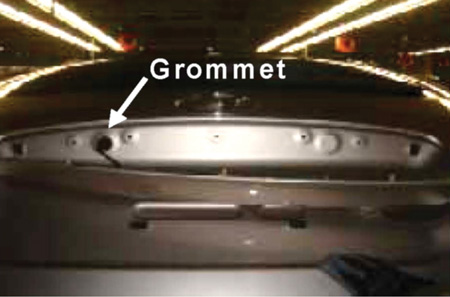
f. Unseat the wiring grommet and unclip the wire harness. (Photo 7).
g. Remove garnish.
h. Apply touch-up paint and clearcoat to rear hatch.
WARNING: Allow time for paint and clear coat to dry.
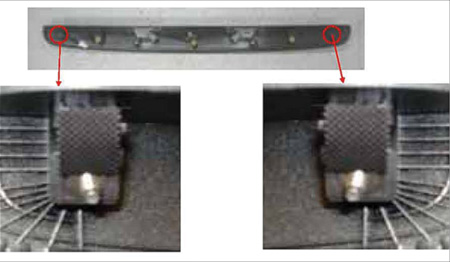
i. To ensure a sufficient gap between the garnish and tailgate panel, apply foam tape to outside tabs. (Photo 8).
j. Check all clips on garnish and trim panel before installation, and replace any broken clips.
k. Install garnish and trim panel
in reverse order of removal
procedures.
l. Verify that a gap is present between the garnish and tailgate.
Dan Espersen is the ALLDATA Senior Collision Program Manager. He’s a Gold Pin Member of the Collision Industry Conference (CIC) and holds an AA Degree in Automotive Technology. He has 16 years of experience in the collision industry and 17 years of experience in the automotive industry.
© 2008 ALLDATA LLC. All rights reserved. All technical information, images and specifications are from the ALLDATA Product. ALLDATA is a registered trademark and ALLDATA Collision is a mark of ALLDATA LLC. All other marks are the property of their respective holders. Hyundai and Santa Fe are registered trademarks of Hyundai Motor America and are being used solely for reference and application purposes.


