 Vehicle manufacturers often publish updates to repair procedures, techniques, part numbers, and equipment and materials, as well as repair information for known issues reported by repair facilities and customers. Manufacturers communicate these updates to the automotive industry via Technical Service Bulletins (TSBs).
If your customer returns with an issue and you have no prior knowledge of these updates, you and your team may waste time chasing a problem unrelated to the collision or your repair. Researching this information prior to production can save your technicians many hours of valuable production time and will ultimately increase your overall Customer Satisfaction Index (CSI).
Here is a TSB from Chrysler regarding a repair for a ticking noise at the base of the A-Pillar on a 2008 Dodge Caliber when the vehicle is driven over slight bumps.
Application
This TSB involves installing an epoxy adhesive at the base of the A-pillar to eliminate a ticking sound when traveling over slight bumps. NOTE: This bulletin applies to vehicles built before December 9, 2007 (MDH1209XX).
Symptom/Condition
The vehicle operator may experience a ticking sound coming from the base of the A-pillar when traveling over bumps. The sound may be interpreted to be coming from the front suspension or dashboard.
If the customer describes the symptom/condition and/or the sound can be duplicated, perform the repair procedure.
Regardless of which side is exhibiting the sound, both sides must be repaired.
Parts/Special Tools
Part # – 05017147AA
Description: Fusor Adhesive #147 (10.1 oz. tube); will service about two vehicles
Part # – 05016570AA
Description: #147 Dispenser (10 oz. tube dispenser – four oz. per repair)
Part # – C-4755
Description: Trim Stick (or equivalent)
Part # – NPN
Description: Wood Tongue Depressor (or equivalent)
Service Information
Always refer to ALLDATA Collision for safety procedures, identification of material types, recommended refinish materials, removal and installation procedures. Always refer to Chrysler for questions relating to applicable or non-applicable warranty repair information.
Procedure
1. Remove A-pillar trim, left and right side:
a. Using Trim Stick C-4755, remove plug from A-pillars.
b. Remove screw from each side.
c. Remove both A-pillar trim covers.
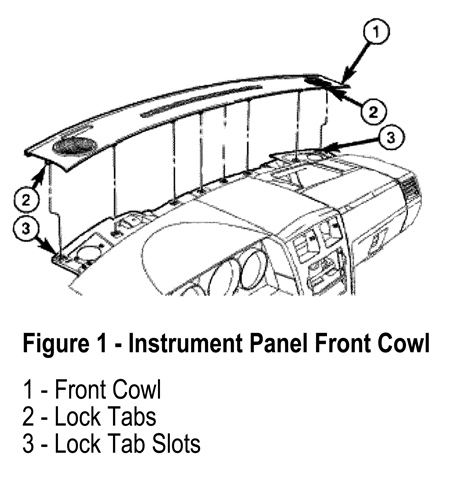
2. Remove the instrument panel front cowl cover (at base of windshield). Using Trim Stick C-4755, pry up on the panel cover to disengage the panel clips from the instrument panel (I/P) (Figure 1).
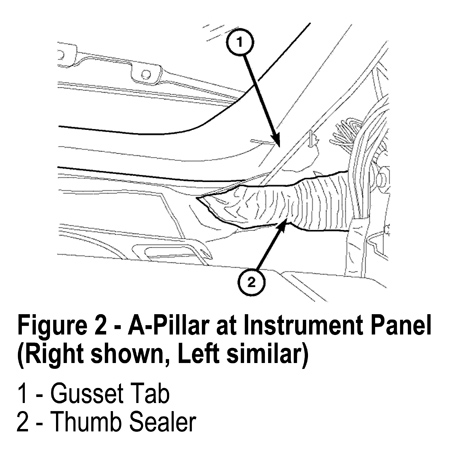
3. Locate gusset tab at lower corner of A-pillar. Remove thumb sealer to the point shown in (Figure 2) to item 2.
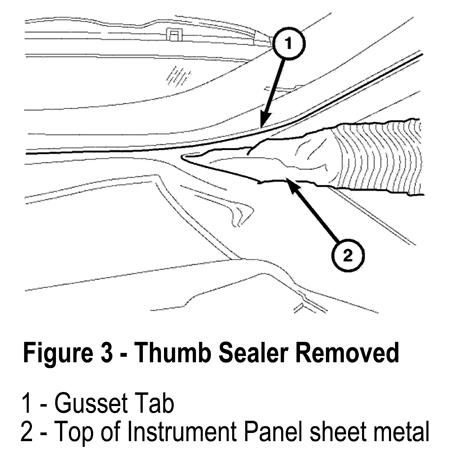
4. Scrape off sealer to expose the gap between tab and top of cowl sheet metal (Figure 3).
5. Clean area thoroughly with shop vacuum.
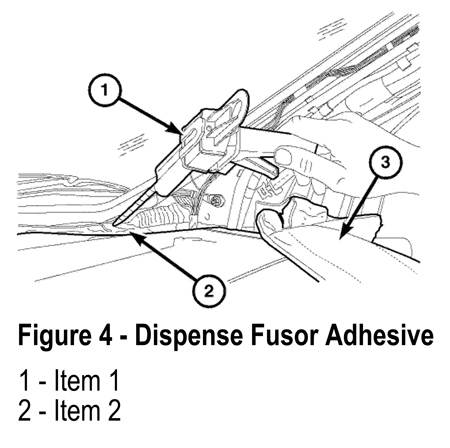
6. Using the dispenser, apply Fusor adhesive at the gap between tab and top of I/P sheet metal (Figure 4).
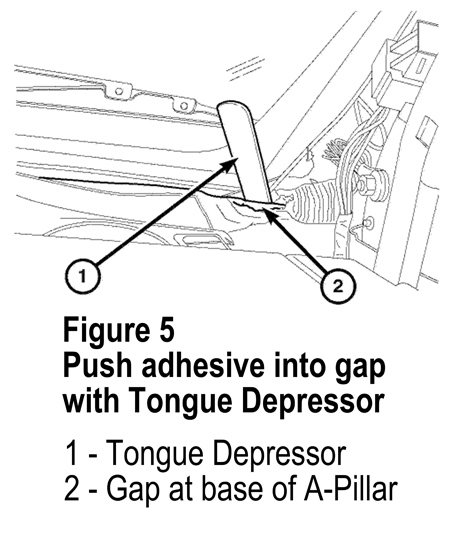
7. Using a wood tongue depressor, push the adhesive down into the gap (Figure 5).
8. Dispense additional adhesive using a circular motion to bridge from A-pillar to I/P (Figure 6).
9. Repeat Step 4 through Step 8 for the other side.
10. Install the instrument panel front cowl cover.
11. Install A-pillar trim on both sides.
NOTE: This repair/service procedure is excerpted from a TSB published by the vehicle manufacturer and is intended for use by trained, professional technicians with the knowledge, tools and equipment to do the job properly and safely. It’s recommended that this procedure not be performed by “do-it-yourselfers.”
Dan Espersen is the ALLDATA Collision Program Manager, a Gold Pin Member of the Collision Industry Conference (CIC) and holds an AA Degree in Automotive Technology. He has 17 years of experience in the collision industry and 17 years of experience in the automotive industry.
© 2009 ALLDATA LLC. All rights reserved. All technical information, images and specifications are from ALLDATA Collision. ALLDATA is a registered trademark and ALLDATA Collision is a mark of ALLDATA LLC. All other marks are the property of their respective holders.


