When you think of undercoats, it’s likely that primer and sealer come to mind, and that’s not wrong. But what is primer? Or sealer? Take “primer,” for example.
Depending on who you ask, the word may reference a filler/surfacer to be applied over body filler, or it may point toward an etch coat of sorts going over bare metal. Neither is wrong.
For the sake of clarity, let’s agree that anything we apply below the color coat is an undercoat. The obvious exception is any sort of body filler, polyester putty, glazing putty, etc.
We’ll run briefly through a list of components which we generally apply in the paint shop (in some shops, the priming is done by body techs). For brevity’s sake, we’ll not cover proper substrate prepping and cleaning procedures here.
Adhesion Promoter and Metal Conditioner
Adhesion promoter will generally be used on raw plastic, either a new, unsealed part or on a damaged part which has been repaired and the coatings have been ground off to expose the raw plastic substrate.
Raw plastic will need an adhesion promoter. This technically is a “primer” as it prepares the substrate for additional coatings. We need to use an adhesion promoter due to the fact that we don’t make anything stick to plastic mechanically – with sand scratches – but rather chemically with this adhesion promoter, or plastic primer.

Unless you’re using one of the one-step plastic primers which have adhesion promoter, decent fill characteristics and elasticity built into it, you’ll need to apply an adhesion promoter before any other primer-filler. A new raw plastic bumper will also need adhesion promoter before sealing, unless a one-step plastic sealer of sorts is used. It, too, is an adhesion promoter and elasticized sealer in one product, with the main benefit of saving application time in the booth.
It’s imperative that the plastic be cleaned properly prior to applying anything. You cannot skip this task and expect anything other than failure.
We do not use an adhesion promoter on bare metal. Instead, we’ll likely use a metal conditioner. Some are two-step products that have an acid-based cleaner which is then rinsed off with water, followed by a zinc phosphate coating which is normally also rinsed off with water. Others are one-step products, such as wash primer, that are usually acid- or alcohol-based with zinc chromate in the pigmentation. They’re applied and wiped off. Regardless of a one- or two-step process, both must be followed by a “full-bodied” primer.
Direct-to-Metal Primers
Available, too, are high-quality acid etch and epoxy primers which can be applied directly over properly prepared and cleaned metal where no metal conditioner is necessary. The acid etch primer would need to be coated with a suitable 2K primer before proceeding, whereas an epoxy primer could stand alone and be sealed or color-coated. But you do not want to apply epoxy primer over an acid etch primer. For specifics, refer to the Technical Data Sheets for the product you’re using.

Acid etch primer can be a 1K (non-catalyzed) or a 2K (catalyzed) product. However, many manufacturers will dictate a 2K product for warranty compliance. The same can be said for many waterborne and UV-activated primers, which we will cover later. They can be applied directly to metal, but for warranty compliance, you’ll need an etch or epoxy primer applied first – check with your paint manufacturer regarding compliance.
The benefit of an acid etch primer is it eliminates the separate metal conditioning step with a phosphoric acid. Then, with a high zinc content, excellent corrosion protection is realized. Since the zinc is more reactive in the galvanic series, it’s offered sacrificially, rather than the metal. Furthermore, the 2K product is superior in that it forms a more durable, non-reversible barrier when dry and cured.
Epoxy primer is a bulletproof coating not typically found in day-to-day production collision repair, but it does have a strong following in high-end, custom and restoration applications. It exhibits fantastic corrosion protection, decent build capabilities, solvent resistance and excellent hold-out of the topcoat. It’s main drawback from a production perspective is its lengthy dry time. With no heat to force it, it will likely need 16 hours or so before you can get back on it, and wet-on-wet application benefits are not possible.
Primer Surfacer/Fillers
Often referred to simply as “primer” here is probably the largest pool of products within the “undercoat” family. While some of these can be applied directly to small areas of exposed metal, we don’t use them in the same capacity as direct-to-metal primers.
For the sake of the old-timers, I suppose we have to mention 1K lacquer primer. While an inferior product and not warrantable by any manufacturer I know of, it does have its fans and is still in use by some shops and hobbyists. It’s reversible when dry, as it dries strictly by evaporation of solvents.
There are multiple offerings from nearly all manufacturers of various 2K primer fillers or surfacers: high-build, low-VOC, super-fast, etc. Some have the ability, with differing mix and reduction ratios, to be used as either a high-build primer or a wet-on-wet sealer with no sanding required. There are some which can be applied with either a roller or a brush for 100 percent transfer efficiency and zero overspray. It also eliminates the cleaning of a spray gun and is able to be applied anywhere in the shop – not just in a prep deck or spraybooth. Some of these may be activated with an isocyanates-free hardener.
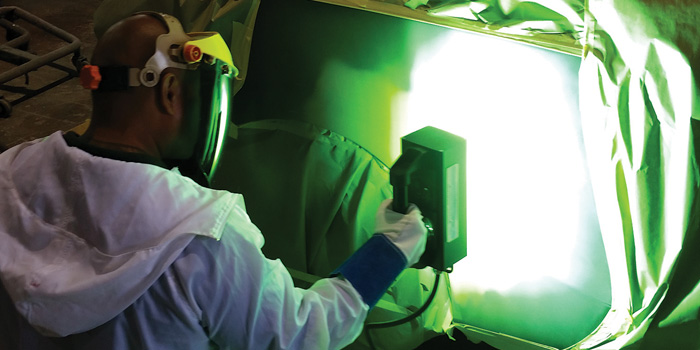
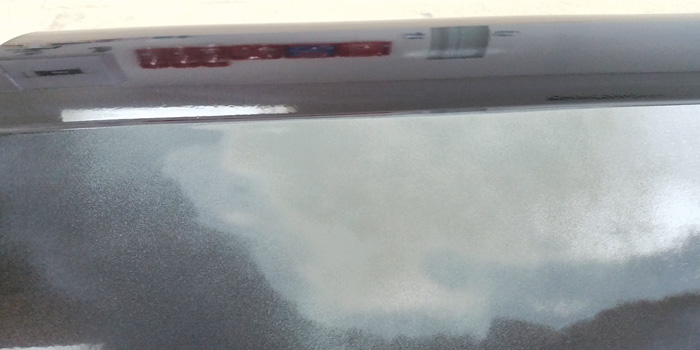
Most all 2K offerings can be air dried or force dried using heat – direct, indirect or IR technology. A “solar bake” is still used by many, though it’s prudent to monitor panel temperature with an IR thermometer regardless of the heat source. We don’t want to give the primer “too much too soon” heat-wise, nor do we want to damage the substrate or cause any body filler to delaminate, which can happen with excessive heat. What’s excessive? Refer to your data sheets for temperature guidelines germane to your product, but keep this as a rule of thumb: if it’s too hot to touch – it’s too hot.
Waterborne
There are a couple of superb 1K primers available that simply aren’t used as much as they could be: waterborne and UV-activated. Being 1K products, there’s no hardener and, as a result, they contain no isocyanates. They will never “kick off” in the spray gun if forgotten about. In fact, they don’t even require the spray gun to be cleaned each time the gun is used to prime a repair, which saves time and cleaning solvent over the course of a day or week. However, some settling of the product in the gun will likely occur and necessitate stirring if not cleaning immediately.
Many waterborne primers can be applied directly to metal. They can be sanded as soon as the water has evaporated from them and therefore are very fast. Waterborne primer forms an impenetrable barrier for great hold-out. Most can be applied over properly prepared plastic, too. The drawback in some eyes is it doesn’t fill as well as a high-build 2K. That’s true, but my take here after being spoiled by many body techs who could really “carve the mud” well is, the better the body work, the less I must ask the primer to fill. At any rate, if nothing else, it’s a great tool to have in the tool box whenever a really fast primer is needed.
UV-Activated
Ultraviolet-activated primer isn’t new but it, too, is underutilized. It can also often be applied directly to metal and properly prepared/primed plastic. I’ve witnessed an 80 percent increase in productivity in one paint shop where they went “all in” with UV primer. Yes, that’s unusual and I’m cherry-picking, but that doesn’t change the fact that UV is more productive than 2K primers in every measurement. No mix time, less application time, less spray gun cleaning, less waste and the biggie: less cure time. With the proper equipment, a shop can stop batch-priming in the evening and “prime-as-they-go,” keeping every job they prime in a day in production. Both waterborne and UV primer are extremely stable, and neither of them have aggressive solvents in them, which often penetrates the feathered paint edge of the repair being primed, resulting in “ringing” or shrinking, particularly if the primer is over-applied.
Sealer
I suppose this brings us to the final member of the undercoat family: sealer.
While most 2K primers can be used as a sealer and painted directly over as long as the final prep is proper for color application, new parts and sand-throughs will need a coat of sealer. Most sealers these days are wet-on-wet, meaning after the appropriate flash time, color can be applied with no need to sand the sealer first. There’s a window to observe; too soon will result in paint problems, as will too long a wait. Refer to your technical reference book or technical data sheets for specifics.
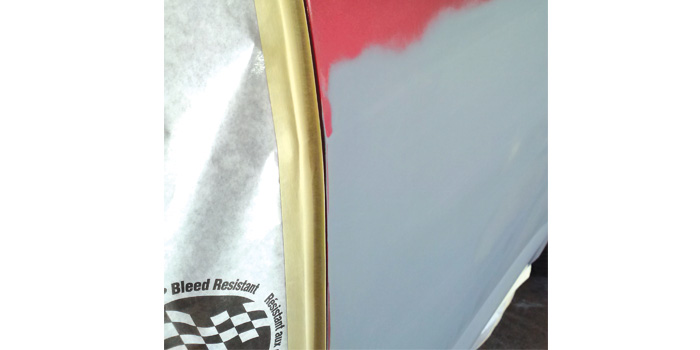
Another benefit of many sealers is that the value can be adjusted, from white to nearly black, to better match the value of the color. Matching the value helps the color to cover faster, which uses less paint and requires less booth time. Of course, there will likely be applications for a transparent sealer too, of which there are more than a couple to choose from. With a transparent sealer, you avoid the visible edge of sealer creep in a door jamb, for example, which is often the result with an opaque sealer.
Keep in mind, the color coat must be applied over an undercoat, and that undercoat can be a primer, provided it’s the proper primer which has been properly prepared. Otherwise, let the final undercoat be a sealer.