Though good systematic surface preparation may be essential to great looking and long-lasting paint jobs, not everyone cares. Like your parents nagging you to wipe your feet, and not slam the screen door or run with a pointy stick, many repairers continue to ignore the paint manufacturers continual harping about good surface prep. (Much like Mom used to say, if you’d listen the first time she said something, she wouldn’t have to keep repeating herself.) Though the steps for surface prep remain unchanged from year to year, perhaps a little refresher on the products and the process will help the information sink in.
1. Wash the car. Certainly every painter on the planet must have heard that washing the car with soap and water is a good idea. One benefit is that some surface contaminants that are impervious to solvent wipes of any kind are readily dissolved and removed by soap and water. But be sure to use car wash soap, not dish or laundry soap. Why? Dish soap is designed to dissolve the residue from food and cooking, and laundry detergent is designed to dissolve and remove assorted contaminants from fabric. It’s the rare car that has bacon grease or grass stains on it. Car wash soap dissolves stuff found on cars like tree sap, brake dust and general road grime. Use the right soap.
Perhaps the best reason to wash the car before work begins is to flush dust and dirt from the drip rails and seams. Many years ago, I conducted a telephone survey for BodyShop Business, and I asked 40 body shops about their surface preparation. All 40 shops solvent-wiped their cars with the correct wax and grease remover, but only two (!) washed their cars with soap and water every time. These two got cleaner paint work as a result. If you’re taking the trouble to read this article, do me a favor and make one change on the very next car you paint: Wash it from top to bottom with car wash soap and a drenching water rinse. I promise the resulting paint work will be cleaner. Really.
2. Solvent wipe the car. Why clean the panel before you sand? If you simply grab the sander and begin abrading the finish on the panel, you’re likely to drive the surface contamination right down into the old paint. And when you apply subsequent coats of primer, sealer, color or clear, they’re likely to fisheye or even refuse to adhere to the unclean substrate. Experts estimate that re-doing collision repair work costs as much as four times the original estimate amount – a good reason to get it right the first time.
Liquid wax- and grease-removing solvents come in two basic types. One is a petroleum distillate, and the other is an alcohol base. Several manufacturers also make a soap-like paste that will clean the panel prior to sanding.
Prior to the National Rule regulating solvent emissions, most wax and grease removers were petroleum solvents. These do a great job of dislodging the typical surface contaminants from the old paint and floating them atop the solvent film long enough to be wiped clean. However, they’re 100 percent VOC because the liquid solvent evaporates completely into the air, so several regulated areas of the country prohibit solvent wax and grease removers.
Alcohol-based wax and grease removers also evaporate 100 percent, in many cases even faster than the solvent versions. But these removers aren’t VOCs because they don’t combine with sunlight to form smog. Alcohol-based or soapy paste cleaners also do a good job of cleaning the surface.
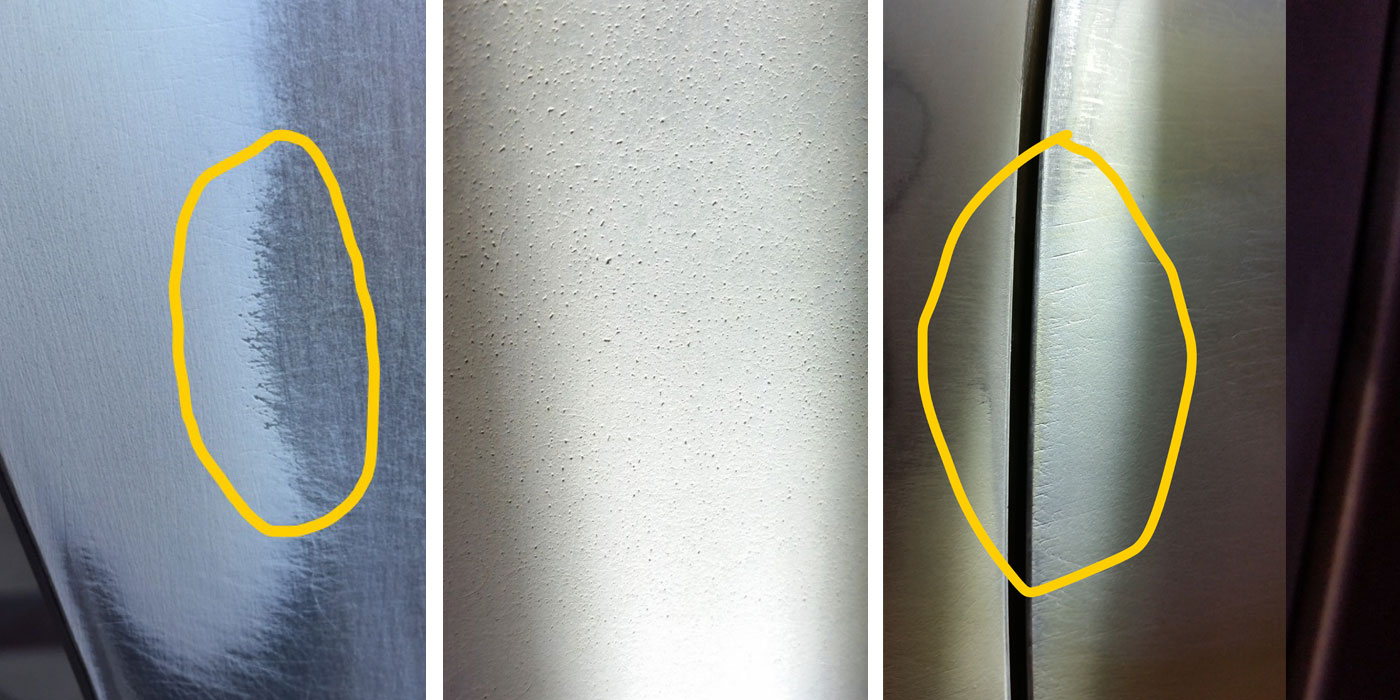
One tip that could save you some grief is to test the freshly wiped surface to see if it’s really clean and free of contaminants. How? Toss a cup of clean water onto the wiped panel. If the water sheets off, the panel is clean. If the water beads up, contaminants are still there. What can you do if you’ve wiped it down carefully and the water still beads up? Switch wax and grease remover types. If the solvent-based cleaner didn’t dissolve the mystery grunge, try the alcohol-based kind, or vice versa.
If you’ve tried both types of liquid cleaners and the soapy paste stuff and still can’t get the cup of water to sheet off the panel, whatever is on your car is pretty tough stuff. A likely culprit is a car dealer-applied paint sealant. Try using hot water and laundry detergent. (Yes, I know I said not to use laundry detergent. But in this case, you should.) With luck and some serious scrubbing, the spiffy magic enzymes you heard about in the detergent’s TV ad will break the bond between the paint sealer and the paint. Once the water sheets off, re-wipe the panel with wax and grease remover to remove the soap film the detergent likely left behind.
3. Sand the car. There are two kinds of adhesion: chemical and mechanical.
Mechanical adhesion is accomplished by abrading the old finish to rough it up, dramatically increasing the contact area. Chemical adhesion is when the new finish sticks to the old one. But for that to happen, their chemistries must be compatible and the timing in which they’re applied must be correct. For example, you could spray the Brand X clear over the correct Brand X basecoat the next day, but once the customer chips the finish, the clear is liable to peel off. Why? The base color got too hard and slick by drying overnight, and the clear didn’t get a chemical bond – even though you used the correct products. To avoid situations like this, follow the paint manufacturer’s directions, not just for the products but also for the time frames.
As you know from experience, thorough sanding (mechanical adhesion) is absolutely necessary to ensure good adhesion in auto refinishing. When the car comes back for a re-do, where’s the paint likely peeling? Around the door handles and windshield molding, where it was difficult to sand. Sanding effectively doubles the surface area, giving the new paint twice as much area to bond to. Imagine a straight line from point A to point B. Now imagine sanding that line with nice, sharp sandpaper. If you took a powerful magnifying glass, you could see each sand scratch, which would look like a mountain range. Though point A and point B are still the same distance apart, the new paint will flow down each mountainside and back up the next, doubling the surface area.
Sandpaper comes in a myriad of shapes and sizes but relatively few types. You can sort the types by their backing or their glue, but I believe the best way to understand their differences is to sort them by abrasive mineral.
Let’s start in the metal shop, where you need sandpaper that’s sharp and durable enough to rip off old finishes and to grind down body filler. The sharpest, most durable and most expensive (surprise!) mineral is ceramic. Each abrasive manufacturer has a brand name for its best ceramic abrasive mineral, and each makes a case that the formula they use to create it results in the sharpest, longest-lasting abrasive.
Also used in the metal shop are abrasives with aluminum oxide minerals. Aluminum oxide is made by mixing bauxite (hard clay) with coke and iron filings. They’re cooked together in a very hot electric arc furnace and then crushed into crystals. The crystals don’t have particularly sharp edges but are hard enough to last a really long time.
Once the job moves into the paint shop, most sanding is done to paint and primer, not body filler and bare metal. The most common sandpaper in the paint shop is made from silicone carbide abrasive. Mixing sand (silicone) and carbon and then cooking them in an electric arc furnace creates a very sharp but fairly brittle abrasive. It doesn’t have to last very long because the sharp abrasive quickly wears away the old paint finish.
Painters also work with finer grits (smaller mineral particles) than metalmen. Making 400-grit ceramic sandpaper doesn’t make much economic sense because the paper will likely load up long before the ceramic abrasive wears away.
Fancy dry sanding papers are often colored some snazzy color to distinguish them from their lesser brethren. In addition to their unique color, top quality dry sanding papers include a lubricant-like zinc sterate. These lubricants serve the same purpose as the water in wet sanding – they help slide the sanding residue out of the way so each stroke of the paper cuts into the substrate, not the accumulated sanding dust.
Finally, there’s wet sanding, which uses water as a lubricant and as a rinse to wash away the swarf. Swarf, a real word, means the residue from sanding and is composed of both the disintegrating sandpaper and the powdered old finish. Wet sandpaper has to be made using waterproof glue (duh) or the abrasive would crumble off the paper once it got wet.
To get the best results fastest and cheapest, metalmen should use aluminum oxide or ceramic sandpaper, and painters/paint preppers should use silicone carbide.
Once you’re finished sanding, re-wipe the surface with wax and grease remover to get rid of the swarf and any handprints. Be sure to wipe off the wax and grease remover while it’s still wet. Both petroleum and alcohol styles loosen the gunk from the surface and float it atop the wet film. But both styles must be wiped off with clean rags while still wet because if they’re allowed to evaporate, the gunk just settles back down on the surface.
4. Mask the car. Automotive masking tapes and masking papers are treated to resist penetration by the paint solvents. For example, if you used butcher paper to mask cars instead of wrapping meat, you’d find that the paint bled right through the paper and likely stained the old finish. The best automotive masking papers are not only treated, they’re coated on one side with either wax or plastic to prevent any solvent from seeping through them. Automotive masking tapes are also treated to resist solvent. They use special adhesives that will hold tight during painting but will release cleanly even after a high-temperature bake.
Many shops used to get by with cheaper masking tapes, until they bought a baking booth. It costs more money to make an adhesive that will stay on the back of the tape at high temperatures and not transfer off onto the car. But the extra cost for a roll of the good tape is small potatoes compared to the labor time to scrub off the tape tracks left by cheap tape.
The most popular method to cover cars is 12-foot-by-400-foot rolls of plastic sheeting. Other choices include 21- or 25-foot plastic bags and spray-on masking liquids, either dry or wet types.
All masking material costs pale in comparison to the labor time to apply and remove them. If the most expensive masking material (whatever that might be) works faster and saves time, it’s well worth the difference in price. For example, old newspapers are free but not only do they wick paint solvent right through them, they have to be applied and taped one sheet at a time. The paper is free, but the labor time will kill you.
5. Tack wipe. Tack rags are generally made from cheesecloth (loosely woven with space between the threads) and coated with shellac. The shellac is sticky and will hold dust particles firmly. As many of you’ve discovered, the paraffin wax in most basecoat paint doesn’t like the shellac on tack rags, and funky-looking “tracks” appear in the finished paint job. What are those? When the painter pressed the tack rag too firmly against the surface, some shellac was transferred off onto the substrate. Then, when the base color was applied, it flowed away from the shellac, causing the finger-shaped streaks to appear. In an effort to solve that problem, some tack rag manufacturers make special base/clear tack rags that contain a reduced amount of shellac, and special tack sponges use a sticky material that isn’t shellac-based.
A better idea might be to unfold the tack rag to its full size. Many tack rags are 18 inches by 36 inches, yet most painters never unfold their tack rags more than 6 inches by 12 inches. Not only is part of the tack rag being wasted, but it doesn’t do as good of a job. If you unfold the tack rag all the way and wad it into a loose ball (yes, it takes precious labor time), it’ll collect and hold more dust and be much less likely to leave tracks in the basecoat.
Whether you use cheesecloth/shellac, high-tech sponges or impregnated paper tack rags, be sure to tack off everything – not just the panel to be painted, but the masking paper surrounding the repair and the air hose to the paint gun.
6. Prime. Many painters still shoot primer with the worst paint gun in the shop. A bad plan. Primer can cost $100 a gallon
these days, and wasting that expensive product by having it spit and spurt through a barely functioning paint gun is false economy. One change might be to take your current topcoat HVLP gun, move it down to shooting primer and buy a new style HVLP gun for color and clear.
Recent advances in primers offer the painter more choices than ever. Hopefully you long ago switched to a 2K (two component = has a catalyst) primer that doesn’t shrink and swell like single-component primer does.
Primer technology continues to change rapidly. One new idea is to apply the primer surfacer with a roller, like you do wall paint. The roller is much smaller and has little texture in the nap, but it saves the painter all sorts of masking time. With no paint overspray drifting around, the labor time to mask and unmask is almost eliminated. There’s a trick to getting the roll-on primer smooth and the edge tapered, but a little practice works wonders.
It’s also possible to get your primer cured in as little as two minutes using a new ultraviolet-cured product. It requires a special UV curing light, but over the course of a month, the difference between two minutes dry time and 20 minutes dry time adds up to a lot of time saved.
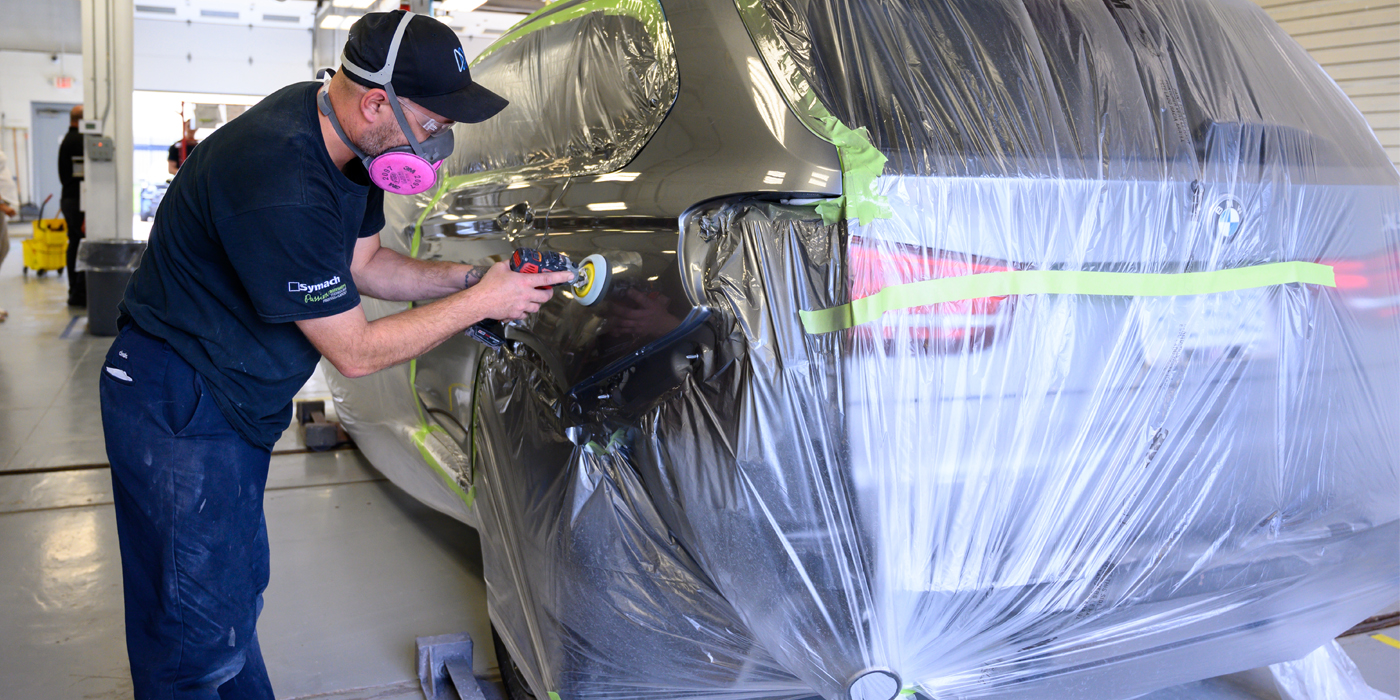
7. Block sand. The last step in surface preparation involves blocking down the primer perfectly smooth. Old time advice like, “Always use a sanding block to back up the paper” is still appropriate. I’m a huge fan of doing as much block sanding as possible by machine. The more hand sanding you do, the longer it takes. Buy enough different styles and shapes of power sanders that you keep hand sanding confined to the styling lines and odd shaped areas on the car.
Use a contrasting color guide coat (for example, speckle the primer with black lacquer aerosol spray paint) to point out the high and low areas. As you remove the guide coat when you sand, it’s easy to see when the surface is completely flat – much the same way 3D structural measuring is faster. When the hole in the frame lines up with the measuring pin, stop pulling. You’ve got it square. When the guide coat is gone, stop sanding. It’s smooth.

8. Listen to me – and Mom. Follow all the above recommended surface prep steps, don’t run with pointy sticks, softly close the screen door and both your customers and your mother will appreciate it.
Writer Mark Clark, owner of Professional PBE Systems in Waterloo, Iowa, is a well-known industry speaker and consultant. He’s been a contributing editor to BodyShop Business since 1988.