 During the course of a busy day, we often overlook important updates or new procedures for repairing a vehicle. Repair procedures related to the structural performance of a vehicle are critical to an estimator formulating a repair plan and a technician repairing the vehicle to factory safety standards.
Structural sectioning procedures have always been a “gray area,” triggering different opinions, repair techniques and identification. Manufacturers may publish position statements on repairing their vehicles’ structural components or may recommend specific sectioning procedures. Access to this published factory information is vital to the proper planning and repair of the vehicle.
Here’s an example of the manufacturer’s sectioning procedure for the front frame rail on a 2007 GMC Sierra 1500 4WD series pickup.
Service Information
Always refer to ALLDATA Collision for safety procedures, identification of material types, recommended refinish materials, removal and installation procedures. Always refer to General Motors for questions relating to applicable or non-applicable warranty repair information.
Application
2007 GMC Sierra 1500 Series 4WD pickup
Cautions
• Refer to “Approved Equipment for Collision Repair” caution in the preface section.
• Refer to “Collision Sectioning” caution in the preface section.
IMPORTANT: Perform all of the steps on both of the rails for complete module replacement.
Removal Procedure
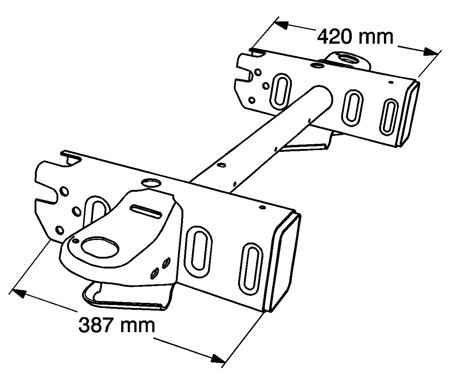
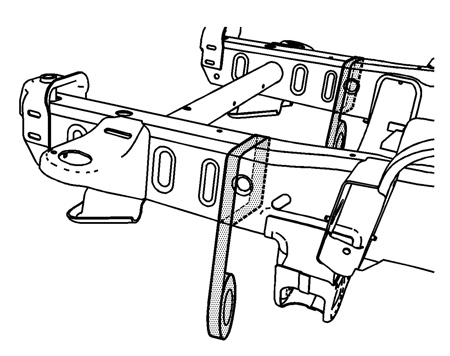
The re-designed frame assembly for the new C/K pickup and utility trucks is a mild steel, hydroformed frame assembly. A pre-sleeved replacement front frame service section, consisting of the left and right frame rail ends, body, mounting brackets and front connecting cross tube is available. Replacement bolt-on front bumper brackets are available and must be ordered separately (Figure 1).
1. Disable the SIR system. Refer to “SIR Disabling and Enabling.”
2. Disconnect the negative battery cable. Refer to “Battery Negative Cable Disconnection and Connection.”
3. Remove all of the related panels and components.
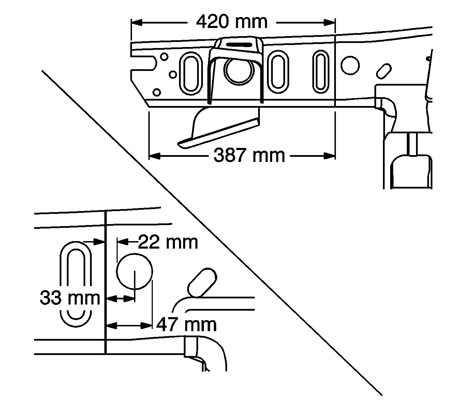
4. Locate and mark the sectioning location by using at least two of the measurements below for each frame rail (Figure 2).
• Top of the frame rail edge rearward 420 mm (16 1/2 in) (with bumper bracket removed).
• Bottom of the frame rail edge rearward 387 mm (15 3/16 in.) (with bumper bracket removed).
• Front edge of the gage hole forward 22 mm (7/8 in.).
• Center of the gage hole forward 33 mm (1 1/4).
• Rear edge of the gage hole forward 47 mm (1 7/8 in.).
IMPORTANT: Line up the masking tape with the tape edge facing the front of the vehicle on the sectioning location.
5. Apply masking tape completely around the frame rail next to the sectioning location as shown
(Figure 3).
IMPORTANT: The tape edge facing the front of the vehicle is the proper cut location.
6. Cut each frame rail at the front edge of the tape line using a reciprocating saw or equivalent, as shown (Figure 4).
7. Remove the damaged frame section.
Installation Procedure
1. Grind the existing frame rail seam to taper seam at a 45-degree angle.
2. Prepare all of the attaching surfaces as necessary.
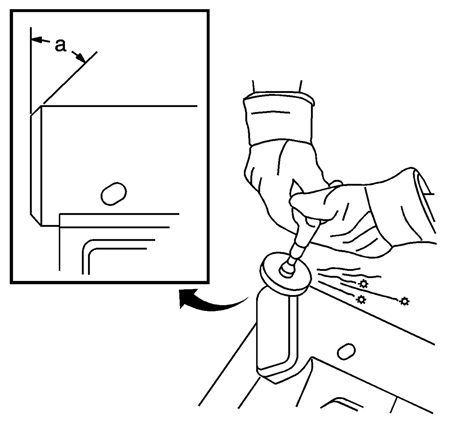
3. Apply the weld-thru primer to all of the welded surfaces (Figure 5).
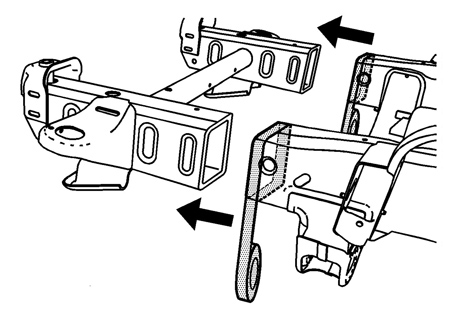
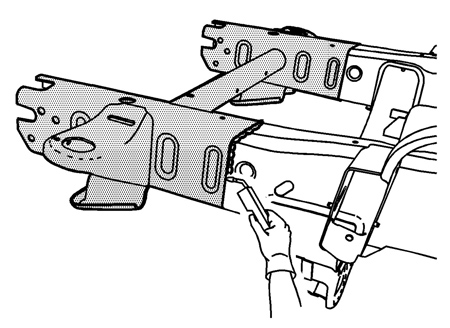
4. Position the service frame section to the existing frame and clamp in place (Figure 6).
IMPORTANT: Verify the frame measurements three-dimensionally to ensure proper position of the service frame.
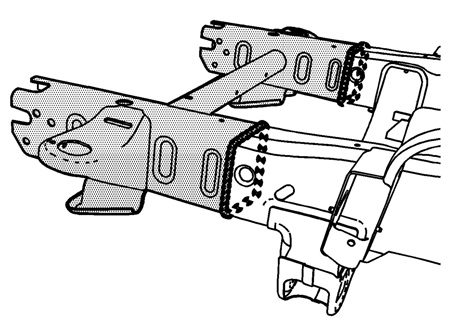
5. Continuous-weld the upper and lower horizontal joints threw each corner.
6. Continuous-weld the inner and outer vertical joints from corner to corner (Figure 7).
7. Clean and prepare all of the welded surfaces.
8. Install all of the related panels and components.
9. Connect the negative battery cable.
10. Enable the SIR system.
Dan Espersen is the ALLDATA Collision Program Manager. He’s a Gold Pin Member of the Collision Industry Conference (CIC) and holds an AA Degree in Automotive Technology. He has 17 years of experience in the collision industry and 17 years of experience in the automotive industry. © 2008 ALLDATA LLC. All rights reserved. All technical information, images and specifications are from the ALLDATA Product. ALLDATA is a registered trademark of ALLDATA LLC. All other marks are the property of their respective holders. GMC, General Motors and Sierra are registered trademark names and model designations of General Motors Corporation. All trademark names and model designations are being used solely for reference and application purposes.