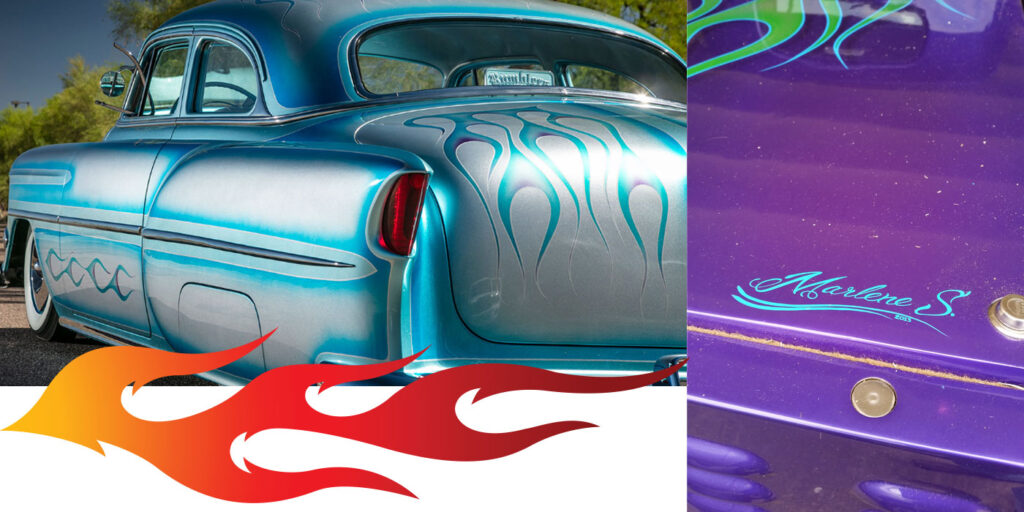
The history of paint as we know it in the collision repair industry has a fairly short timeline. The famous line by Henry Ford, “You can have any color of vehicle, as long as it’s black,” may or may not be true, but something we can be certain of is a single color on a production line is about productivity, not capability.
As a species, evidence shows we’ve been fooling around with color since paleolithic times. For my knuckle-dragging brothers, that’s the old Stone Age. Naturally, as tools were just being developed, materials for these colors were limited to simple organic origin, such as clay, pollen and ground roots. Fast forward, but perhaps not as far as one might imagine, and synthetic colors were developed, resulting from a complex mixture that included metals. Interestingly, Egyptian Blue is the first known synthetic color.

The first known synthetic color was Egyptian blue.
Man has always had a reason for the color chosen — Ford for productivity, Egyptian Blue symbolizing water and heaven, etc. But current OEM color choices are about sales.
You may be wondering why we’re looking at a little color history in an article on paint preparation. One of the reasons we’re able to see the vibrant colors Egyptians painted is because they prepped their substrate properly — and that is still required for longevity of the paint work.
History of Preparation
Can we determine with certainty the procedure the ancients used in their substrate preparation? No, of course not. However, by using reason and what we know about paint failures today, we can draw the conclusion that even way back then, the fundamentals were few. The techniques may have been many, but the fundamentals were few.
The Fundamentals
While there is plenty of overlap between preparing sheet-metal parts and plastic parts, we will not be covering plastic parts here.
Simmered down to the most basic and simple level, we have cleaning and abrading. Naturally, there is nothing simple in collision repair, so let us expand upon the basic premise. To ensure an accurate and swift paint repair, the fundamentals and peripheral tasks need to be done in a logical sequence:
- Reading the repair order (RO)
- Cleaning
- Inspecting
- Abrading
- Cleaning
- Inspecting
- Initial masking
- Inspecting
- Priming
- Block-sanding
- Inspecting
- Final-sanding
- Cleaning
- Inspecting
- Final masking
- Final cleaning
At first glance, all the cleaning and inspecting may seem superfluous, but remember: nothing is faster or more profitable than doing the job one time.
Additionally, the best time to address a flaw or issue of any kind is before advancing to the next task. And you must identify the item to be addressed, which means you must know what you’re looking for and what you’re looking at. Decide on the corrective course, then be intentional in the task — not just going through the motions. Do not abandon the goal of the task; achieve it before moving on.
Easier said than done? Not really. It may be helpful to adopt the Practice of Owning the Outcome (POO) mindset. Instead of saying, “Oh POO, I didn’t mean to …” in response to something not being to the quality standard of the shop, say, “It’s like that because I wanted it to be like that. It’s not an accident. I did that on purpose.” Own it.
Do we pretend a quality job is an accident? A fluke? No. We expect our work to be good and proper; that is our intention. Likewise, it’s reasonable to conclude that if the job is substandard, then it must have been on purpose. Perhaps we lacked intention of the task or the skill to perform it, or perhaps we just didn’t care.
I’m not suggesting we have complete control over everything — if a huntsman spider in Hawaii hitched a ride on a vehicle, only to expose itself on a freshly painted job, or a moth revealed itself in the clearcoat of a just-painted hood, well, there’s no way we can guarantee avoidance. However, most paint failures can be avoided by sticking to the fundamentals and being intentional.
With a plethora of training videos available from most of the paint manufacturers, as well as companies such as 3M, Norton, Carborundum, etc., there is really no excuse for not knowing how to properly use a product. Not everyone agrees on best practices, but most have some overlap. And remember: The techniques are many. Keep to the fundamentals. The following has been my roadmap for successful paint preparation.
Read the RO
Begin by reading the RO to ensure all that needs to be done is on the sheet, and that any additional work is noted as not all repairs are obvious. Let us not pretend we can guess what needs to be done.
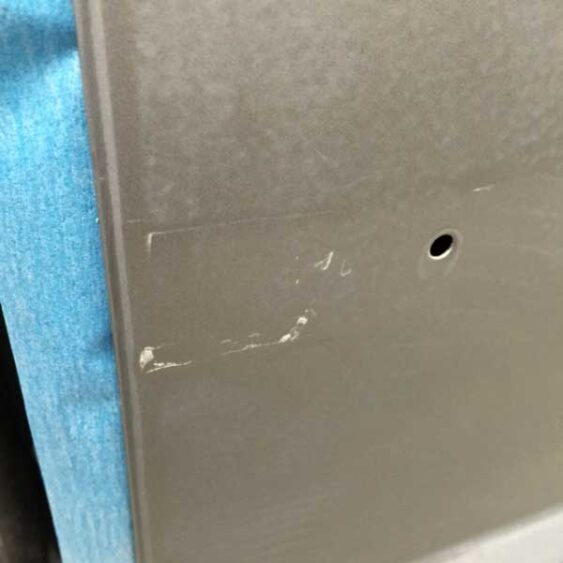
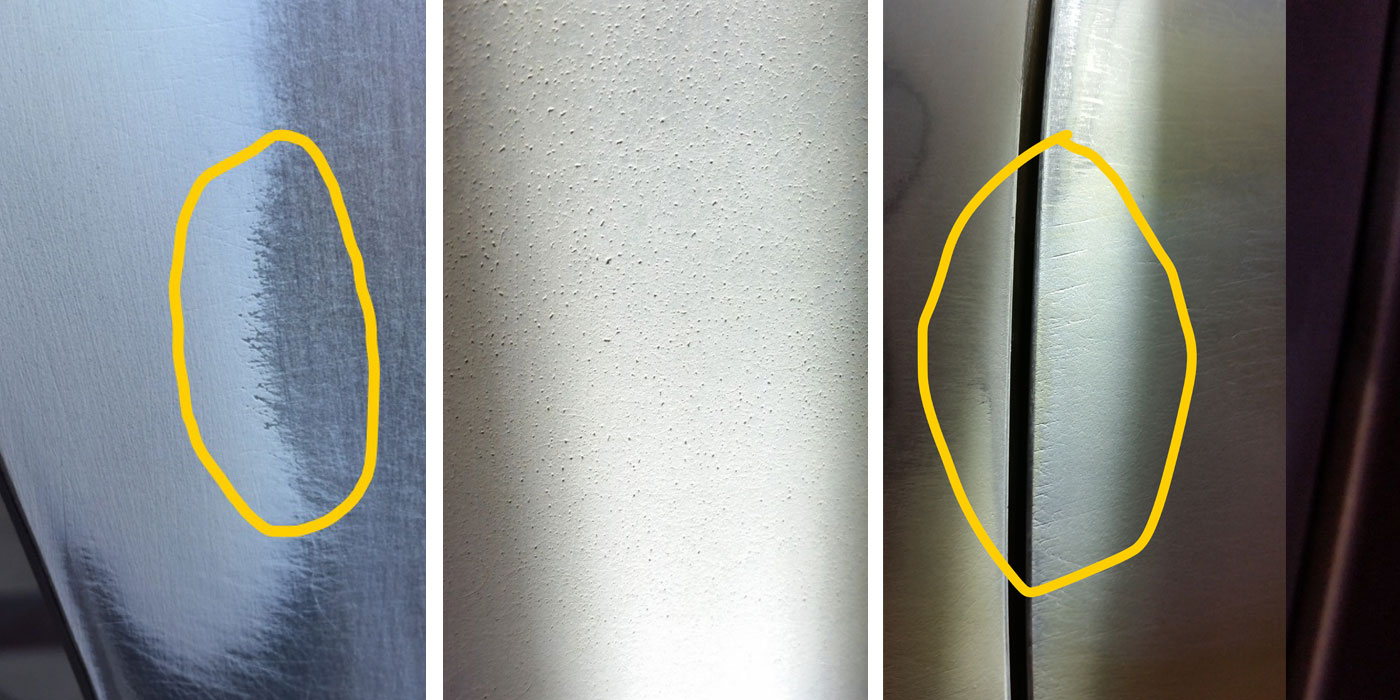
An example of inadequate cleaning; all adhesive should have been removed prior to sanding.
Cleaning
Presuming this repair is a mix of new panel replacement as well as a repaired panel, we start with blowing off the body filler with compressed air and performing a two-rag cleaning technique on the paint and blend panels, saturating one paper towel with cleaning solvent to wash/wipe and following it with a dry one. My preference is to first use waterborne cleaner, followed by a solvent cleaner. The first excels at removing organic contaminates and the latter at removing petroleum-derivative contaminates.
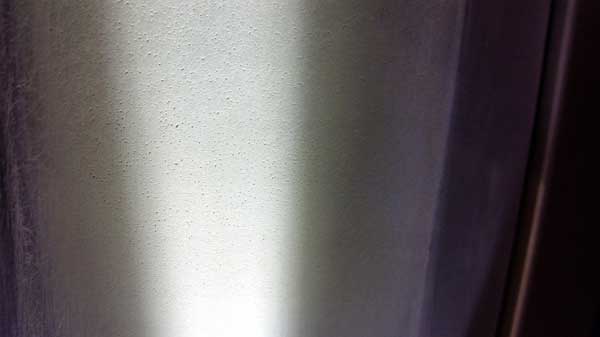
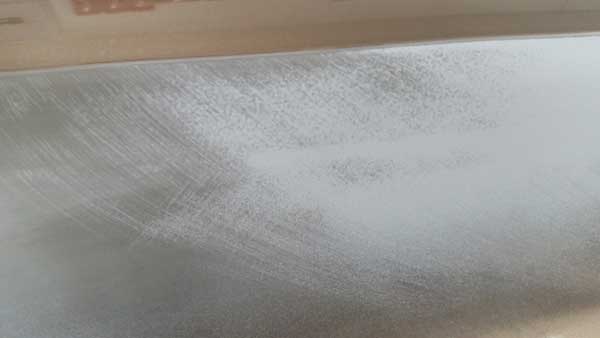
The side-light technique is great for revealing pinholes … as well as coarse scratches that need to be addressed prior to priming.
Inspecting
Inspect the body filler. Feel the body filler for the proper straightness or contour; if the work is acceptable, then move to a side-light-technique, looking for pinholes or overly aggressive scratches. If either are found, now is the time to address them. Don’t believe that the primer will fix them; that’s not the job of primer. Pinholes and scratches can be fixed in the paint shop with a putty of sorts or returned to the bodyman to address, depending on your shop’s protocol. Regardless of who corrects them, correct them before advancing. Also, inspect all blend panels for any missed damage that needs to be considered and look over the new panels for any dings or “box-burns” that have damaged the manufacturer’s e-coat.
Abrading
The body filler should not be spread over the edge of the existing broken paint film — sand scratch swelling will likely result from the practice. The filler should only be on the damaged metal, leaving the paint edge to be feathered out, approximately one inch per paint job. For example, if the only paint on the panel is factory, then an inch to feather the clear, color and undercoat is sufficient. You’ll need a two-inch featheredge if it’s been repainted once before and so on. The featheredge provides a gradual step to the substrate where the body filler has been applied; the purpose is to create a smooth bed for the primer to lay in. After application, the film-build over the repair is slightly above the existing paint film … and will need to be block-sanded level later.
I like 240 grit on an orbital sander for my featheredge; some like 220, while others want 320. The fundamental here is the one inch per paint job. Extending past the featheredge, step out the sanding with 320 grit paper, then 400 — still on the orbital — to ensure any primer overspray lands on a sanded area. When the sandpaper grit is 400 and below, do not jump more than 100 grit; don’t go from 240 to 400. This rule does not apply when the sandpaper is 400 grit and finer; for example, it’s okay to go from 400 to 600.
Some like to finish-sand the entire panel; others prefer the technique of priming first and finishing off the panel later. My preference is to prime now and then move to sanding replacement parts while the primer dries. But prior to priming, we need to clean again.
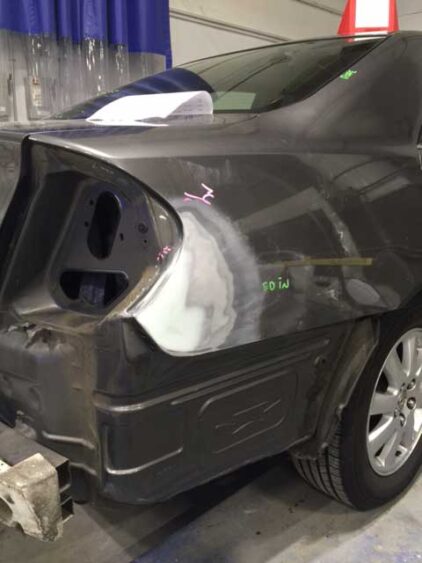
Here we have proper application of body filler directly to the substrate as well as a good featheredge. Unfortunately, the cleaning is lacking.
Cleaning
The purpose here is to remove all the sanding dust. Using compressed air, blow the repaired panel off, followed by the two-rag cleaning technique using waterborne cleaner. Apply the cleaner right over the body filler, but be fast about it; wipe it back off and then use compressed air again to facilitate the evaporation of any remaining cleaner. Failure to eliminate sanding dust or moisture prior to priming will obviously result in adhesion problems.
Inspect
Double check your work to ensure the featheredges are proper and everything that needs to be sanded has been sanded sufficiently.
Initial Mask
The purpose of this masking is to control the overspray from the priming operation. Do not attempt to control overspray with low air pressure at the spray gun. This leads to excessive texture, which leads to additional labor, material and time when sanding. It’s faster, easier and cheaper to mask now rather than clean overspray later.
Inspect
Double check to ensure there is no over- or under-masking.
Priming
One purpose of the primer/surfacer is to replace the missing paint film (which has been ground away to allow proper application of the body filler directly to the substrate). Another purpose is to isolate the body filler and give the topcoats something to adhere to. The paint itself is not designed to stick to bare steel, seal the body filler or even be applied to the featheredge — that is the job of the primer/surfacer. How many coats of primer/surfacer you use will depend on the type of primer/surfacer. Generally, a 2K urethane primer will need three coats while a UV primer needs two. Follow the manufacturer’s directions and, when required, use an etch primer where bare metal is exposed.
Do not rush the application of the primer but allow for the stated flash time between coats as directed. Failure to do so will likely result in shrinkage or adhesion problems later.
Block Sanding
Contrary to popular belief, block-sanding in the paint shop isn’t to straighten out the body work; that should have happened on the repair side with the bodyman. The paint shop shouldn’t even touch the body filler with an abrasive, and as mentioned earlier, the job of the primer is not to make up for deficiencies of the body filler. The bodyman should have block-sanded the filler to be straight and level with the substrate, where all the paint film has been ground back, exposing a “ring” of metal surrounding the body filler. The paint shop previously feathered and primed the “low spot,” which covers the repair and adds film-build to it in order to replace the thickness of the removed paint film. The finished prime-job should be slightly “fatter” than the surrounding panel — think “pitcher’s mound.” This “fat” primer is what we’ll block-sand.
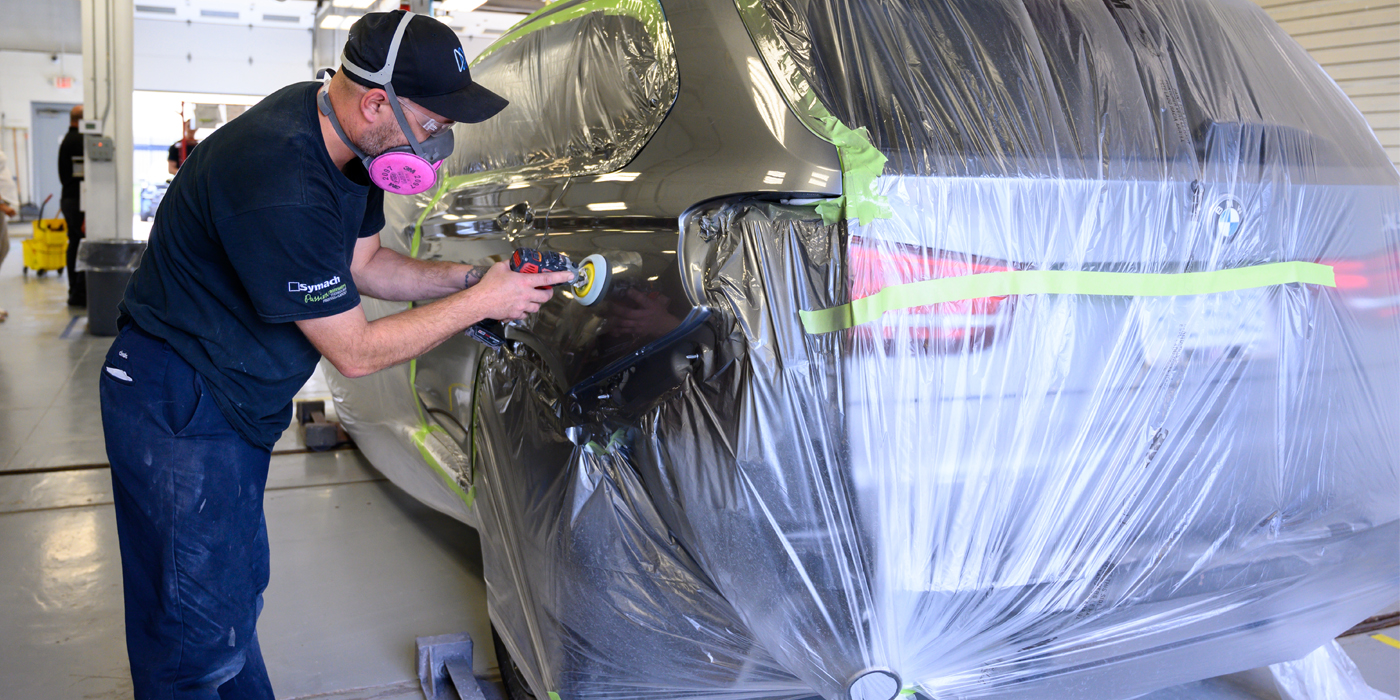
Powdered guide-coat reveals the crosshatch sanding pattern as well as the sanding progress.
Begin by applying a “guide coat,” which informs us of our progress as we sand. The sandpaper grit we start with is fiercely debated, but know that the final result will likely be in the 600-grit range for most current basecoat/clearcoat systems.
The grit you start with will leave a sand scratch signature that will need to be removed. You will step grit-to-grit — applying guide coat between each grit — removing previous sand scratches until you reach the final grit. If you begin with too fine a grit, then you fail to cut the primer flat and the result will be primer that is “wavy-smooth.” There is a learning curve here; as you sand, you must always leave enough material for the next grit sandpaper. By the time you’re at your final grit, you want the primer flat. The “pitcher’s mound” is gone, yet the primer has not been over-sanded, creating a low spot.
A quick word about guide coats: While spray-on guide coats are still in use, they do not compare to the efficacy of powdered guide coats. The powdered guide coat is better at revealing scratches and pinholes, and as a plus, it does not clog the sandpaper as fast as the spray-on variety.
Use the longest block that is practical for the size of the repair. Wrap your starting grit sandpaper on the block and, with a cross-hatch pattern, start block-sanding. Control your strokes and keep the sanding on and near the primer — no careless strokes a foot away from the repair. Once satisfied, apply guide coat, change sandpaper to a finer grit, and now block-sand out the previous grit’s sand scratches. Continue with this process until you’ve reached your final grit.
I like to start with 240 grit, followed by 320 grit, followed by 400 grit and finally 600 grit. I know many who like to start with 320 grit and some who like to finish in 800 grit. Remember the goal of the task: to sand the primer flat, finishing with a paintable grit.
Inspect
Blow the area off and inspect the edge of the primer for adequate sanding; there should be no “funny” primer edges, only a smooth, tapered edge. Also, double check that all aggressive scratches and pinholes have been eliminated.
Final Sanding
Now is the time to finish sanding the balance of the repaired panel as well as any blend or replacement panels. They all should be cleaned with the two-towel, two-solvent cleaning method described earlier.
Here again the grit selection comes up for debate when preparing blend panels; we need a sand-scratch signature that the clearcoat will adhere to and invisibly fill. You’ll likely see grits between 800 to 1,200 being suggested; it’s safe to say 1,000 grit will suffice.
Use an orbital sander with a soft interface pad and sand the panel as completely as possible, avoiding hard body lines and edges — we’ll hand-sand those areas with a gray scuff-pad or ultra-fine sandpaper. I don’t think it matters if you hand-sand first or run the orbital sander first, but some instructors are dogmatic about hand-sanding first.
Replacement panels will need to have a sealer applied prior to painting and, generally, a 400-grit scratch signature from an orbital sander is sufficient for final sanding on these parts. I still prefer to use an interface pad here to help avoid over-sanding the e-coat.
Additionally, replacement panels may have some e-coat damage that needs to be addressed, and if that is the case, I like 400 grit on an orbital sander with no interface pad — sand just enough to remove the defect. Leave as much of the e-coat as possible, as this is an excellent corrosion barrier for the steel. Any bare steel spots that have been created from removing the defects will need a shot of an etch-primer.
Cleaning
Blow all prepped panels off; I find it helpful to use a paper towel in conjunction with the compressed air. Again, use the two-towel and solvent method to further remove all sanding dust.
Inspect
With adequate lighting, scrutinize all panels. Ensure all edges are fully sanded — but not over-sanded. Now is the time to address anything you see that you don’t want to paint over.
Final Masking
The final masking will actually take place in the booth when a plastic car cover is stretched over the vehicle. However, for the sake of booth cycle time, we want to mask as much as possible before entering the booth. With today’s plastic car covers, which are directional and have one side that paint will adhere to, you can safely use them for the critical mask edge immediately adjacent to the panel you’ll paint. Still, it may be advantageous to use a paper critical edge, in some cases for increased efficiency, once in the booth. To get the most productivity out of the booth, you should aim for painting within 15 minutes of entering the booth. A word about masking paper: If using a waterborne color system, you must use a paper designed for it.
Final Cleaning
Your final cleaning solvent, prior to tacking off, will be dependent upon your paint system; use a waterborne cleaner with waterborne paint and a solvent cleaner with solvent paint. Use the two-rag technique, and follow up thoroughly with a tack-rag.
Understanding and being faithful to the fundamentals will likely get your paint job through the next Stone Age.