I hired Bernie because he represented himself as an authority in all that was needed in our business – even though I had no position that would be fitting for a being of his apparent superior knowledge and skill. He “needed a little money” since he’d just moved to our area to be closer to his mom in her later years. So I hired him, patting myself on the back for hiring such a knowledgeable person.
As knowledgeable as Bernie was, however, attention to detail was one of the traits that sometimes eluded him.
One summer day, our boss’ son, Matt, brought his four-wheeler to the shop, requesting a “special project” be done on it. He wanted some rebar welded into the nerf bars to keep his feet from slipping down and getting trapped as the earth speedily rushed past. Bernie took it upon himself to help Matt – figuring he’d gain a few of those brownie points we all could use more of. So Bernie proceeded to roll the MIG welder over to whip out this “special project.”
As Bernie was rushing around and preparing to weld the bars in place, I kept trying to get his attention. But Bernie brushed me off, assuring me that he knew what he was doing.
After he welded the bars in place, I asked if he was done. When he assured me that he was, I slapped the bars with my open hand and knocked loose the bar that was supposed to keep young Matt’s feet from hitting the ground.
Bernie looked up at me dumbfounded. I explained to him that the reason I was trying to get his attention earlier was to tell him to turn on the gas prior to welding the bars in place.
Bernie had made a mistake that many of us often do. Although he’d meticulously prepped the weld areas, he’d overlooked one thing – and that’s all that’s required to make any procedure go amiss. Luckily, in this case, the problem had been found before any damage was done.
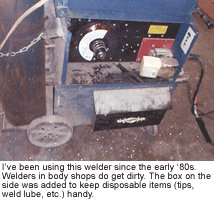
Once he saw the error of his ways, Bernie quickly cleaned the welds and proceeded to weld the bars in with the gas added – and made a safe addition to Matt’s four-wheeler. He got rid of the proverbial “weak link” and restored his reputation.
When it comes to MIG welding, leave any one detail undone, and it’ll compromise the whole repair. Don’t learn the hard way. The following tips will (hopefully) help to take the mystery out of MIG welding and to make your life in the body shop a little more pleasant.
Picking a Welder: Is Big Always Better?
Without a doubt, there are many types of welders out there, but the most user-friendly and versatile for the autobody repair technician is the MIG welder. Many other types of welders will weld certain materials better but, in my opinion, there’s no equal to the versatility and ease of use of the MIG.
Most of us started out with instructions on using the welder – instructions that went something like, “it’s easy. Just pull the trigger and get the feel of it.” And, although we might not want to admit it, for some of us, that was the extent of our formal welding instruction. Granted, this illustrates the ease of use of the welder, but even so, we should all have a better understanding of the welding process, starting with choosing a welder.
I know you’re likely thinking that I’m getting ready to tell you the magic combination here, but don’t get your hopes up. What works for me may not work for you. But I can tell you that, basically, what you need is something simple and that for 90 percent of what we do in the autobody repair business, you don’t really need a welder with a lot of output. I’ve seen technicians buy a little 110-volt welder and mount it on a creeper with a small bottle, giving them a handy, compact unit that will take care of about 90 percent of their welding needs. I myself prefer and own a little heavier unit.
The small units usually do a good job of welding light sheet metal, which we’re welding most of the time, but I tend to “push” a welder in order to get more production. And if you run a welder hotter, it reduces its intended duty cycle. If there’s one thing a bodyman is typically bad at, it’s waiting on anything – and waiting on a welder is no different.
The bigger welders typically have a duty cycle proportionately longer that enables you to weld longer without letting your welder cool. Ideally, you’d have the little compact unit for all the small quick jobs, and then when a larger amount of welding is required, you’d get out the big guns for the larger, heavier jobs.
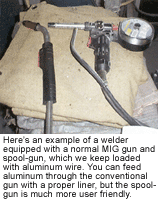
While we’re deciding what size of welder you want, we also need to think about the types of material you’ll be welding. Most of us weld high-strength steel and mild steel. There’s a trend in the industry, however, that’s convinced me to add aluminum welding capability to our list of needs. Still, in most autobody repair shops, we don’t need a high-production push-pull feed aluminum welder. We can get by usually by adding to our current welder -Êif it’s equipped to handle it – a spoolgun and another bottle for Argon in place of the 75 percent carbon dioxide/25 percent Argon mix we commonly use for steel welding. More and more units are becoming available for just such situations. You can leave steel in the main gun, flip a switch and change the bottle, and you’re ready to weld aluminum with the spoolgun on the same unit.
After weighing all the pros and cons, you ultimately need to decide which capabilities you think you should pay for in your particular circumstance. Some shops will get along fine with the simplest and most inexpensive welder available, while others feel the need for expanded capabilities – such as pulse timers and stitch settings – and maybe even multiple welders.
Go for a Test Weld
Once you’ve decided what kind of unit you need, sample several different units. I’ve found that most people will gladly let you try the unit they’re currently using. That way, you might be able to discover which welder and which features “feel” best to you.
When testing a welder, I often get two razor blades and butt-weld the sharp edges together to test the welder’s smoothness when welding light-gauge materials. A friend who has a farm supply store saw me do this and before he left, he procured several of the welded blades to put with his welder display to illustrate how thin of metal could be welded with “his” welders. It’s a good test, but be sure to try the welder in a situation similar to the heaviest situation that you expect to encounter. If you can find a friend with spot, stitch and pulse timers, try them too. I use the stitch setting often, but when I purchased my own welder, I didn’t see the need to spend the extra money to add a timer attachment.
I’ve found that some welders work well on one end of the spectrum but fail miserably on the other end. During a test weld is the time to find this out – not after you’ve spent too much or not enough money on a welder that won’t do what you need.
Now is the time to buy what you need. Spending too little here is just as bad as, or worse than, spending too much. As with most purchases in life, you’ll remember how well (or poorly) the unit works longer than you’ll remember the price. Buy what you anticipate you’ll need. No more, no less.
Once you have your welder, you’ll be thinking that you can’t wait until you need it. Just like all our new “toys,” we’re anxious to use them. I say, don’t wait until you need it. Use it on scrap, on anything you can, to make sure it’s set up and ready.
We recently started using a new welder in our shop, only to find out that it was plagued with problems feeding the wire when we needed it most. I believe it was all in the drive- wheel alignment and tension settings, but time will tell if that was our only problem.
Sometimes, it can take a while for potential problems to rear there ugly heads, but rest assured that the ugly heads will rear at the least opportune times. So get that much-needed practice, and test that new machine at the same time.
Practical Pointers
Earlier I touched on how little instruction many of us have gotten on welding. If you don’t enlist some professional instruction, I would implore you to at least get a welding manual that gives you a source when things go afoul.
I’m going to date myself here a little bit, but when I was a teenager in vo-tech learning autobody repair, we didn’t have a MIG welder in the shop. I spent weeks on end in a welding class holding a mild steel rod and a torch learning to join metal. Later, I begged an instructor to show me how to TIG weld so I could weld aluminum if needed. I had to learn to use the MIG later – in a shop environment. At that time, I enlisted the help of the local ag instructor at the high school for some pointers.
Now I won’t even try to pretend that I could teach you all the ins and outs of MIG welding in this article, but I will try to give you some pointers that should help you out.
- Get the surfaces as clean as possible (an often-overlooked step). This will make more of a difference than almost anything else I can tell you. Often, you’ll be working on painted and galvanized metal, and any contaminants that are present will contribute to porous, weak welds and excessive splattering.
- This is kind of a no-brainer, but check the chart that comes with the welder to get close to the setting needed for the thickness and type of metal you’re trying to weld. I usually find that about 25 cfh is a good starting point for your gas setting, although most specs call for about 20cfh. Adjust the welder up and down slightly from these settings on your practice materials that simulate the materials you’ll be welding on. Then practice, practice, practice. This can’t be overstated.
- Welding in the flat and horizontal positions will be very similar, although horizontal welds often need slightly less “heat” to keep puddle fallout to a minimum. You’ll typically use angles from 60 to 70 degrees on a fillet joint, all the way to 90 degrees on a butt-weld.
- Vertical welding can be a bit more challenging. You’ll usually use around 10 percent less heat with a vertical weld compared to a flat weld because of gravity’s effect on the weld puddle. When vertical welding, gun angle tends to work best in the 5- to 15-degree angle range. You’ll have deeper penetration on a vertical up weld, so if melt-through is expected, I typically use a vertical down weld to lessen the chance of melt-through.
- Overhead welding angles are similar to flat welding, just upside down. I usually like to lessen the heat on overhead welds, and I also tend to move faster to keep the puddle from falling. Gravity works in all positions, but in some positions, it seems to work against us instead of with us.
- Plug welds are probably the most common weld you’ll use, and they’re done by welding around the edge of the hole and then circling toward the middle, leaving a nice, little rosebud. When doing verticle plug welds, try to use gravity to your advantage. I usually weld either up or down each side – depending how much penetration I’m after – repeating this pattern until the hole is filled.
- When welding aluminum, remember there are many different alloys in many types of aluminum. For example, a high magnesium content will make the welder want to burn the metal when compared to some other alloys. Remember that “aluminum” isn’t a definitive word. Also, most aluminum alloys will melt at approximately 1,220 degrees and form an aluminum oxide coating when the molten aluminum hits the air. The aluminum oxide coating helps to protect the aluminum from corrosion, but it takes about three times as much heat to melt as aluminum. Restarting an aluminum weld has some added challenges that need to be considered.
The Wonderful World of Welding
With experience, you’ll learn to vary the voltage and amperage settings, along with gun technique – such as weaving to flatten the weld or to fill gaps. I’ve spent hours using the stitch setting to weld closed the fender-to-door gaps on stock cars. Other times, I’ve switched to heavier gauge wire in order to use the MIG on the other end of the spectrum for fabricating frame sections. In the typical body shop, a 10-pound roll of wire seems to last forever. I have a friend who was a production welder, however, and he typically used 50 pounds of wire in an average day. He was good. He also had lots of practice.
And that’s what it comes down to.
No matter how many articles I write about welding and no matter how much textbook welding you learn, the best way to get a feel for welding is to just do it. Practice does make perfect.
Writer Keith Combs is the body shop manager at Bill Roberts Chevrolet in Bolivar, Mo., and a GM/ASE Master Collision Repair/Refinish Technician of the Year. He’s been in the collision repair industry for 23 years.

