 To me, a car has always been a thing of beauty – the bodylines, the sparkle of fresh paint, the sound of a finely tuned power plant, a glowing instrument panel, chrome shining in the sun and the feel of leather as you strap yourself into the driver’s seat.
All of this conjures up images from years ago behind the wheel of many muscle cars. The first time I hit the gas in a four-cylinder front-wheel drive tin can, I was more than disappointed. Give me a big ol’ V8 and let me loose!
Fast-forward to 2014. While the 2015 Corvette Z06 will put out a whopping 620 horses, there is generally more concern today for miles per gallon than horsepower. Punch is most likely provided by turbo chargers sitting on four-bangers. Engines and other vehicle technologies are a space age away from the vintage GTO, Barracuda, Daytona, Cobra or anything ending in SS.
Decline of Steel
Besides power plant technology, a fundamental change is happening in what our cars are made of and how they’re made. I’m talking about an acceleration (pun intended) in the decline of steel body panels.
Ford recently shook things up when it announced its new lineup of all-aluminum F-series pickup trucks. Plus, the 2015 Mustang will sport aluminum fenders and an aluminum hood. The new F-150s, with aluminum bodies on steel frames, will weigh in about 700 pounds lighter than current models.
Of course, aluminum is not entirely new to the collision industry. The 2014 Corvette has an aluminum frame, and high-end vehicles such as Audi and Jaguar currently feature extensive aluminum components.
I’ve spoken to many shop owners who are reluctant to invest in aluminum tools and equipment, saying, “We don’t work on ‘those’ types of cars.” They’re referring to the high-end luxury vehicles, but even mainstream cars like the Prius integrate aluminum panels into some models, so you know it’s only the beginning.
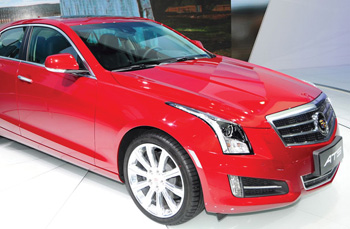
2013 Cadillac ATS RWD
Here’s part of a procedure from GM for replacing the aluminum front wheelhouse on a 2013 Cadillac ATS. This is not the entire article, which includes both full and partial replacement. For the purposes of this article, only the portion of the procedure dealing with partial replacement is included.
NOTE: The front wheelhouse panel is cast aluminum and rivet bonded to the front lower frame rail (ultra high strength steel) and hinge pillar upper extensions (dual phase steel). The front wheelhouse is serviced as a complete assembly that includes the hinge pillar upper extension, which is rivet bonded to the front wheelhouse panel.
NOTE: Partial replacement of the front wheelhouse assembly can be done by replacing only the front wheelhouse panel (cast aluminum). The front wheelhouse panel will need to be separated from the complete wheelhouse service assembly and replaced using adhesive and rivets.
NOTE: Proper alignment of the wheelhouse assembly is important. The use of three-dimensional measuring equipment is recommended when installing the part.
- Disable the SIR system and then disconnect the negative battery cable.
- Prior to applying adhesive or welding, fit the wheelhouse assembly to the structure and check for proper alignment.
- With the part properly located and aligned, mark the locations for the rivets and welds recorded from the original part and drill the holes for the rivets.
- Remove the part from the vehicle to clean and prepare the surfaces for bonding and welding.
NOTE: Leave the Elpo-coating on the adhesive bonding surfaces of the service part to allow additional protection of the aluminum from galvanic corrosion. - Scuff sand the bonding surfaces on the service part to remove the gloss of the Elpo-coating.
- Using a grinding disk or equivalent, prepare a bare steel surface on the bonding areas of the vehicle structure.
- Clean and prepare all welding surfaces.
NOTE: Refer to the adhesive manufacturer’s recommendation for specific application and curing recommendations. - Apply a bead of adhesive to all bonding surfaces on the vehicle structure and service part, per the adhesive manufacturer’s recommendations.
Completely cover all bare surfaces with the adhesive. - Using a small brush, spread a coat of the adhesive to cover the entire adhesive bonding surface to ensure proper corrosion protection.
NOTE: Do not allow the adhesive to cure off the vehicle, prior to installing and aligning the part. Refer to the adhesive manufacturer’s recommendations for specific cure times. - Apply a bead of adhesive to the mating surface of the service part, per the adhesive manufacturer’s recommendations. NOTE: Do not pull the panels apart after they’re joined together. Slide the panels against each other to realign the panels, or proper joint strength may be affected.
NOTE: Proper alignment of the wheelhouse assembly is important. The use of three-dimensional measuring equipment is recommended when installing the part. - Install the service part to the vehicle structure and check for proper alignment.
- Install the rivets along the bonding joint at the original locations. Refer to the electronic parts catalog for the recommended rivets.
- Weld the service part at the original weld locations, as necessary.
- Install the front tie bar attachment bracket, front outer upper rail and upper outer rail reinforcement bracket.
- Clean all welded surfaces.
- Apply the sealers and anti-corrosion materials to the repair area, as necessary.
- Paint the repaired area.
- Install all related panels and components.
- Enable the SIR system and then connect the negative battery cable.
Information Rules
Technology is moving faster than a ’70 Plymouth Hemi ’Cuda over a
quarter mile. The point is, of course, that you need solid OEM
information to estimate jobs and safely repair collision damage these
days.
So, when you’re pining for a hot Chevelle SS, Charger or Boss 302, just remember that the technically advanced (and much safer) cars of today will be symbols of the good ol’ days for a new generation. And as far as future vehicles go, who knows what they’ll be made of. Not me!
NOTE: This repair/service information is excerpted from information published by the
vehicle manufacturer, and is intended for the purpose of promoting OE collision repair information to trained, professional technicians with the knowledge, tools and equipment to do the job properly and safely. Before attempting any repairs described, refer to the complete article in ALLDATA Collision S3500. It’s recommended that these procedures not be performed by “do-it-yourselfers.”
Karl Kirschenman, ALLDATA collision product manager, holds a bachelor of science degree in communication. He has more than 10 years of experience in the collision industry.
© 2014 ALLDATA LLC. All rights reserved. All technical information, images and specifications are from ALLDATA Collision S3500. ALLDATA and ALLDATA Collision are registered trademarks of ALLDATA LLC. All other marks are the property of their respective holders.


