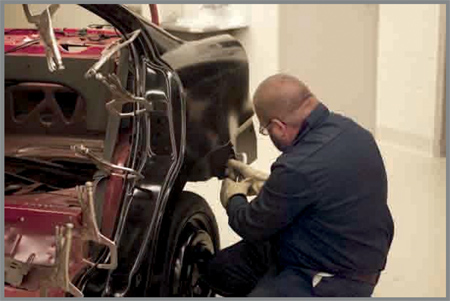

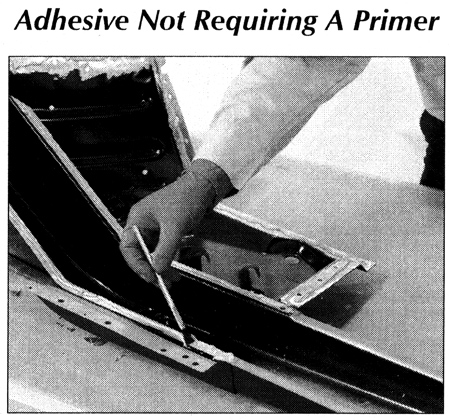
Adhesive bonding is a part of automobile construction today and therefore a serious technique that must be properly adhered to if a successful repair is to be achieved. (Did you like that? “Adhered” to? Well, I thought it was funny anyway.) But know that there’s no one specific process to use each and every time. One automobile manufacturer may want you to use a specific adhesive and prepare the bond area in a certain way, while another might have a completely different procedure and still another might not want you to use adhesives on its vehicles except for door skins. And the adhesive manufacturers are no different – one may want you to remove the e-coat, including the zinc coating from the bond area, while another might want you to scuff the e-coat and wax and grease remove the bond area.
Some manufacturers are very specific and state their position exactly. Daimler Chrysler, for example, states that it doesn’t recommend adhesive bonding alone on any major panel on any of its vehicles. Now wait a minute. I’ve taken off plenty of quarter panels on Daimler Chrysler cars, and they had plenty of adhesive applied to them. Yes, that’s true, but it was in conjunction with STRSW (Squeeze Type Resistance Spot Welding), a process called “weld bonding.” Ford has much the same policy.
My point is that adhesives are not a “carte blanche” replacement for welding. But when used in conjunction with welding, they can provide a better repair than either welding alone or adhesives alone. The reason is that the “holding” stress is applied more evenly and uniformly to the entire bond flange than just one fastening method or another would be on its own. It makes sense when you think about it in mechanical terms.
C’mon, Feel the Noise
What the heck is he talking about now? Let’s go back to that mechanical way of thinking about things for a moment. Imagine a quarter panel that’s only spot welded on. Tap it with a pencil, like David Letterman does to his desk. Hear that echoing, resonant sound of the vibrating sound waves coursing through the metal? Now imagine the same panel only with adhesives and STRSW (weld bonding) around the entire attaching surface. OK, now drum on it again with that pencil. Those sound waves really sound blunted and dead, don’t they? So weld bonding would have a dramatic effect on quieting the road noise in a vehicle, wouldn’t it?
There will always be those overzealous salespeople who will extol the benefits of their products far beyond the intentions of the companies they represent. And there will always be repairers who will refuse to read the recommendations of either the automobile manufacturer or the adhesive maker and perform whatever method is the easiest and quickest. These are the same people who will blame the product when it fails and then denigrate the industry as a whole for good measure.
In the past (and I go back 40 years), dreamers were trying to figure out a way to avoid welding the sail panel of a quarter panel to reduce the distortion and finish time. Single-sided spot welding, which was highly recommended by welder salesmen, was tried. Recently, one European car manufacturer recommended rivet bonding the sail panel with countersunk rivets and adhesives on their expensive aluminum-intensive vehicle. Both of these methods then require an application of plastic filler to finish, but when “Old Man Sun” hits that sail panel, a bond line appears where the lap joint was made. History does repeat itself.
So, for those of you who want to know what this has to do with adhesive bonding, here it is: There’s no real need for you to duplicate these two previous failures with a third one. Do not adhesively bond the sail panel of a quarter panel and then cover it with plastic filler … reinforced or not. Weld it solid. Now I feel better. If it saves one shop from a comeback or one customer from losing trust in her repairer or even our industry from receiving another black eye, it was worth it.
Failures and Types
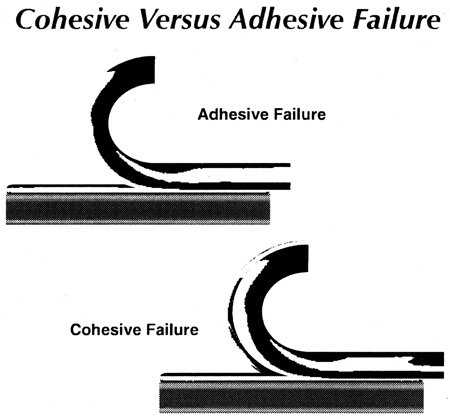
There are two types of failure relating to adhesives: adhesive failure and cohesive failure. Adhesive failure is where the adhesive pulls away from the surface or substrate. A large factor here is operator error. An improperly prepared flange, contaminants on the surface or improper bond line thickness can all (with other reasons) lead to an adhesive failure. Cohesive failure is where the adhesive itself pulls apart. A good image that represents this is a cotton ball being pulled apart. Some reasons for this are: expired shelf life of the adhesive (too old), trying to speed-cure an adhesive with heat when not recommended, or lifting a bond panel after setting instead of sliding, which introduces air bubbles into the adhesive and thus weakens it (Diagram 1).
There are three basic types of adhesives commonly used in the repair industry: epoxy, acrylic and urethane. Epoxy and acrylic are two-part systems, while urethane is a one-part structure much like many bonded glass adhesives. Each have different characteristics and recommended procedures, which is why you just can’t chuck a tube of glue in your squeeze gun and go to work. If you do that, your exposure to failure is going to be a lot higher than if you actually read the technical service information that comes with the adhesive. For example, acrylics cure faster than epoxies or urethanes. This could affect the time you have to set a panel. Heating an acrylic adhesive to speed its cure can weaken and degrade it. So know what you’re working with and know its limitations and characteristics.
Work Time/Wet Time
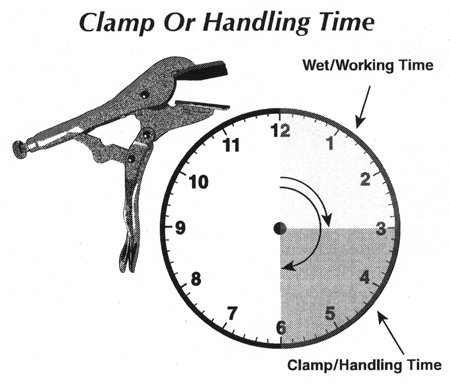
No, I’m not talking about retiring to the pub after an eight-hour shift. What I’m referring to is the amount of time you have to spread or tool the adhesive and attach the component parts together after you apply it. This work time or wet time will vary depending upon the size of the part (bond area) and temperature (Diagram 2). Because of these variables, many adhesive manufacturers make two or more choices available when it comes to panel size or cure time as it relates to what you’re attempting to accomplish. If you have a large part with a lot of bond area, you’ll want to use a slower-curing product.
Notice Diagram 2, which identifies an ideal working temperature of 75 degrees F. The higher the temperature is above 75 degrees Fahrenheit, the more the work time will decrease. The lower the temperature is below 75 degrees, the more the work time will increase. As a rule of thumb for calculating work/wet time, figure that for every 20 degrees Fahrenheit increase in temperature, your work time is decreased by half. For every decrease of 20 degrees, your work time is doubled.
Most adhesives are engineered for a relative humidity of 50 percent. Use the manufacturer’s technical service information to accurately determine which adhesive to choose and how much time you’ll have to accomplish the job.
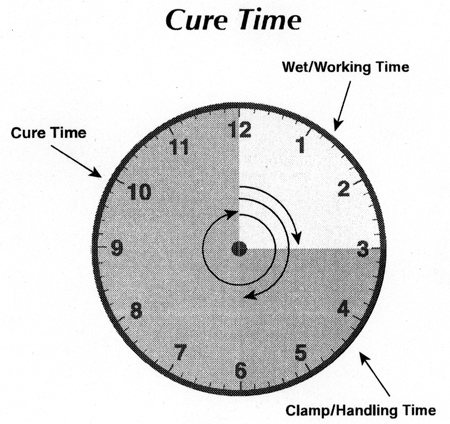
Two additional times that should concern you are clamp time and cure time. The clamp time is the amount of time that the parts should be held under pressure. The cure time is the amount of time before the adhesive is fully set (cured) and the vehicle can be significantly moved or returned to service. By “significantly moved,” I mean lifting the vehicle on a hoist or jack or driving it on any uneven surface (like around the corner or down the block into the paint booth). Temperature is also a factor with clamp and cure time.
Once again, take the guesswork out of this equation and look at the technical service information. While you’re there, verify whether you can use heat to enhance and speed up cure time (Diagrams 3 and 4).
Preparation of the Bond Area
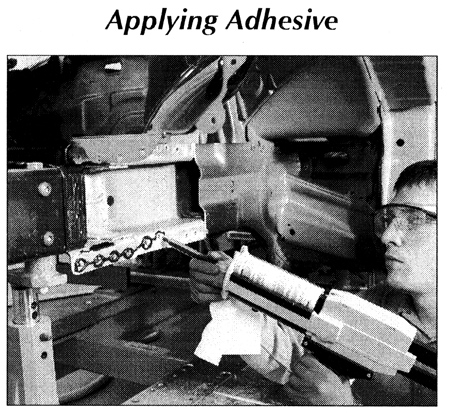
Some adhesives have corrosion rotection features built in, which will often require removal of the e-coat off both the existing and new parts. This is important because these adhesives depend on the bare abraded metal surface to achieve a strong bond. Also, it’s important to completely cover all bare metal (Photo 5) with adhesive to prevent the development of any corrosion (rust) that could seriously compromise the bond area. A good way to achieve this is to apply a thin bead of adhesive to each part and then spread it out completely and evenly, covering all bare metal. Then, apply an appropriate-size bead of adhesive to one of the parts. Assemble the parts, align without lifting and then clamp.
Another brand of adhesive will require an application of corrosion- resistant primer to any bare metal in the bond area and, when cured, scuffing and degreasing the surface before it can be applied. Always refer to the adhesive manufacturer’s technical service information for exact preparation requirements.
When applying adhesives, always apply in a continuous bead without voids or gaps. If holes are involved in the bond area, make sure the bead surrounds the holes to seal off any gaps or leaks (Photo 6).
To achieve the maximum strength the adhesive has to offer, the bond-line must have the proper thickness. If the adhesive is too tightly clamped, the bond-line can be too thin, which will compromise the bond’s strength. To prevent this from happening, some adhesive manufacturers have included glass beads in their formulas.
However, other manufacturers require shims in the bond-line area. This is because their adhesives don’t contain the glass beads, and the shims allow clamping without excessively thinning the bond-line. To verify the proper bond-line thickness, review the technical service information for the adhesive you’re using.
Apps and Tips
Some manufacturers use proprie- tary guns that are useable with their product only. If the adhesive you’ve chosen is one of those, it will also be necessary to obtain an applicator gun. Be aware of this. I’ve been sold adhesives by salesmen who forgot to mention their product required a certain applicator gun that would take four days to get. This has a tendency to cause stress, which I don’t like. And nobody around me likes it either.
The mixing tips, sometimes called auger tips, can be specifically designed for just one adhesive but also fit on the cartridge of another product, like seam sealer or flexible foam. Here’s the deal: These tips are different lengths designed to properly catalyze specific products. Do not use another mixing tip from a different product, even if it does fit the cartridge. The consequences could be an adhesive that never cures.
Some automobile manufacturers use urethane to bond the top panels of their vehicles onto the structures, which is different than most of the panel-bonding adhesives on the market. Most urethanes are one-part, while acrylics and epoxies are two-part. No matter, but just be aware that the processes have differences. The urethane process for these top panels is similar to the windshield and backlight process in most automobiles. The top can be removed by using a cutting process and tools similar to the bonded glass removal process. Always follow the automobile manufacturer’s recommended procedure. Most will want you to prepare the existing bed of urethane in a specific manner, which includes trimming the bed to a consistent height just prior to the application of the fresh urethane adhesive.
Coating of any bare metal with corrosion-resistant primer before the application of the adhesive is another requirement. Anchoring plug welds in each corner of the top of the structure is a usual requirement. New panel preparation will require degreasing with a certain solvent like isopropyl alcohol that’s compatible with urethane adhesives.
Clean Up Your Mess
When working with adhesives, I’ve always found it better to clean the excess up while the adhesive is still wet. It’s much easier and quicker. The easiest way is to remove as much excess as you can by using a putty knife and dry rag before ever using solvent on a rag. Never douse solvent directly onto adhesive while it’s wet because it can be absorbed into the bond area and compromise the bond.
There’s a little more to using adhesives than just gluing parts together, but knowledge is power. For more of it, you might be interested in taking the following I-CAR courses: ADH01 (Adhesive Bonding), PLA01 (Plastic Welding Repair), PLA02 (Plastic Adhesive Repair), EXT02 (Welded and Adhesively Bonded Panel Replacement) and WCS04 (Squeeze Type Resistance Spot Welding – Weld Bonding).
Mike West, a contributing editor to BodyShop Business, has been a shop owner for more than 30 years and a technician for more than 40 years. His shop in Seattle, Wash., has attained the I-CAR Gold Class distinction and the ASE Blue Seal of Excellence.
18 Steps to Adhesive Bonding
1. Remove the damaged panel. If the panel was previously bonded, cut away the inside area of the damaged panel but leave a two- to three-inch strip of the panel bonded to the vehicle. Apply heat to the panel’s exterior and pry or peel the panel off the vehicle as the adhesive softens.
2. To avoid grinding any contaminants into metal surfaces, use adhesive cleaner to clean all areas of the replacement panel and the portions of the vehicle that will be bonded.
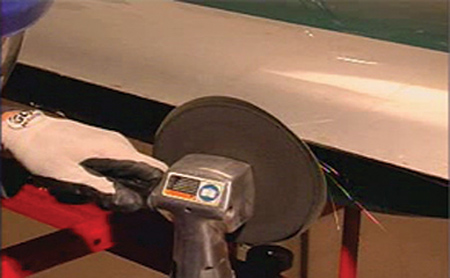
3. In the parts of the replacement panel that will be bonded, remove the e-coat using an appropriate disc. These discs can also be used to remove primer, paint and corrosion from the inner structure of the vehicle. If bonding a door skin, the e-coat does not have to be removed, but the area that will be bonded must be scuffed. Since the flange will be hemmed later, any potential e-coat failure will be overcome.
4. Grind off all exposed welds or raised metal on the vehicle that could prevent the replacement panel from fitting well.
5. Straighten all metal surfaces that will be bonded.
6. Obtain enough clamps of the correct type to hold the replacement panel in place during curing. Sheet metal screws also may be used in areas that are non-cosmetic or where there is not enough space to place clamps.
7. Dry fit the replacement panel and clamp it in place. It’s very important to a obtain good fit and alignment. Remove the panel from the vehicle.
8. If the panel must be cut or reshaped in order to fit, make those adjustments then confirm the panel fits well.
9. Use adhesive cleaner to re-clean all areas of the replacement panel and vehicle inner structure that will be bonded.
10. If any areas need to be MIG welded, they should be sprayed with weld-thru coating at this time. STRSW can be done through panel bonding adhesive so weld-thru coating isn’t needed in those areas.
11. Apply the adhesive to the appropriate areas of the replacement panel and vehicle. Do not apply adhesive to areas that have been sprayed with weld-thru coating.
12. Spread the adhesive with a spreader or acid brush to cover all bare metal surfaces.
13. Place a second bead of adhesive in the central flange area of either the replacement panel or the vehicle’s inner structure.
14. Apply seam sealer to intrustion beams or roof bows for flutter prevention. This will prevent road noise or vibrations from occurring in the interior of the vehicle.
15. Place the replacement panel on the vehicle and slide it into the correct position. Do not lift the panel because air pockets could form in the adhesive between the replacement panel and the vehicle.
16. Clamp the panel into position. Clamps should be spaced closely enough to achieve proper fit and adhesive squeeze-out.
17. Place sheet metal screws in non-cosmetic areas or spaces where there is not enough room to use clamps.
18. Remove excess adhesive from the outside edges of the seams.
Courtesy of 3M Bondo Corporation.


