Over the last 10 years, I’ve heard many remarks alluding to the demise of the oxyacetylene torch. This astonishes me, considering I’ve always worked with this reliable old standard. Upon reflection, I can’t imagine a real shop without one. I know there are probably shops out there without a gas welder setup (oxyacetylene), but those shops are probably the same ones that sublet glass work and airbags, don’t repair plastic bumper covers, don’t repair aluminum, etc.

One Versatile Tool
I’m on the advisory board of one of our local collision repair training programs. The school where the training is conducted invited a group of local outside “experts” to tour its facility and give impartial feedback on how to improve the program. One of the suggestions was to surplus the two gas welders the program owned.
I reviewed the list of experts and found two shop owners (neither one a technician), an equipment supplier and an insurance adjuster. Not a single one had a hands-on technical background – and they were making suggestions on how to improve the program! I’m afraid that this isn’t the exception either.

I asked our instructors on they felt about the experts’ suggestions. They told me that they used the torches daily to facilitate removal of a rusty nut, release a bonded panel, warm up some heavy undercoater in order to more quickly and efficiently remove it, or cut a piece of metal to make a pull plate. In short, they were completely against surplusing them because of their versatility.

I was at an ASE workshop recently which, incidentally, is where the questions for the ASE tests are developed. I devised a question regarding heat shrinking body metal, which set off a half-hour debate. An “ivory tower” type from a large company told me that he got nervous every time he saw a tech approach a car with a torch in his hand. Wake up, buddy! This has been going on for more than 100 years. It isn’t some wacky, hybridized, whatchamacallit

thing with no history behind it. It’s been part of the collision repair industry from day one, so let’s not get so hasty to throw it out the window. It’s still an incredibly useful piece of equipment that can add versatility to any shop.
Can you operate a collision repair shop without an oxyacetylene welder? My guess is that you could, but you’d definitely be limiting your capabilities. Given the choice, I’d rather be more capable than less capable.

My goal here isn’t to convince you that oxyacetylene welding is a better way to weld modern vehicles or even older vehicles than MIG (Metal Inert Gas) welding. On the contrary, it isn’t, but the gas welder used as a supplement to MIG makes a dynamic duo that gives strength and depth to your capabilities.
Metal Finishing
Any metal finisher will tell you that the use of controlled flame heat is crucial to the metal finishing process. What is metal finishing? It’s the repair of body metal without the use of plastic filler. It’s fast and doesn’t introduce a foreign product into your repair process. Note an example of the process in photos 1-5, which show how to fix a low spot in a rear door.
The procedure:
1.Identify a shallow low spot.
2. Remove paint around the dent with 80 grit sandpaper on a grinder.
3. Install a small tip on your torch. Set your regulators at 5 to 7 lbs. for acetylene and 12 to 15 lbs. for oxygen. Ignite the torch by cracking the acetylene knob on the torch and providing a spark to the tip. Once lit, add air (oxygen) and gas (acetylene)

until you have the sharpest pointed flame possible. This will be an oxidizing flame because the center cone of your flame will be highly feathered out to a sharp point and allows you more control with the heat. This is a soft flame.
4. Apply a small amount of heat to the low spot. Concentrate! The moment you see the metal begin to rise, remove the heat and file with a body file. Repeat as necessary. (You shouldn’t burn paint during heating.)

5. Air cool. Grind surface with 80 grit, air cool (with blower) and re-file. Check for any lows after filing. If low spots still remain, reapply controlled heat and file. The filing actually helps lock the metal molecules in position. If you don’t file, the metal simply returns to its dented form. Regrind with 80 grit and featheredge.
Note:
- Be aware of where you point the flame when filing!
- If the dent goes down instead of up, you’ll have to bring it out manually first.
- This process works beautifully on hail damage.
- Paint shouldn’t burn and metal shouldn’t turn blue during heating. Be gentle.

Heating
The procedure:
1. The heating of aluminum is crucial and necessary to facilitate a repair (see photos 6-7). Aluminum is hard in its stamped shape and even harder in its dented shape. You must heat it to its repair temperature of 400 degrees F to 570 degrees F before attempting

to remove dents or you risk cracking the metal. Heat must be monitored to avoid overheating or annealing, which is the permanent softening of aluminum. This would change the engineered and designed-in hardness of the panel, which should be avoided. A non-contact thermometer on painted area is quick and easy. An oxyacetylene torch is the quickest way to warm a panel.

2. Warming up of undercoatings before power wire brushing (see photos 8-9) or scraping allows a much quicker, easier and better result. Try to warm from the backside if possible. Be focused and warm coatings evenly, don’t burn. The result will be nice, clean and coating-free.
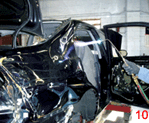
3. Quarter panels and door panels use bonding extensively. Without heat to release the bond, the job is very difficult (see photos 10-11). Identify the location of adhesives.

I like to use a larger tip or even a rose bud for releasing adhesives on the panels I’m replacing because it heats quickly and burning some paint isn’t a worry. Warm it up with your torch carefully in the bond zone. Apply gentle pressure until it releases. When replacing this part, apply new adhesive to the old adhesive after final fitting of the replacement panel.
Note: Always pre-fit part before applying adhesives and be completely assured of final fit position before leaving and allowing adhesive to cure out of position.
Cutting
There are many devices used to cut metals: abrasive saws, reciprocating saws, air chisels and panel cutters, plasma cutters or oxyacetylene cutting torches. All of these, with the
exception of the oxy torch, require electricity or compressed air. The oxy torch is self-contained and on wheels. Hmm…that means I can take it to the storage lot out back and cut off that front bumper end that’s resting on the perfectly fine tire of a customer’s pickup, then drive the pickup into the shop without the use of a tow rig. Convenience in an old process!
The procedure:
1. Attach cutting torch (see photo 12).
2. Turn up oxygen regulator to 40 lbs. (see photo 13) and acetylene at 5 to 7 lbs.

3. With cutting knob closed and air knob on torch body fully opened, slowly crack the gas knob until you feel gas pass through cutting tip. Ignite gas with spark and add air from knob on cutting head until you have a neutral flame (see photo 14). Depress cutting lever to release cutting air (hence 40-lb. setting).
4. Start heating at the edge of the metal, pointing the flame away from anything but the damaged part. Once the edge is cherry red, depress the cutting lever. Use gas welding goggles and gloves. Cut the part off. (See photos 15-16).
Note: Be aware of the direction of cutting sparks and prevent unnecessary damage. If it’s predictable, it’s preventable.
Heat Shrinking
The use of the oxyacetylene
torch is necessary in the true heat shrinking process. This process comes into play when you need to straighten an expensive-to-replace or difficult-to-procure part. If you didn’t have

a torch like this and thus had to replace this part (possibly a quarter panel), it might lead to the total of an otherwise fine vehicle and the loss of a job for you, perhaps when you most need it. The damage may be fairly localized but deep, causing the metal to be stretched. If the panel is mild steel body metal and not high-strength low alloy (HSLA), heat shrinking after straightening is an option for you.
The procedure:
1. Remove the damage to reveal high spots and stretched areas.
2. Attach a small welding tip and set gauges for 5 to 7 lbs. for gas (acetylene) and 12 to 15 lbs. for air (oxygen).
3. Crack the gas knob and ignite the torch, dial in air to neutral flame J.O.F. (just off feather).
4. Identify the highest spot. Place a series of quarter- to dime-sized cherry red hot spots around that high spot, driving the high-stretched metal into the hot spots one at a
time. A flat dolly is placed on the backside of the hot spot immediately after heating and a hammer is applied around the hot spot, driving the molecules into the more fluid hot spot to thicken it. Compressed air is immediately applied. Then, move to the next spot until you’ve returned the contour to its proper shape…a very viable process.
Note:
- Access to both sides is very helpful.
- Be sure to use the flat side of the dolly on the backside in the “hammer off dolly” process, to avoid additional stretching.
- Be aware that you’re not driving down the cherry red hot spot but driving the surrounding stretched and high metal into it, making the metal thicker and thereby “shrinking” it. Cool, huh?
- For a complete article on the process of heat shrinking, visit
www.bodyshopbusiness.com and search for the article titled, “Heat Shrinking Metal,” by Mike West, published in February 2006. - Make sure to properly paint and rustproof the backside of the heat shrink area.
Oxyacetylene Welding
What? Do you really need to know this? It all depends on your goals as a technician. Can you be an expert collision repairer without being a gas welder? I think so. But if you want to be at the top of your field, you should be able to gas weld. It opens the door to TIG

welding, silver and bronze brazing and hammer welding. These are all skills that a highly skilled auto body/collision repairer/metal man should aspire to, and to a great extent, are achieved through practice and self education. Don’t despair…if you’re interested, you’ll learn. I’ve used all of these skills and continue to use them.
Why should you consider oxyacetylene welding?
1. You can weld torn or cracked mild steel with a gas welder and produce a better stress-relieved weld than a MIG weld – without disabling airbags, electronics and radio codes.

2. Consider this: a tear in a piece of steel can be welded, with access to both sides, and finished so that you can’t tell where it was welded before painting. This was a process used by Porsche on the nose panel of the 356, a body style they carried for 17 years. Hammer welding or forging of your welds allows you to finish a weld to invisibility (see photos 17-19).
3. TIG (Tungsten Inert Gas) welding produces some of the finest welding possible. The basic skills for TIG welding come from oxyacetylene welding. They’re exactly the same skills, with the addition of a foot control, to increase or decrease heat required. The physical coordination required (holding a gas torch in one hand and feeding filler rod into the weld pool) is exactly the same for TIG welding. Cut some strips of zinc-free 22-gauge metal and practice with your oxy torch. Weld with a small tip and the 5- to 7-lb. gas and 12- to 15-lb. air setting. Use a J.O.F. neutral flame. You won’t become proficient in an hour, so be prepared to spend some time doing it.

4. I mentioned hammer welding, which is the common description for forging a weld. By heating a 1/2-inch of a gas-welded joint to cherry red and placing the crown side of the dolly on the backside, then quickly hammering the weld site in the “hammer on dolly” method, you can forge the filler rod into the pieces being welded, which allows metal finishing without filler. This method allows a stress-free weld because of the temperature you’re working at. Allow the weld to cool naturally. This will also take some
practice.
Here’s a hammer welding success story: A customer (a good one, I might add) collected fine automobiles but liked to drive them on extended tours. He ran a red light in Winnipeg with his 1936 Packard Dual Cowl Phaeton, and the Dodge that hit him tore off his front bumper, damaged the radiator grille shell and thermostatically controlled shutters, and ripped the fender. The adjuster and I agreed on 40 hours of repair on the fender. It was repaired using the hammer welding process and no filler. All the damaged parts were repaired and re-plated, and my customer was happy again.

5. Wondering where you could use the silver/bronze brazing process? It used to be quite a common practice to braze parts onto an automobile with the oxyacetylene torch, but those days went away with the advent of high-strength steels. But brazing is coming back in the MIG form because it can join metal together at a much lower temperature than steel welding. You can do oxyacetylene brazing on cast iron successfully. Case in point: I silver brazed a continuous, solid, German Silver molding together, completing the entire circuit around the fenders, running boards and front and rear aprons of a 1928 Mercedes Benz SSK. One solid complete molding!

Soldering and Leading
Flame soldering with oxyacetylene is ideal for the times when you need to solder something that requires more heat than the average soldering gun can produce. Perhaps you’re making or repairing a starter cable and need to attach a new stake connector at the end of it. Soldering with acid-free rosin core solder, using a mild soft flame, is the most positive connection you can make – bar none.

Leading has been called a lost art. Well, it’s not an art and it hasn’t been lost (see photos 20-22).
It still has its uses, where a thick fill is needed (over 1/4 inch) on an edge or mating flange. Take this example: A Land Rover Discovery was hit in the door pillar, which was part of the firewall/cowl. The dealer body shop manager told the adjuster “there’s nobody that can repair that pillar.” The adjuster told me, “I thought of you when he said that.” The Land Rover wasn’t scheduled to make this part until an unknown time and we were no. 3 on the waiting list. The car had been sitting for over a year when the insurer gathered up the parts (making a couple of trips) and brought it to me. I removed the damaged part from the rest of the firewall/cowl where it was spot welded, straightened it to close tolerance and welded it back on. I fit the new door and leaded the exposed door pillar and hinge mounting area. Beautiful…the SUV was back to its owner in a month, and I had fun – and was paid well for having it.
Tempering/Tool Making
I know, I’m reaching here. But I feel this is something you should know if you’ve read this far.Every master collision repair man has tools in his box that he made himself. That’s one of the things that make him a master.

The set of pry bar picks in photo 23 was made from the torsion bar springs that are commonly used in most deck lids. You can either reclaim a couple rods out of a total, or go to a wrecking yard and remove them. And make sure to use a set from a heavy deck, like a frame car (Caddy or similar).
The procedure:
1. Choose torsion bars that are at least 3/8 inch in diameter or close.
2. These are spring steel, so heating to the shape you desire will be necessary.
3. Cut ends of the bars off and cut to desired length using abrasive saw.
4. Determine shape you want for handle end and pick end.
5. Get a bucket of water deep enough to immerse the ends of the rods.
6. Place rod in a vice, heat to cherry red and bend to desired shape. Quench in water.
7. Remove discoloration from heat affect zone. Wire wheel, Scotch Brite or sand paper will work. Metal should be bright in this area.
8. Re-ignite your torch to a neutral flame and heat the heat affect zone you previously heated to a dark blue color. Do this slowly and evenly, so that you get a uniform blue over your entire heat affect zone. Immediately quench in water.
9. Remove blue color from heat affect zone using same method as before.
10. Replace tool (it’s not a rod anymore) in vice. Re-ignite torch and, using fast, even strokes, play the flame over the heat affect zone until the bright metal turns a straw color. This won’t take long, so focus. Allow to air cool. You just made yourself a set of valuable pry bars. Mine have lasted more than 40 years. I also made a set for my vo-tech instructor, painted them and put his initials on the shafts. It looked like he got a little choked up when I presented them to the old guy.
Dead or Alive?
Is the oxyacetylene torch dead? Well, you’ll have to be the judge. To master metal workers, they’d rather give up a toe or maybe a troublesome family member than this useful and valuable instrument.
Writer Mike West, a contributing editor to BodyShop Business, has been a shop owner for more than 30 years and a technician for more than 40 years. His shop in Seattle, Wash., has attained the I-CAR Gold Class distinction and the ASE Blue Seal of
Excellence.
|
Did You Know?
The oxyacetylene torch flame ranges from 5,800 degrees F to 6,300 degrees F. Steel melts at around 2,800 degrees F and non-ferrous metals at a much lower temperature. Steel, aluminum, brass, copper and cast iron are weldable using the oxyacetylene process. A rod of nearly the same analysis as the base metal is used while, with the exception of steel, a flux is used on other metals, usually applied to a heated rod or sprinkled in the joint. |

