If you have any familiarity with my scribblings in BodyShop Business, you’ve undoubtedly discovered that I have an affinity for alliteration. How could a title such as “Proper Paint Prep” fail to present precisely the same opportunity?
Over the decades, I’ve gravitated toward another expression, “The Logical Sequence,” which not only plants a seed of specificity but also encourages economy of motion (a.k.a. efficiency). And let’s not kid ourselves, with ever-shrinking margins, for whatever reason, being efficient has become a requisite.
We will drive through proper paint prep for the sake of accuracy in the operation, but we will approach it by way of The Logical Sequence.
“Carl, what do you mean by, ‘the sake of accuracy’?” Well, I believe it was Col. Cooper who credited Ross Seyfried as saying, “You can’t miss fast enough to win.” While he was referring to competitive pistol shooting, my reference is to the accuracy of the paint shop operation – in its entirety – because a redo for any reason is the result of an inaccuracy somewhere within the operation. Thus my comment illustrating the obvious: “You can never paint something a second time fast enough to be profitable.” What’s worse than painting it twice? Painting it three times. So let’s be accurate, darnit. It’s the decided first step toward efficiency: doing the job right the first time. Doing each operation of the job in the most efficient order leads us to The Logical Sequence.
The Logical Sequence
- Clean the vehicle. The vehicle needs to be clean. If it came in filthy, how can we possibly identify damage other than the apparent point of impact, related or unrelated? This needs to be done up-front at the time of estimating. Remember the earlier spiel about efficiency? I challenge any shop to testify that they’ve never had to run a job back through because a customer claimed, “…that wasn’t there. It must’ve been part of the accident.” In this scenario, when the job re-enters production, it’s difficult to get paid a second time for duplicate R&I operations, certain masking operations including bagging the car, detailing the car, tinting if necessary, cut and buff, etc. We haven’t even discussed the administrative cost of a supplement/redo, or the “aggravation factor” that will slow a painter down due to an unprofitable redo that was “someone else’s fault,” real or imagined. The mental gymnastics are real and slow a guy down. The lost revenue to the shop from one redo a week – because we don’t have a fresh job in the booth – can have an annual gross impact in excess of $135,000, based on an average repair order (RO) value of $2,600. That’s over $30,000 annually with just one redo a month. That potential lost doesn’t even factor in the paint and materials costs associated with the redo. I know cleaning the vehicle for estimating purposes isn’t exactly a paint shop operation, but at every mountaintop, we need to shout the benefits of an accurate estimate and proper customer expectation. Frankly, you can’t identify it and communicate it if you can’t see it, and it’s difficult to see it if it’s filthy.
As long as I’m already on the estimating soapbox, we should mention the hidden damage that’s revealed once the teardown occurs and the benefit of 100-percent teardown prior to putting the car into production. Not much kills efficiency more than pushing the vehicle aside while waiting for parts or approval, and of course that has a direct impact on cycle time.
Sorry…back to the paint shop.
- Read the RO. Before we do anything, we’re going to read the estimate and remove any assumptions regarding what we’ll fix and paint. Ask questions now.
- Clean the repaired panel and the adjacent panels. The best practice is to use soap and water on them first, which could be argued was already done prior to estimating. Next, we use a waterborne cleaner and finally a solvent wax and grease remover. Use a pressurized sprayer to apply the cleaners and a clean paper towel to wipe them off. By using a combination of solvent and waterborne cleaners, both water- and solvent-soluble contaminates can be eliminated. Failing to properly clean the panel now may result in contamination issues later, as the heat created by the friction of sanding can drive those surface contaminates into the paint’s pores.
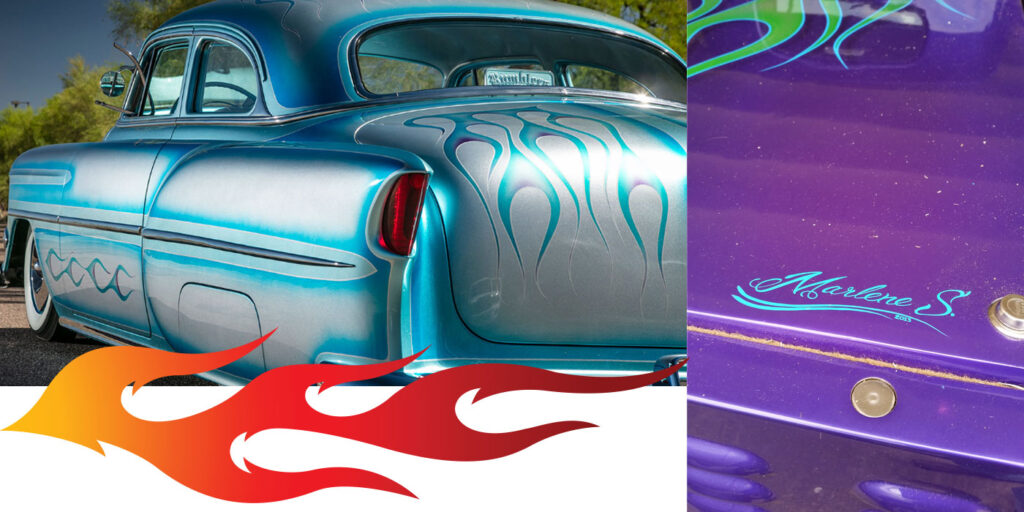
- Get your color code formula chosen. It doesn’t matter if you’re using a variant chip deck, your own color library, a color camera or some combination of these tools: Pick your color now using the clean, unsanded panels – preferably in the blend zone – for the color assessment. If you sand the relevant blend panels before identifying your color, then you must assess irrelevant panels. Who cares if the color matches the front fender when the repair calls for a new rear door, with blends on the front door and quarter panel? For all we know, the fender may have been previously refinished. When replacing a rear bumper, it needs to match the quarter panels, at the bumper junction. Matching it to the sail panel portion of the quarter begs for a mismatch, as the sail panel bears more UV exposure and typically has suffered more UV degradation than the lower quarter and is therefore likely a slightly different color. Match the color where it matters, meaning in the blend zone prior to further prepping, or at the point of the bumper’s edge.
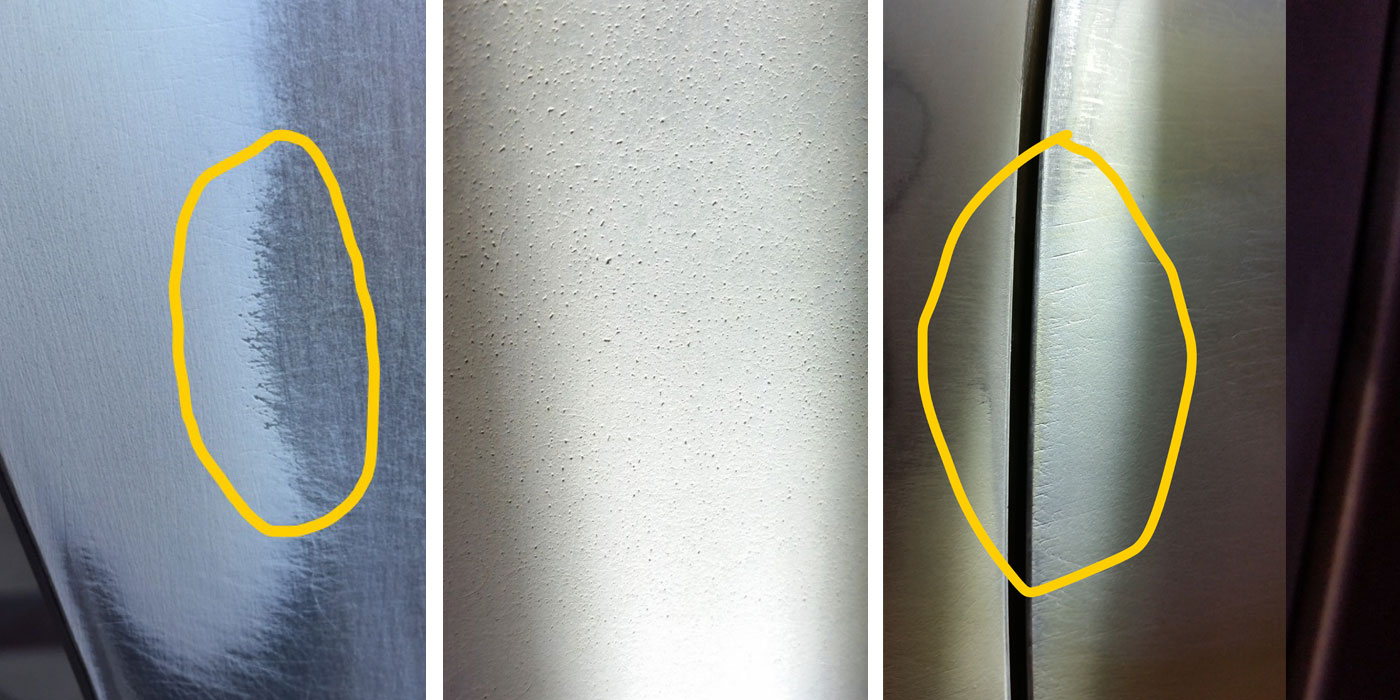
A body line that changes angle can make a color appear different above and below it. Assess your color everywhere it matters. - Inspect the repair. Blow off the repaired area with compressed air and feel the repair for anything that shouldn’t be there, primarily high spots or low spots. If it’s good to go, inspect the body filler with an auxiliary light, using the side-light technique. Any pinholes or overly aggressive scratches should be dealt with now. Whether that happens in the paint shop or is kicked back to the body shop depends on several factors. If the shop has a quality-control program in place and work is inspected before moving to the next department, then it can easily be fixed right in the bodyman’s stall. If the vehicle is in the paint shop when the pinholes are discovered, then the painter and the bodyman benefit from having protocol established as to how to handle it. A decent model is, the occasional scratch or pinhole is fixed in the paint shop for the sake of efficiency. An epidemic of them necessitates a discussion with the offending bodyman, for the sake of future efficiency. I’ve seen several situations where it was as simple as having the bodyman blow off and visually inspect his work with adequate lighting. And, uh, it’s not uncommon to hand a pair of 125-power reading spectacles to the bodyman and suddenly he can see what the fuss is all about. The workforce’s eyes are indeed aging. Regardless of who fixes the pinholes, the point of the inspection is to find them and fix them prior to priming. There are several products to address this: 1K putty, 2K putty, one-step pinhole fillers, etc.
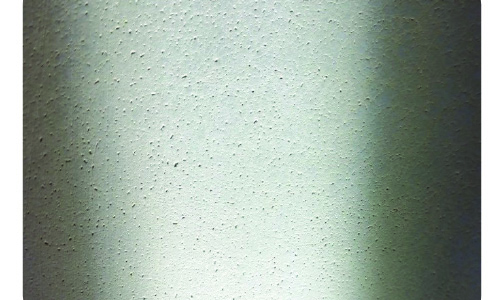
The sidelight technique, which consists of shining a flashlight parallel to the panel, reveals hard-to-see pinholes. - Feather-edge. Most of the plastic body fillers are designed to be applied over bare metal. For minor repairs, some glazing-type fillers can be applied over paint, but they’re typically pretty universal in stating they must be applied over unbroken, fully cured clear – not broken, sanded-through coatings. With that in mind, the paint surrounding the repaired damage should have been ground back and is in need of being feathered. Feathering is simply a sanding technique to taper the paint edge to give our primer a smooth bed to lay on. We don’t want any abrupt changes in the thickness of the paint edge and the repaired area for the same reason we previously inspected for aggressive scratches or gouges; we don’t want to ask the primer to do more than it was designed to do. Most primers have a tech sheet that lays out that product’s limitations and the recommended substrate preparation, sanding grit-wise. That tech sheet alone can be a valuable training tool to help everyone – bodymen, preppers and painters – understand the primer’s limitations and the preparation expectations. The feathered edge should be about one inch per paint job – not one inch per layer of coating (primer, color and clear), but one inch per paint job. So naturally, if the job has been repainted once over the OEM coating, then the feathered edge should be in the neighborhood of two inches wide, so on and so forth, being mindful of excessive film build and stripping the panel when necessary.
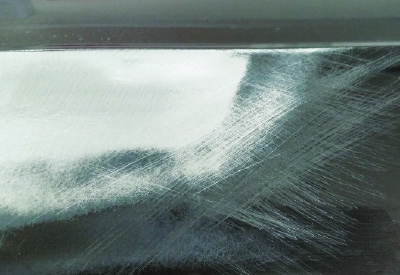
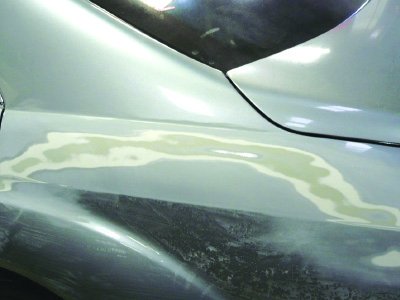
Aggressive sand scratches that haven’t been properly feathered with the appropriate grit will result in sand-scratch swelling if primed over. - Clean again. The goal of this cleaning is to completely remove any sanding dust that, if present when priming, will result in poor adhesion. We’ll start by blowing it off with compressed air, followed by a waterborne cleaner, spray on, wipe off. Don’t be concerned with getting the body filler wet because, after wiping it all off, we’ll blow it off again with compressed air. This will encourage a complete evaporation of any residual cleaner. Another consideration here is the type of paper towel used. A towel that is not H20-specific will break down and leave small fiber particulates after the wiping. If you use your clean hand to “wipe” the surface while blowing it off, you’ll feel those particulates and can easily ensure their removal if not using a paper towel designed for use with waterborne cleaners.
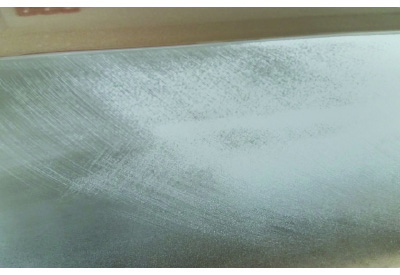
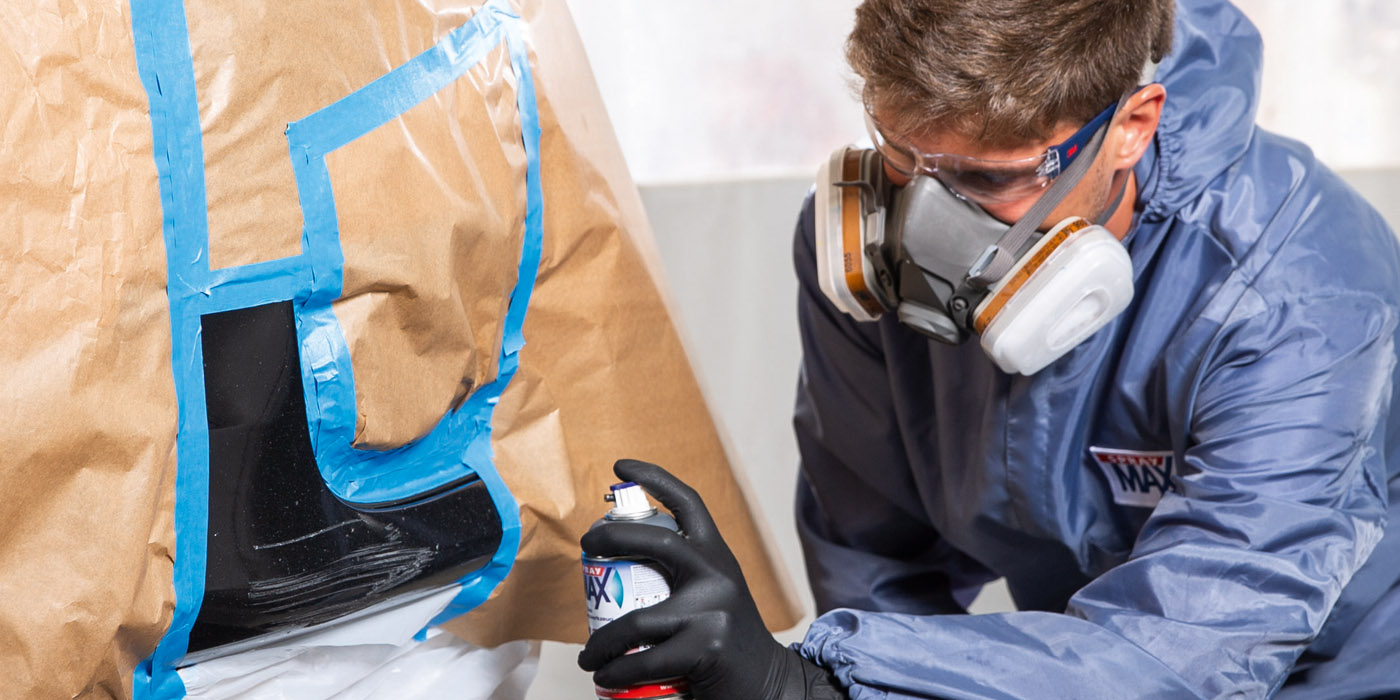
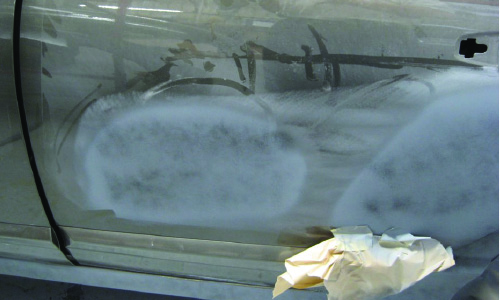
Guide coat helps us see high/low spots. A powdered guide coat will reveal every scratch and pinhole as well. - Mask for prime. Unless the repaired spot is very small or on a panel that has been removed from the vehicle, you’ll want to protect the vehicle from primer overspray. How much protection will depend on the size of the repair and the amount of primer you’re spraying. Controlling the primer drift (that little bit of primer overspray that migrates past the primer spot) to keep it from the edge of the panel is also a consideration with regard to blending. Can we blend within the panel or do we have to put color to the edge of the panel due to primer drift? Air pressure and gun technique also factor in to controlling the overspray.
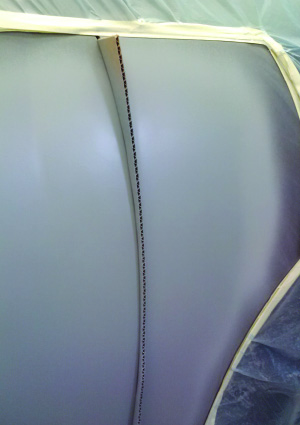
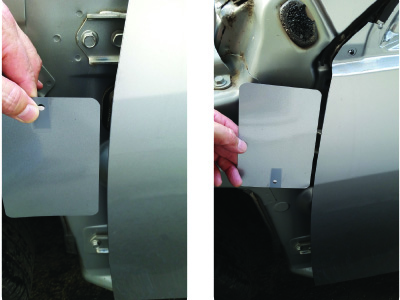
Mask for prime is often an operation we can get paid for. Here, a piece of cardboard between the fender and door prevents overspray on the A pillar. - Prime. The repaired area will likely have some exposed bare metal that will need a light coat of etch primer first, followed with a primer filler or surfacer. In years past, when lacquer primer was used, it was common practice for each coat of primer to overlap the previous coat – “inside-out.” That was fine for a soluble product because the fuzzy primer edge was melted into the subsequent coat. Today’s 2K primers are not soluble and therefore the fuzzy primer edge doesn’t melt with the next coat. As a result, the priming technique has changed to “outside-in.” The first coat is the largest covering, followed by a slightly smaller coat, and finally a smaller third coat. This way, the fuzzy edge of primer is never buried but always exposed to our sandpaper and therefore sanded out. The old “inside-out” technique can result in air-entrapment pinholes at the edges of the first two coats of primer.
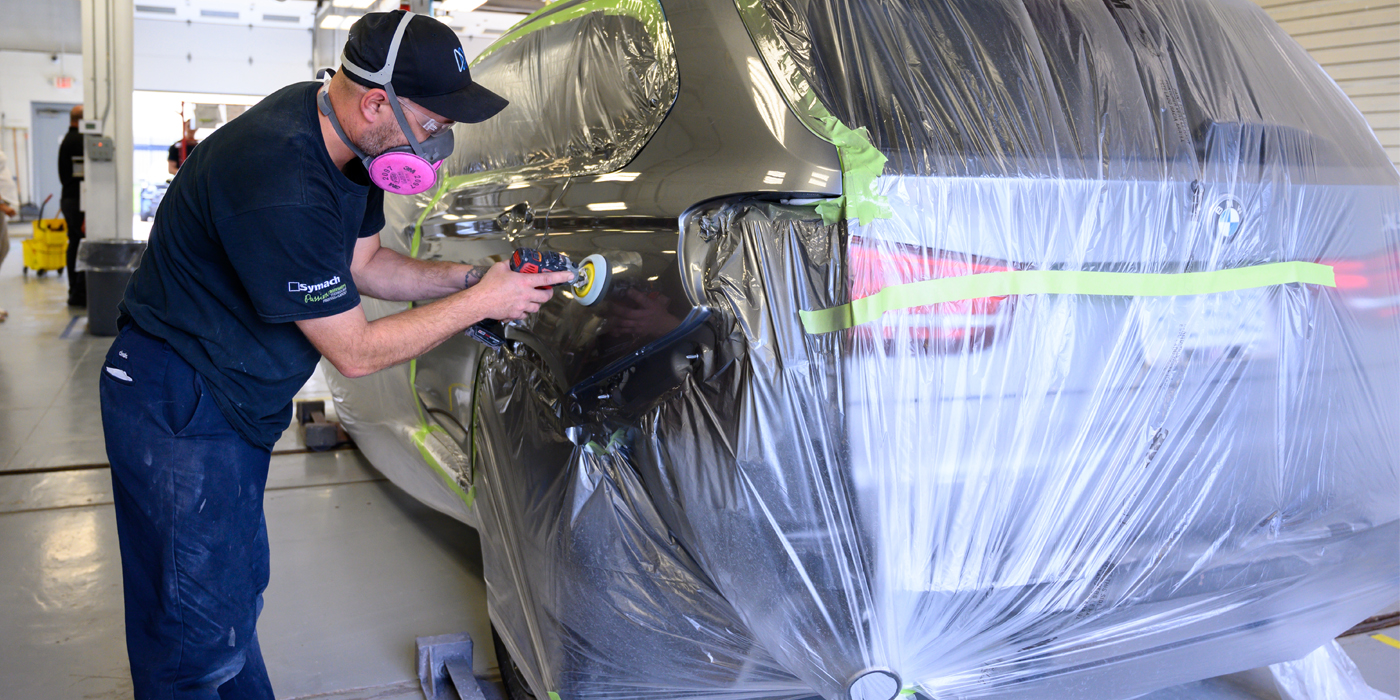
- Guide coat and block sand. You may or may not need to remove your masking first. If you’re using spray-on guide coat, you’ll want to apply it before removing the masking to avoid overspraying anything. With a powdered guide coat, it doesn’t matter. I prefer a powdered product as it covers 100 percent of the surface, meaning any pinhole or scratch I missed will now be revealed as I sand off the guide coat. Additionally, a spray-on guide coat will start to load my sandpaper. Using the longest block practical, start with a cross-hatch sanding pattern, which helps to avoid cutting a groove with the block. The guide coat tells us when the surface is flat – no high or low spots.
The grit we block-sand with is up for debate, with many prepper/painters using a 320-grit sandpaper. I prefer a 240-grit sandpaper. You’ll need to decide for yourself, but let’s take a look at the functions of sandpaper in the paint shop for prepping.
We basically have one of three categories we assign the paper to: rough sanding or cutting; finish sanding or smoothing; and scuff sanding or abrading for adhesion purposes. I classify any sandpaper grit that can be painted over as a finish-sanding grit. Acrylic enamels can easily paint over 320 grit. Furthermore, 320-grit loads fast and quits “cutting.” This is why my preference is for a 240-grit cut. Regardless, I suspect most of us today are using a basecoat/clearcoat system and need to finish it off finer than 320 anyway. So we now once again want to apply a guide coat, and this is where a powdered product really shines. The panel is already flat, so now we need to chase out scratches – either 240- or 320-grit –and the powdered guide coat reveals every scratch to be removed. The next grit to use is determined by what grit scratch we’re trying to remove. A good general rule of thumb is to never jump more than 100 grits when using grits under 400. So to eliminate my 240 scratches, I’ll use 320, followed with more guide coat and then 400 grit. The goal is to stair-step to the final grit you’re after, as dictated by the technical reference manual, without creating a low spot. You may be done when you achieve 400 grit if you’re planning on sealing the repair, and will likely need to take it to 600 grit if you plan on painting it without sealing. At each step of the sanding process, you must leave enough material for the next grit sandpaper or risk sanding a low spot into the repair. It sounds more difficult than it is and, repetition being the mother of skill, the more a prepper does it, the better and faster he gets.
- Prepare the blend panel. Presumably, the blend panels have been cleaned already, but if not, revisit item no. 3 and properly clean the panel. Only a scuff sand is required here, and the grit you use will be determined by the sanding technique: wet hand sanding, dry hand sanding or dry machine sanding with an orbital pattern and a soft innerface pad. The grit signature is different for each technique, even when the same grit paper is used, wet sanding being the most aggressive followed by dry hand sanding. Finally, the orbital scratch from the dry machine sanding leaves the finest grit signature. Depending on your technique, anywhere from 800- to 1200-grit may be called for. Refer to the tech sheet for your specific product.
Summary
You may employ variances of sorts throughout the process, which is perfectly fine. And that brings to mind another expression I like: “The techniques are many, but the fundamentals are few.”
Remain faithful to the fundamentals and you’ll likely be on target. Nothing is faster than accuracy.