Wrong!
"Rewiring the vehicle after the repairs"
actually must start at the beginning of the process – not at the
end. During disassembly of the vehicle (staging) for the initial
inspection or reinspection, careful planning and procedures must
be in place to ensure reassembly can be done properly and efficiently
after the metal and paint work are completed.
There are five basic areas of this process
to look at: disassembly, protection procedures, reassembly, repairs
and verification. Following proper procedures for all five of
these will improve efficiency and the quality of repairs during
the rewiring process.
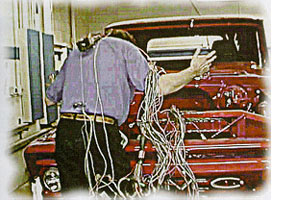
Disassembly Procedures
The disassembly process can begin during the
initial inspection of the vehicle when writing the estimate. Removing
components without properly documenting their location, mounting
configuration or connections can lead to many hours of wasted
time – not to mention possible damage to the systems involved.
To start this process:
- Begin by taking pictures of complex electrical systems with
a digital or video camera. Video cameras can really be a big help
because they can also include audio explanations to assist in
the reassembly later.
Since the battery may also be disconnected, it’s important to
document electronic memory items that may be lost when the power
has been disconnected, such as the customer’s radio station presets.
These should be written down and kept with the vehicle’s file
and on the repair order in the vehicle.
It’s also important to note that disconnecting the battery may
require a specific procedure for many vehicles. If a service manual
isn’t available, look in the owner’s manual for warnings and procedures.
- When disconnecting any electrical component, be careful. Electronic
component connections are intended to disconnect easily if the
correct release is found. Pulling directly on the wiring to "give
it a little help" isn’t the best solution to a difficult
release clip.
If it’s necessary to remove the wiring terminal from the connector
or connector block so the wiring can pass through an opening,
it will generally require special tools. These tools allow for
proper release without damaging the wire terminal or connection
block.
- When connections are disconnected, label the component to
the connection. This can be done many ways. For instance, commercial
marking tapes are available, which allow for easy positive identification
during reassembly. Colored tape can also assist in matching components
and connections for proper assembly. And, again, a video camera
can be a great assistant.
Wiring diagrams also can be very helpful to identify reconnection
locations for connection blocks when the wiring is removed or
torn from the connection. But, keep in mind that the wire color
entering a connection block doesn’t always match the wire colors
of the other connector. In a case like this, a wiring diagram
is very helpful.
- Place each component and its mounting hardware together in
a parts bag, box or container. Mark each bag with the same color
or number used for its vehicle connection.
Also, keep components separate – and organized. This will improve
reassembly dramatically.
- Place all removed components in a parts cart in order of removal.
Protection During Repairs
Once electronic components are removed from the vehicle, it’s
very important to protect them from damage until they’re reinstalled.
This not only includes protection from physical damage, but also
from excessive heat and electromagnetic interference (EMI).
If the component is completely removed, placing it in a parts
bag or box and storing it in a parts cart normally will be fine
– as long as the parts cart isn’t stored too close to a power
source producing excessive EMI. Typically, auto collision facilities
wouldn’t have this problem, but high-frequency equipment, such
as a heli-arc welding machine, can produce a detrimental EMI to
sensitive computer equipment.
The more common situation that requires additional precautions
is when the component isn’t removed completely from the vehicle
but repositioned during the repairs. This includes wiring harnesses
and sensors.
If any component is just repositioned, it’s important to:
- Place the component(s) away from possible damage during the
repairs. During structural work, hammering, cutting, heating and
welding can damage electrical wiring and electrical components.
It’s important to ensure this doesn’t happen. - Don’t allow components to "hang" from their connectors.
- Don’t coil or lay the wiring harness in an area close to welding
or near the welding unit. Induced voltage – the ability of a power
source to cause current flow in another circuit without actual
contact – can occur from this condition and can damage or activate
electronic systems. - Protect wiring connectors from body and paint dust. Many of
the connections used today include a die-electric grease to provide
a seal from moisture. This grease will attract dust when exposed
during disconnection, so it’s advisable to cover these connections
with plastic bags to prevent contamination. - Since static electricity can also damage electronic systems,
don’t touch these components without being properly discharged
(grounded). Also, don’t touch the terminals of connectors directly
unless grounded and wearing rubber gloves. Static charges and
acid from fingers can damage the component, and acid can cause
corrosion to form.
Commercial devices are available to ground yourself during handling
of sensitive electronic components.
Reassembly
To reinstall electrical components, reverse the disassembly process
to ensure proper location and wire routing. Again, documenting
the disassembly allows for much easier reinstallation since reassembly
may take place weeks after the disassembly.
During reassembly, follow these key points:
- Reverse the sequence of removal as close as possible. This
will generally lessen errors involving the removal of a newly
installed component to allow reinstalling another. (Remember assembling
the kids’ bicycles without looking at the direction sheet?) - Make sure to route wiring along the same original path because
proper routing is very important for the electronic system to
operate properly. Induced voltage can occur if wiring is improperly
routed, and this can happen especially if wiring is laid parallel
to another set of wiring or circuitry. Wiring that’s susceptible
to this condition is generally routed at perpendicular angles
(90 degrees) to each other. - Attach mounting clips in the same location. During disassembly,
careful removal is necessary to not break or damage the retaining
clips. These mounting locations are normally predrilled or stamped,
which allows for easier reassembly since the mounting holes are
already there as a guide. - Ensure a proper ground is available to the component if required.
Many electronic components may use a case ground, with an electrical
diagram indicating this by a ground symbol (y) attached to the
component outline. Many times this indicates the mounting bolt
will ground the component for proper operation.
If there is a ground wire, the wire terminal may include a special
fastener that may have a specific side to contact the body to
ensure proper grounding. This type may include a rougher side
that will "dig through" the paint and primer to get
proper contact with the metal surface.
The fasteners may also include special mounting washers and coated
retainers.
Note: During disassembly, proper organization of the component
and fasteners together in a parts bag will greatly improve the
reassembly process.
- Properly torque the fasteners if required. Many sensors have
specific torque specifications to ensure secure mounting and grounding.
Automotive service manuals and third-party guides will generally
identify these specific requirements when necessary, and instruction
sheets may also be included with new replacement parts. - Replace mounting fasteners and retaining clips with "like
kind and quality." Many safety-related components require
replacement of the mounting hardware along with the new component,
and this may be true for many other mechanical-related systems
as well. Vehicle manufacturers generally provide this documentation
in their service manuals.
If new fasteners or retaining clips are needed, they must match
the original equipment manufacturer (OEM) specifications. This
may include grade, pitch, length, type and coatings. Don’t go
to your bolt drawer or can for replacements that look about the
same.
- During rewiring, it may be necessary to add more dielectric
grease to the connection to ensure proper sealing from moisture.
Many options are available, but it’s best to use recommended products
from the OEM. - When using dielectric grease, make sure proper connections
are obtained. Doing a voltage drop test across the connection
(covered in the next section) can indicate improper connections.
Repairs
Following a collision, it’s common to run across damaged wiring
that must be properly repaired or replaced. Proper repair includes
proper tools, connectors and procedures. This article’s scope
is not to explain all, but to look at some important considerations.
Each vehicle manufacturer may differ as to what area of the system
can or cannot be repaired. Typically, manufacturers differ the
most on safety-related systems, such as passive restraints (air
bags included), and some manufacturers have specific guidelines
about the repair of the main wiring harness. Service manuals and
third-party system-specific manuals do a great job of indicating
these special guidelines.
In general, the common guidelines are:
- Manufacturers normally don’t recommend the repair of any wiring
from the component’s connector to the component itself for safety-related
systems. This "pig’s tail" may be very long to route
around another component. In any case, it’s not normally recommended
to repair. - Recommended methods of repair of other wiring areas vary.
Options may include soldering and/or special connectors.
Soldering – Some manufacturers approve soldering as an
acceptable method of wire repair. But there are a few important
considerations to be aware of when soldering: First, the preparation
of the joint is as important as the preparation for properly welding
in a structural rail. The properly prepared wires are normally
twisted together in what’s known as a "Western Union"
joint. The wire is heated with a soldering iron, and solder is
then melted to the joint.
It’s important that the soldering iron used doesn’t damage the
circuitry or component. Around sensitive circuitry, I-CAR recommends
using a soldering iron at approximately 15 watts. This low wattage
will keep the heat contained and will have very little EMI, but
it will be able to melt the solder during the operation. In addition,
the solder used should be of a small diameter (requiring less
heat) and be flux core, not acid core.
After the joint has been completed, it must be sealed from the
environment. This, generally, will include a special filled connector
or a "shrink wrapping connector." In most cases, the
connector must be installed to the wire before joining.
Connectors – Besides soldering, many manufacturers recommend
the use of "solderless" special connectors, which are
used to join the wires together and seal them from the environment.
There are probably as many special connectors as there are different
wires on a vehicle, and many have come to be available from other
industries. But, keep in mind, these connectors must be designed
for automotive use and be acceptable to the vehicle manufacturer’s
needs.
These connectors generally require a special tool to properly
join the wires and seal the connection. One type commonly used
includes a butane heat source to melt the connector to seal the
joint.
- In any repair or connector, it’s important not to add excessive
resistance to the circuit. If the joint isn’t properly sealed,
the joint will corrode and can increase the resistance of the
joint, which can cause many problems – including false readings
of the diagnostic mode of many systems, improper operation of
the component and possible replacement of the wrong parts.
A voltage drop check is used to determine if excessive resistance
is present through a connection or repair. To take a voltage drop
check, measure the voltage from both sides of the connection or
repair joint. If the readings vary greater than .1 of a volt on
the "hot side" or power side of the circuit or .05 of
a volt on the ground side of the circuit, the joint or repair
needs to be checked for loose connections, corrosion or poor repairs.
Make sure the readings are taken with a DVOM with at least 10
mega-ohms of impedance. Any less could cause serious damage to
sensitive electronic circuits.
- If individual wires in a group require replacement, replace
them with the same diameter, type and length. Circuit requirements
determine the wire diameter needs, so make sure not to change
this. It’s also very important to match not only the diameter,
but also the wire used (copper or aluminum) and type (solid or
strand).
Verification
Once all the components are properly reinstalled and the wiring
has been routed as before, the repairs still aren’t complete until
the systems are checked for proper operation – which includes
resetting radio stations or any other personal settings.
Most electronic systems today have self-testing capabilities and
automatic warning systems. Warning lights are no longer "idiot
lights" as we’ve been accustomed to for many years. In fact,
in some systems they can be used to diagnose where the system
problem exists. Service manuals and third-party, system-specific
manuals offer troubleshooting procedures that are easy to follow
and may only require minimal equipment, such as a DVOM (depending
on the manufacturer and system).
Scan tools also can normally verify the system operation and may
be necessary to remove system fault codes on many safety-related
systems. These tools are very valuable for many of today’s electronic
systems.
A very important point to keep in mind is that some systems need
to "relearn" their function. A common example of this
is with some driveability systems. Some vehicles, after the battery
has been disconnected, will run very rough initially until the
system relearns the operation from sensor input.
To correct this, the vehicle should be driven a few miles until
– miraculously – it begins to drive fine! Check footnotes and
other service bulletins for information involving these vehicles.
Otherwise, you may spend hours rechecking everything you’ve done
only to find that it now works fine.
Wired
The key to rewiring a vehicle is to have procedures in place during
disassembly so that once the time comes for reassembly, there’s
no guesswork involved.
Guesswork leads to errors and efficiency loss – not to mention
lost profits. And, in today’s competitive marketplace, a collision
repair business that guesses about repairs isn’t going to stay
in business for long.
Writer Tony Passwater is a long time industry educator and
consultant who’s been a collision repair facility owner, vocational
educator and I-CAR international instructor; has taught seminars
across the United States, Korea and China; and is currently an
industry consultant. He can be contacted at (317) 290-0611 or
([email protected]).